Highlighting & Resolving Errors in a Workflow
Highlighting & Resolving Errors in a Workflow
The Error Identification and Resolution feature powered by AI helps you quickly spot, understand, and fix errors within your workflows. This feature offers visual cues, actionable insights, and clear guidance for troubleshooting directly from the Error Tab in your workflow interface.
How to Use the Error Identification and Resolution Feature
To make the most out of the error identification and resolution feature, follow the steps outlined below. This will guide you through the process of spotting errors, resolving them with the help of AI, and using the key features effectively.
How to Use the AI for Error ResolutionWhen you are creating a workflow or editing the existing one:
Step 1: Identifying Errors
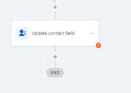
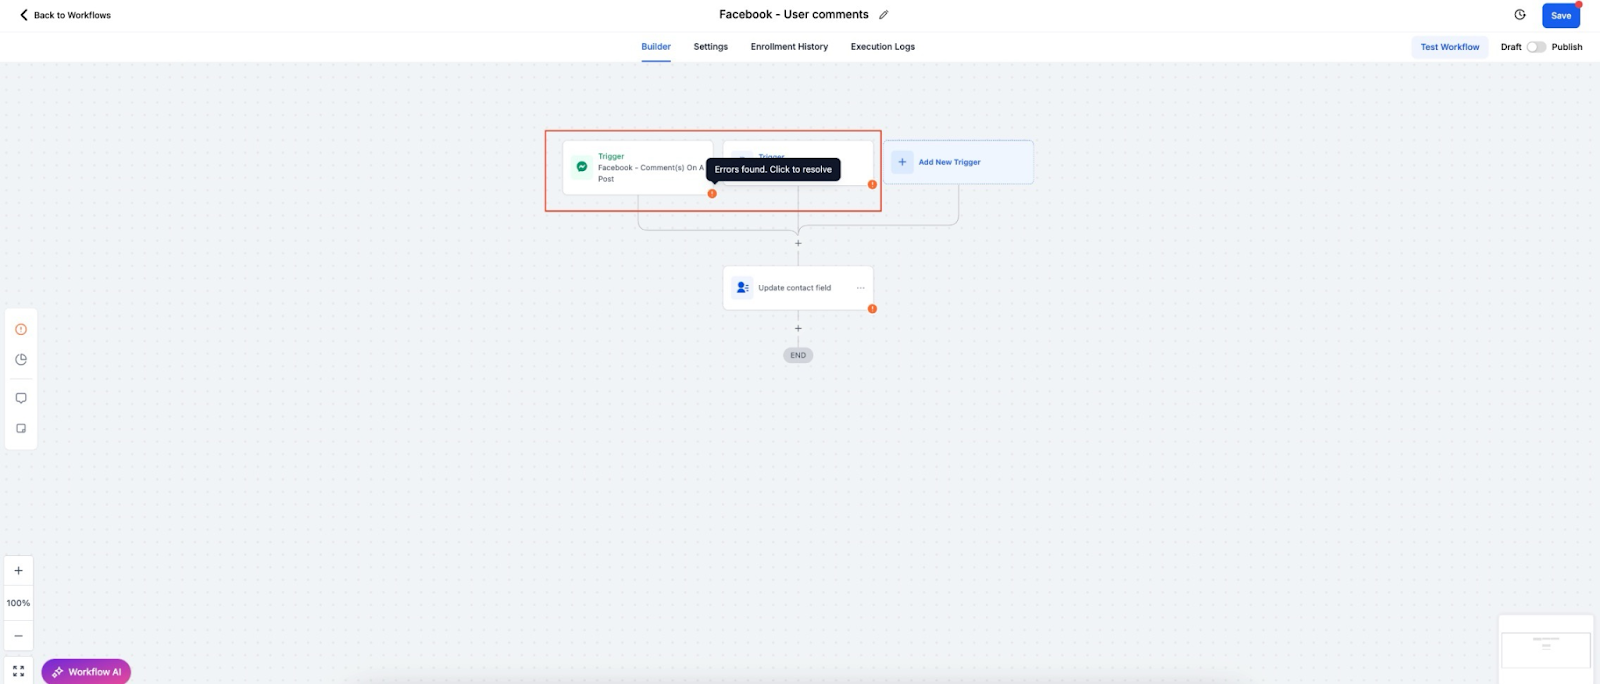
Errors are clearly marked with a warning icon in the workflow builder.
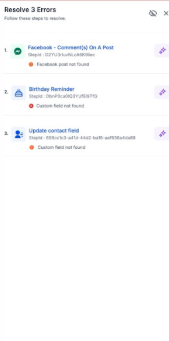
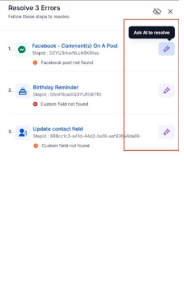
To see all errors, click on the Error Tab in the side panel.
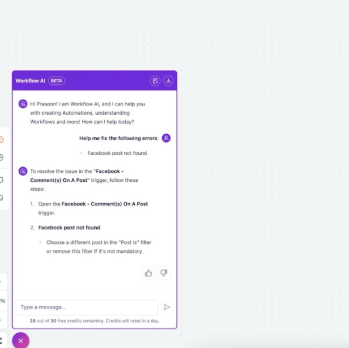
Step 2: Using the AI Assistant to Fix Errors
Click on the “Resolve through AI” button next to the error.
The AI Assistant will open in the panel and provide:
Error Explanation: What caused the error.
Suggested Fixes: Actionable steps to resolve the issue.
Step 3: Applying Fixes
Follow the AI’s recommended fixes in the action or trigger sidebar.
If the error involves an integration, the AI will guide you to the appropriate settings to resolve it.
Step 4: Confirming and Continuing
Once the issue is fixed, the warning icon will disappear, confirming the error has been resolved.
Resolved errors will be automatically cleared from the side panel list.
Why This Feature Matters
Improves Workflow Reliability: Errors are detected and addressed quickly, which ensures smooth execution of your workflows.
Saves Time: By providing clear error explanations and suggested fixes, this feature minimizes time spent troubleshooting.
Boosts Confidence: The ability to troubleshoot complex workflows independently, without needing external support, increases user confidence.
Key Features
1. Error Button in Workflow PanelLocated in the left panel within your workflow builder. Clicking the error button will open the error panel, where a list of all detected errors will be displayed. Errors are categorized as:
Integration Issues: Problems with connecting external services.
Missing Mandatory Fields: Errors due to missing essential data in any trigger or action.
2. Visual Error HighlightingErrors are shown with a warning icon placed at the bottom right corner of the affected actions and triggers. These visual cues help you spot errors quickly within the workflow builder.
3. Error PanelA new side panel is available where you can view all errors related to the current workflow in one place, making it easy to manage and resolve them.
4. AI-Powered Error ResolutionThe AI Assistant provides detailed explanations for each error and suggests actionable steps to resolve them. A “Resolve through AI” button allows you to apply fixes directly with guidance from the AI Assistant. Clicking the button will open the sidebar for the specific action or trigger, where you can make the necessary adjustments.
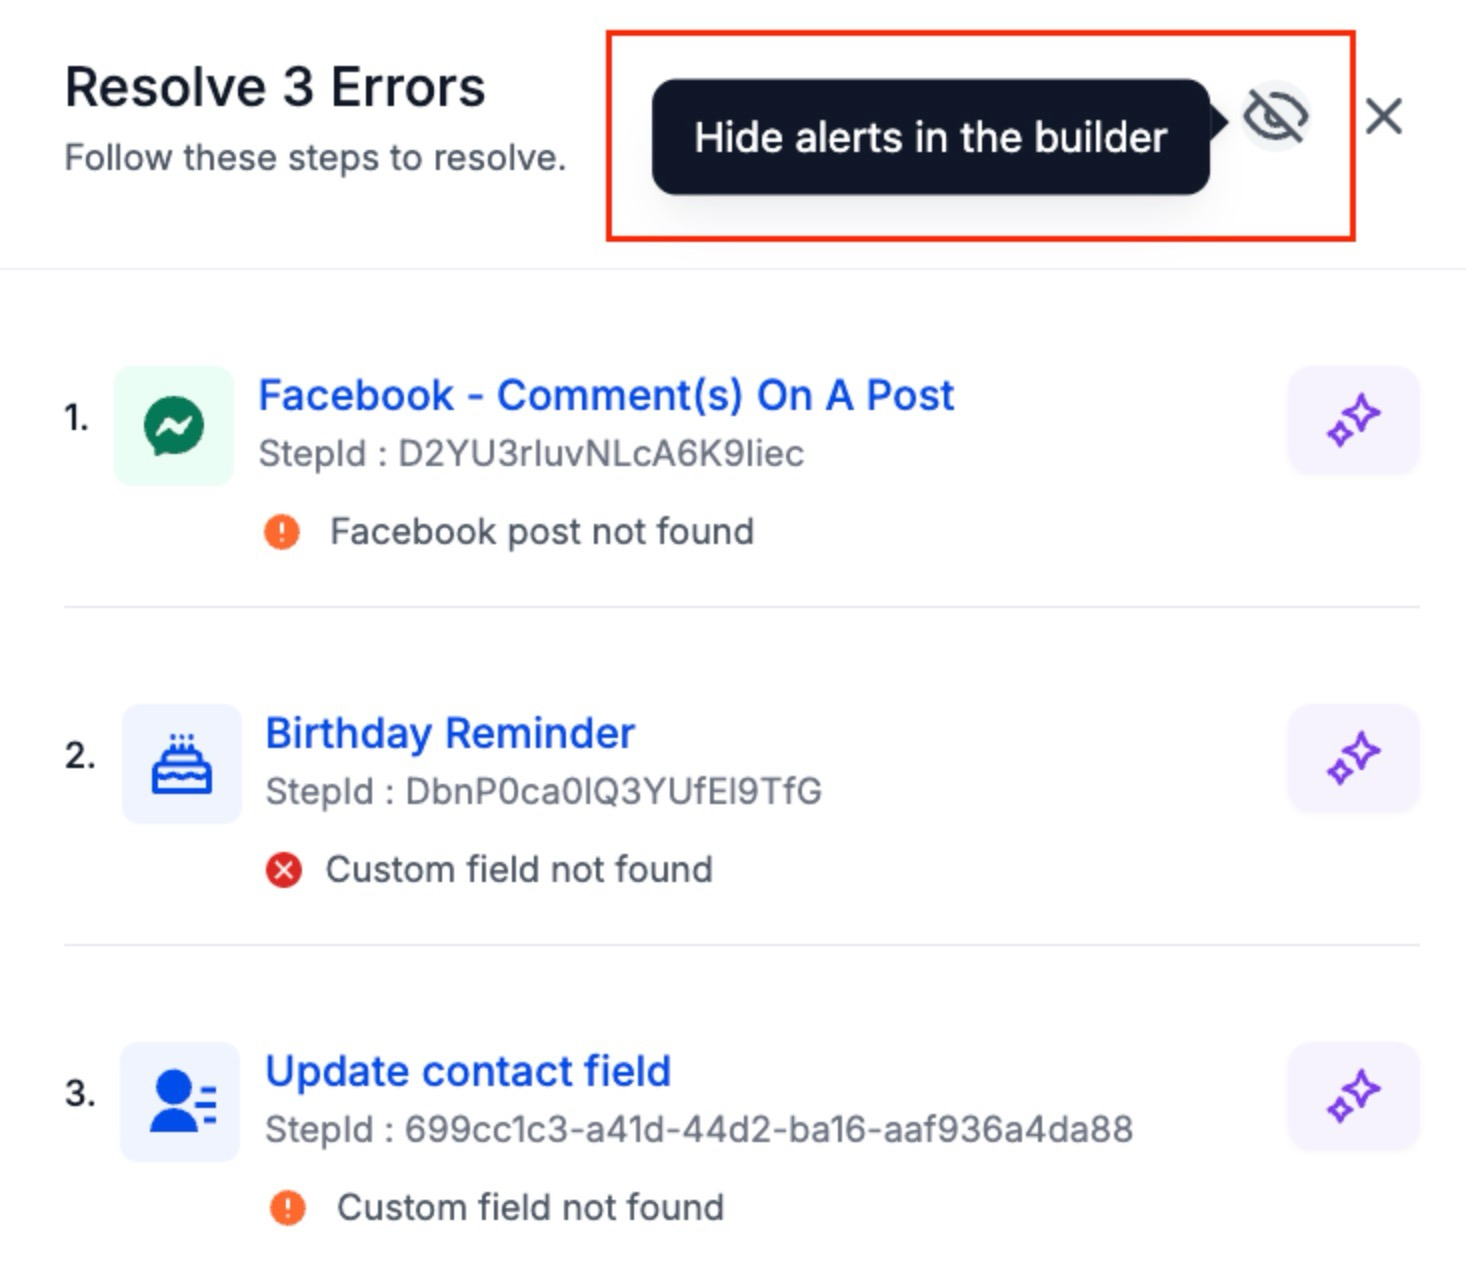
5. Disabling Error Tab VisibilityIf you prefer not to see the error tab at all times, you can hide it. A toggle button in the side panel settings lets you enable or disable the tab based on your preference.
Common Error Types and Resolutions
Section titled “Common Error Types and Resolutions”1. Integration Issues
Error: Failed integration due to incorrect authentication.
Resolution: The AI will suggest reconnecting or re-authenticating the integration.
2. Missing Mandatory Fields
Error: Required fields missing in the data, such as appointment dates or custom fields.
Resolution: The AI will list the missing fields and offer options to map them or create new ones.
Question: Can I hide the warning icons permanently? Answer: Yes, you can turn off the visibility of the warning icons by toggling the option in the side panel settings.
Question: Will my workflow move back to the draft stage if an error is found? Answer: No, your workflow will not be moved to the draft stage if an error is detected. It will remain in its current stateThe Error Identification and Resolution feature, powered by AI helps you quickly spot, understand, and fix errors within your workflows. This feature offers visual cues, actionable insights, and clear guidance for troubleshooting directly from the Error Tab in your workflow interface.
Question: How do I resolve integration errors within my workflow using the AI feature? Answer: The AI Assistant will detect integration issues such as failed authentication and suggest actionable steps like reconnecting or re-authenticating the integration to fix the issue.
Question: What happens to an error in the side panel list once I have fixed it?
Answer: Once the issue is resolved, the warning icon will disappear and the error will be automatically cleared from the side panel list.
Question: Can I manage the visibility of the Error Tab? Answer: Yes. If you prefer a cleaner workspace, you can use the toggle button in the side panel settings to enable or disable the visibility of the Error Tab based on your preference.
Question: How does the AI help if a workflow error is caused by a missing appointment date or custom field?
Answer: The AI will specifically list the missing fields and offer you options to either map the existing data correctly or create new fields to satisfy the requirement.