How to Create Services v2 - 101
This article provides a comprehensive overview of how to establish and manage professional service offerings within your digital workspace. By the end of this guide, you will understand how to configure scheduling options, organize your offerings into logical categories, and utilize advanced features to enhance the customer booking experience.
Overview and Purpose
The primary goal of the Services panel is to allow users to create bookable offerings so customers can self-schedule online with confidence. Whether you provide coaching sessions, wellness treatments, or professional consultations, defining your services ensures that your business remains organized behind the scenes while providing a seamless interface for your clients.
By utilizing this system, you can manage how and when services are offered, who provides them, and how they are bundled. This infrastructure supports both simple one time appointments and complex business flows, including multi location scheduling, tiered pricing, and resource management.
Key Features and Benefits
Section titled “Key Features and Benefits”Setting up your services with precision ensures a smoother scheduling process and reduces administrative overhead. Below are the core features and the benefits they provide:
- Variations: Present multiple options, such as different durations or price tiers, within a single service listing.
- Add-ons: Offer optional extras during the checkout process to increase the total value of a booking.
- Resources: Reserve shared assets like rooms, chairs, or specific equipment to prevent double bookings.
- Processing Time and Buffers: Build realistic gaps for preparation or cleanup to support a sustainable schedule.
- Staff Assignment: Link specific team members to services and manage their unique working hours
- Date Specific Hours: You can add date-specific hours according to your availability.
- Categories: Group related services together to help customers navigate your booking page easily.
- Private Services: Create specific offerings that are hidden from the public list and only accessible via a direct link.
- Deposits and Pricing: Manage your revenue by collecting partial payments or full deposits at the time of booking.
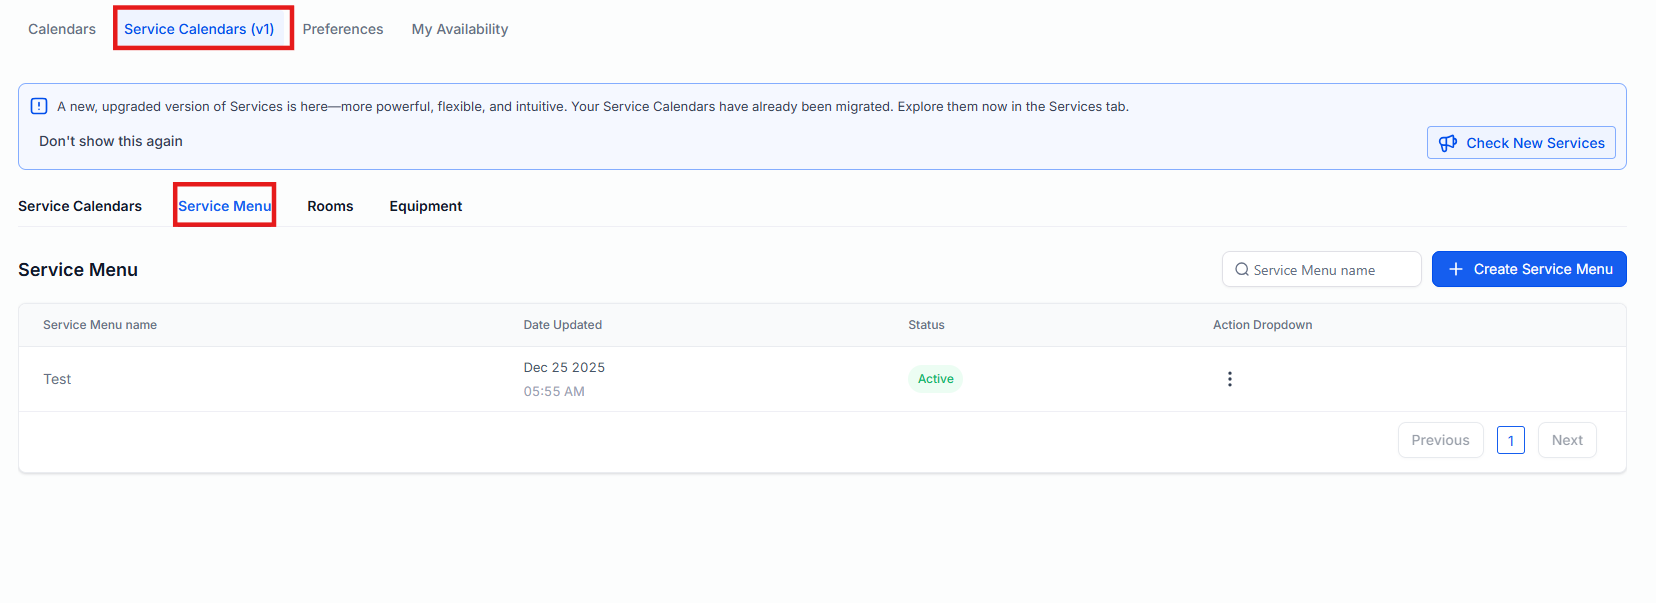
How to Access the Services Panel
Section titled “How to Access the Services Panel”The Services Panel serves as the central hub for building and organizing your booking experience. To access this area:
- Select the Calendars section from the primary navigation menu.
- Choose Calendar Settings from the top navigation area.
- Click on the Service calendar >** **Service menu tab to view your searchable list of all current offerings.
Creating and Managing Categories
Section titled “Creating and Managing Categories”Categories allow you to group similar services, which improves the layout of your public booking page.
- To create a new group, click the New Category button.
- To modify an existing group, use the three-dot(⋮)icon to edit the name or settings.
To change the order in which services appear to customers, simply drag and drop the categories into your preferred sequence.
Service Management and Advanced Settings
To update an existing feature, open the Service Editor by clicking the three-dot (⋮) icon next to any service in the Services Panel and selecting Edit.
The editor allows you to manage the following:
- Service Details: Adjust staff assignments, duration, buffer times, pricing, and payment or deposit settings.
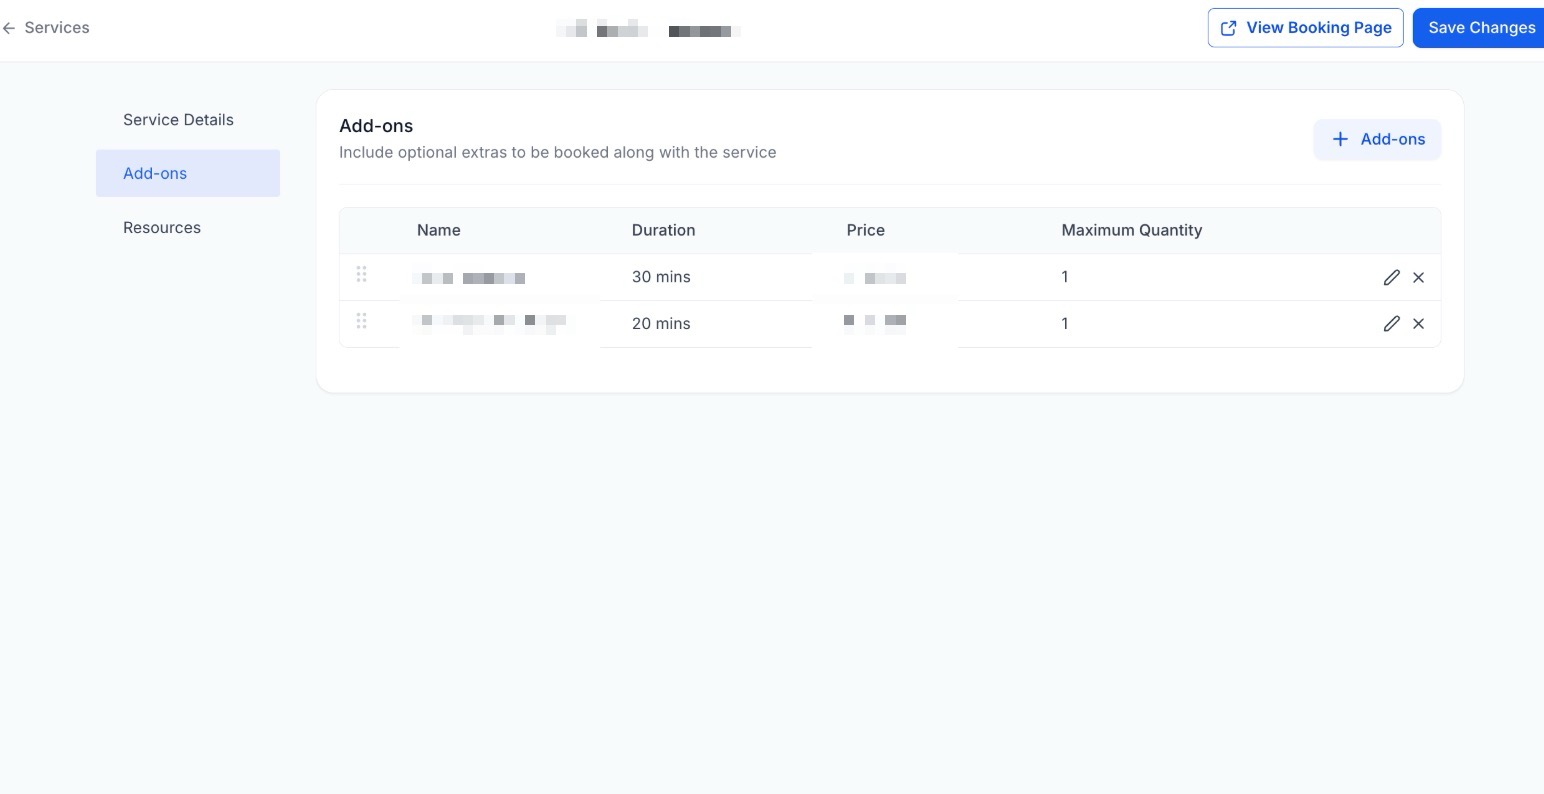
- Add-Ons: Offer optional extras to enhance the service or increase sales.
- Resources: Link specific rooms, equipment, or assets to the service.
Add ons
These are optional extras that customers can select alongside a main service. They are ideal for personalizing appointments or upselling additional features. Add ons can be made visible to customers on the booking page or kept for internal use only by staff members.
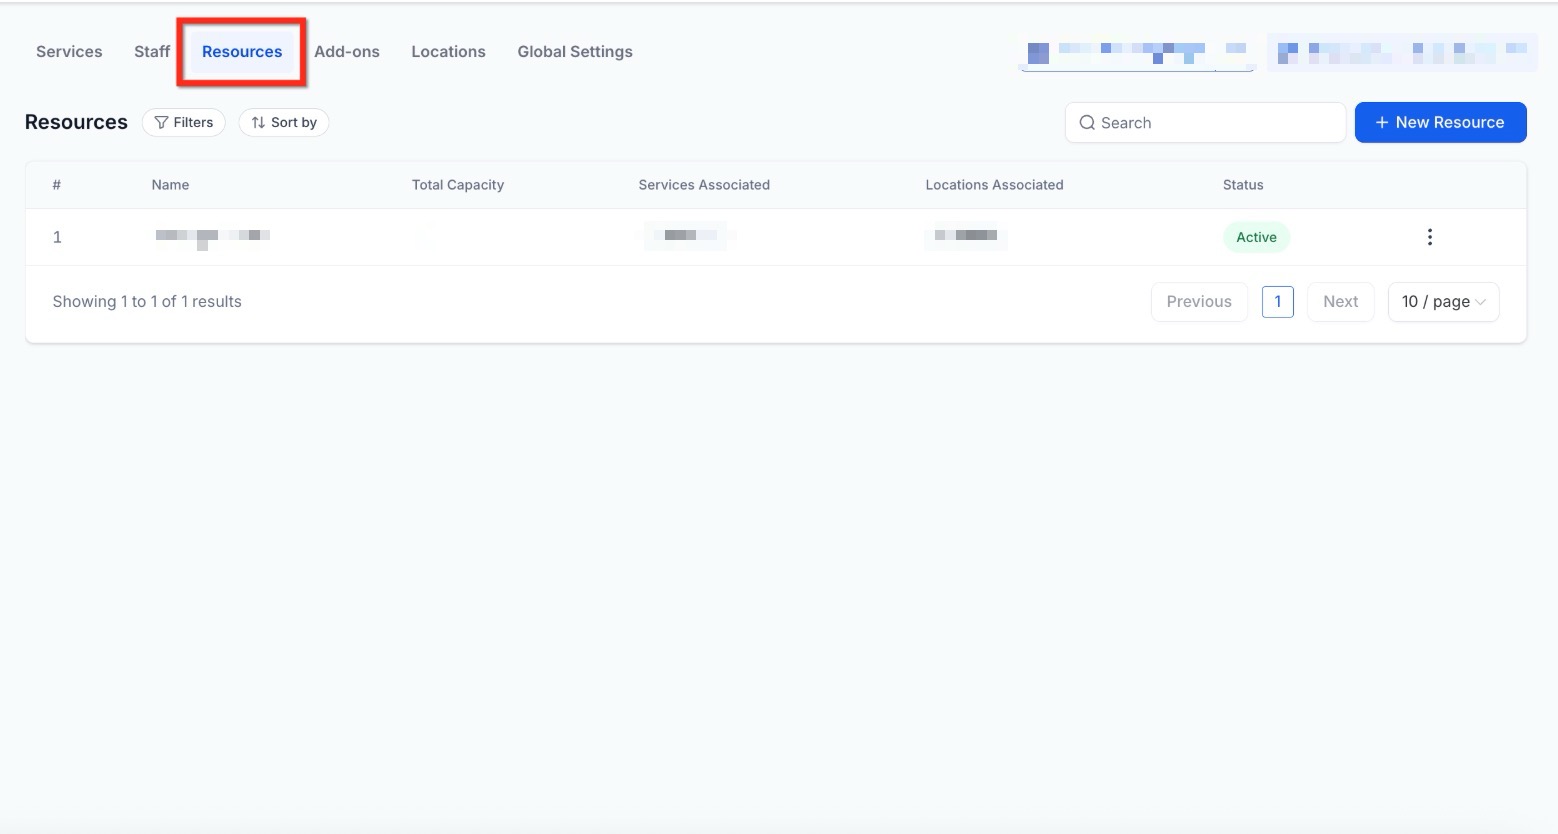
Resources
Section titled “Resources”Resources are assets required for a service to occur, such as a specific treatment room or a piece of technology. By assigning resources and setting their capacity, the system ensures that you never book more clients than your physical space or equipment can handle.
Step-by-Step Guide to Creating a New Service
Section titled “Step-by-Step Guide to Creating a New Service”Follow these steps to ensure your service is fully configured and ready for public booking.
Step 1: Initialize the Service
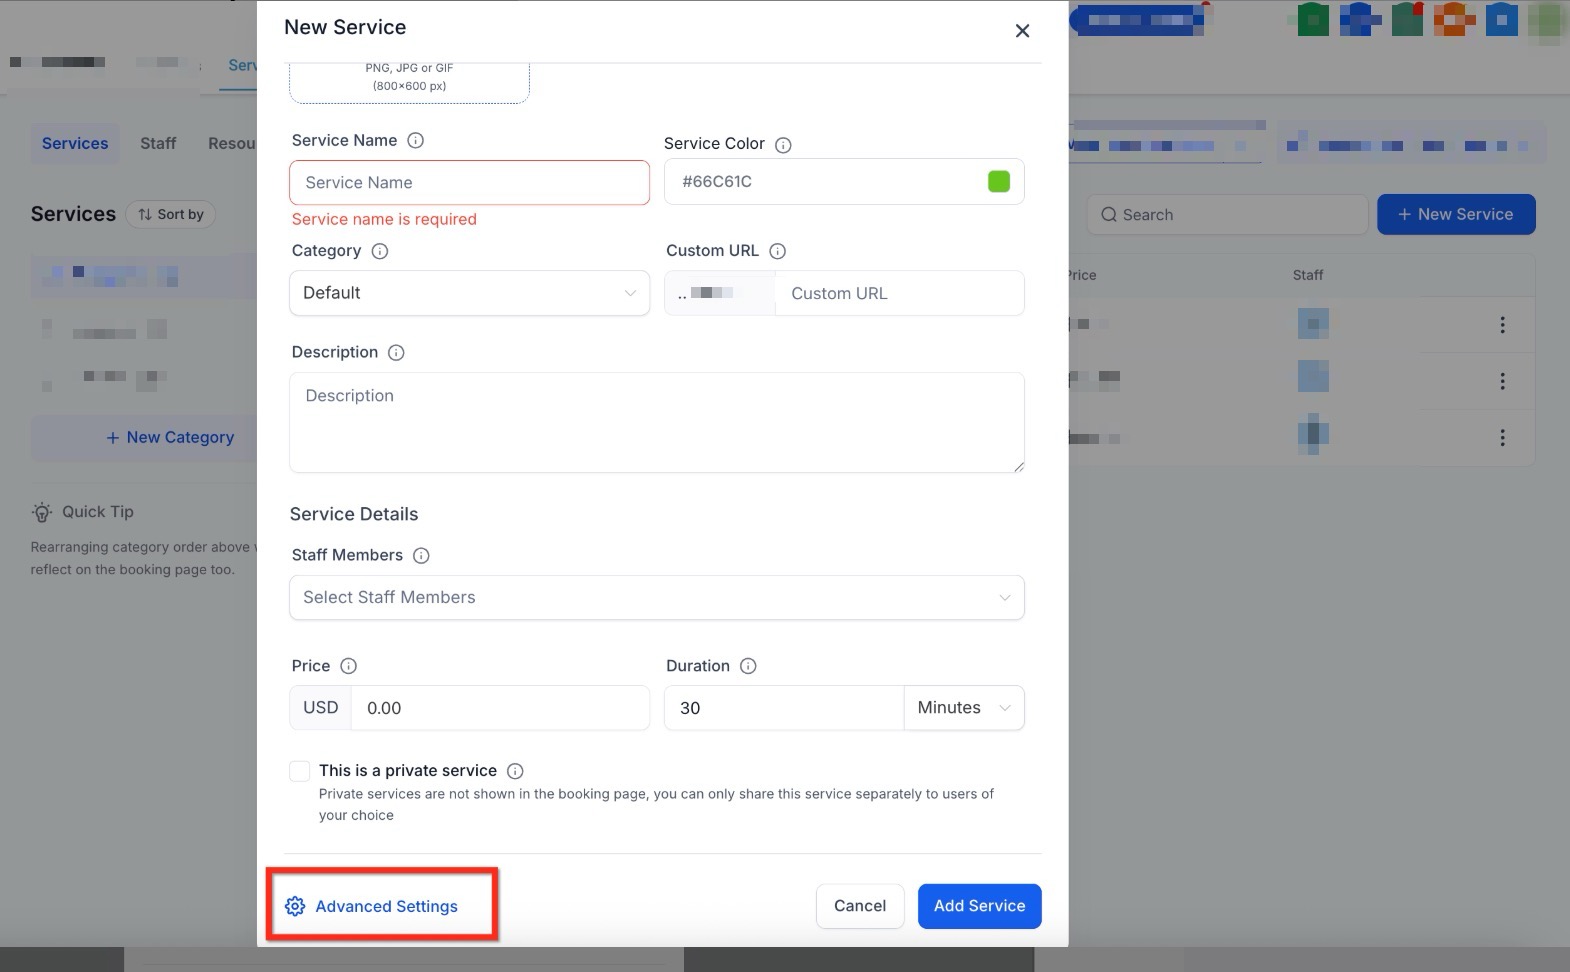
Section titled “Step 1: Initialize the Service”Navigate to the Services tab and click the +New Service button located in the upper right corner of the screen.

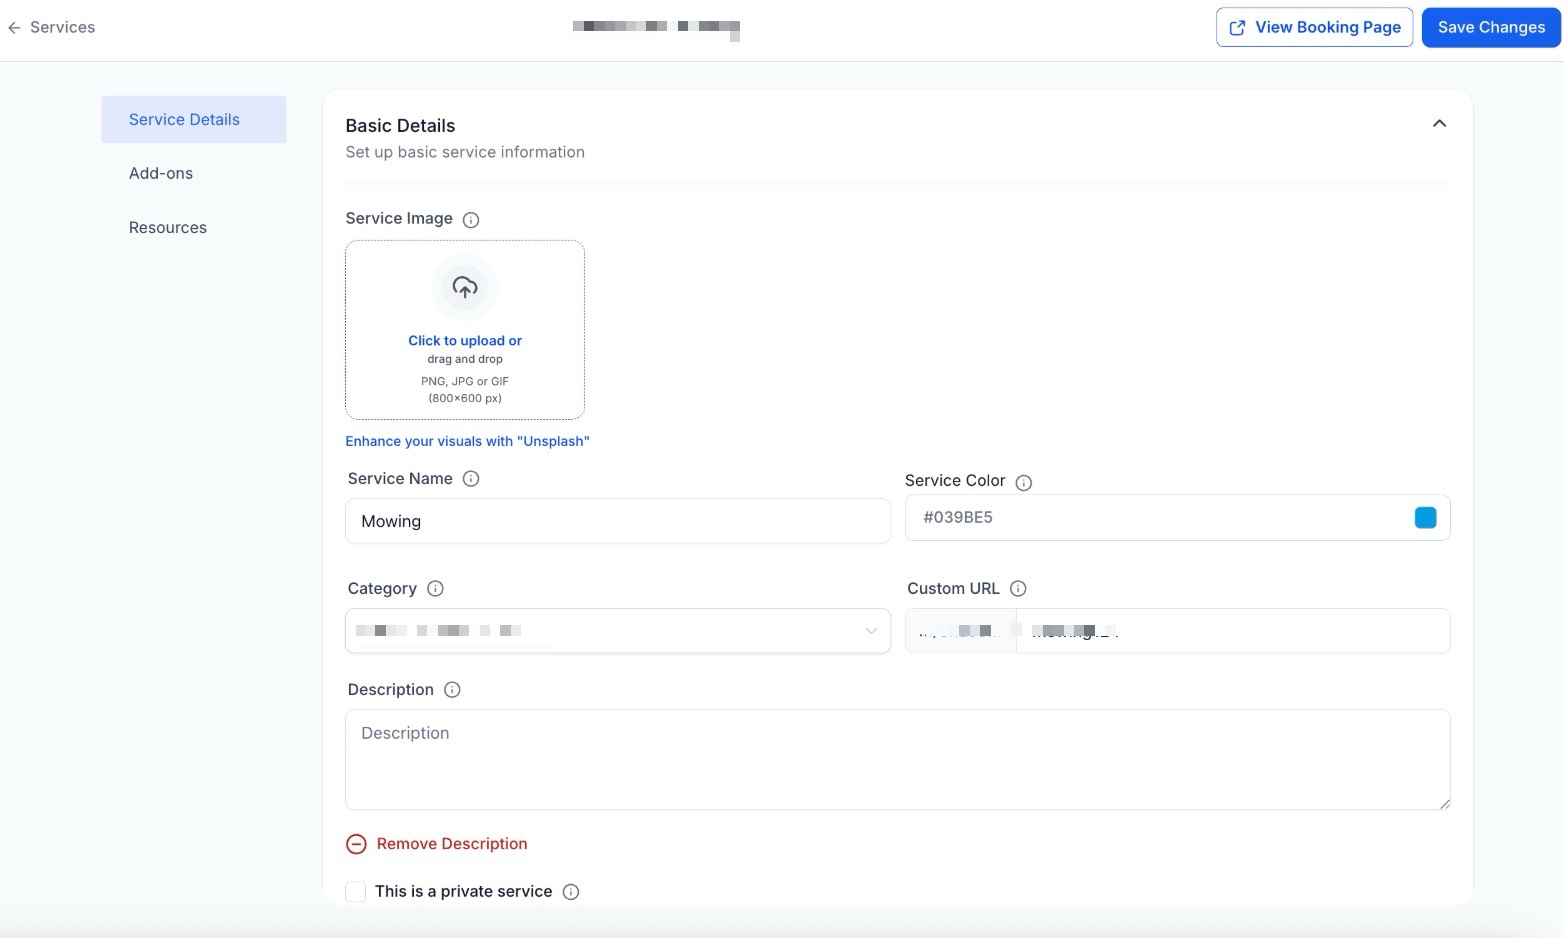
Step 2: Put Basic Details
Input the fundamental information that customers will see:
Service Image: Upload a visual representation of the service.
- Service Name: The public title customers will see.
- Service Color: Choose a color for easy identification on your calendar.
- Category: Organize your service by category (defaults to “General” if left blank).
- Custom URL: Create a unique booking link for this specific service.
- Description: Provide a brief overview of what the service includes.
- Private Service: Toggle this to hide the service from public pages; bookings will then be restricted to internal staff only.
- Staff Members: Assign at least one provider to make this service bookable.
- Duration: Set the total length of the appointment.
Once finished, select Advanced Settings to configure further options.
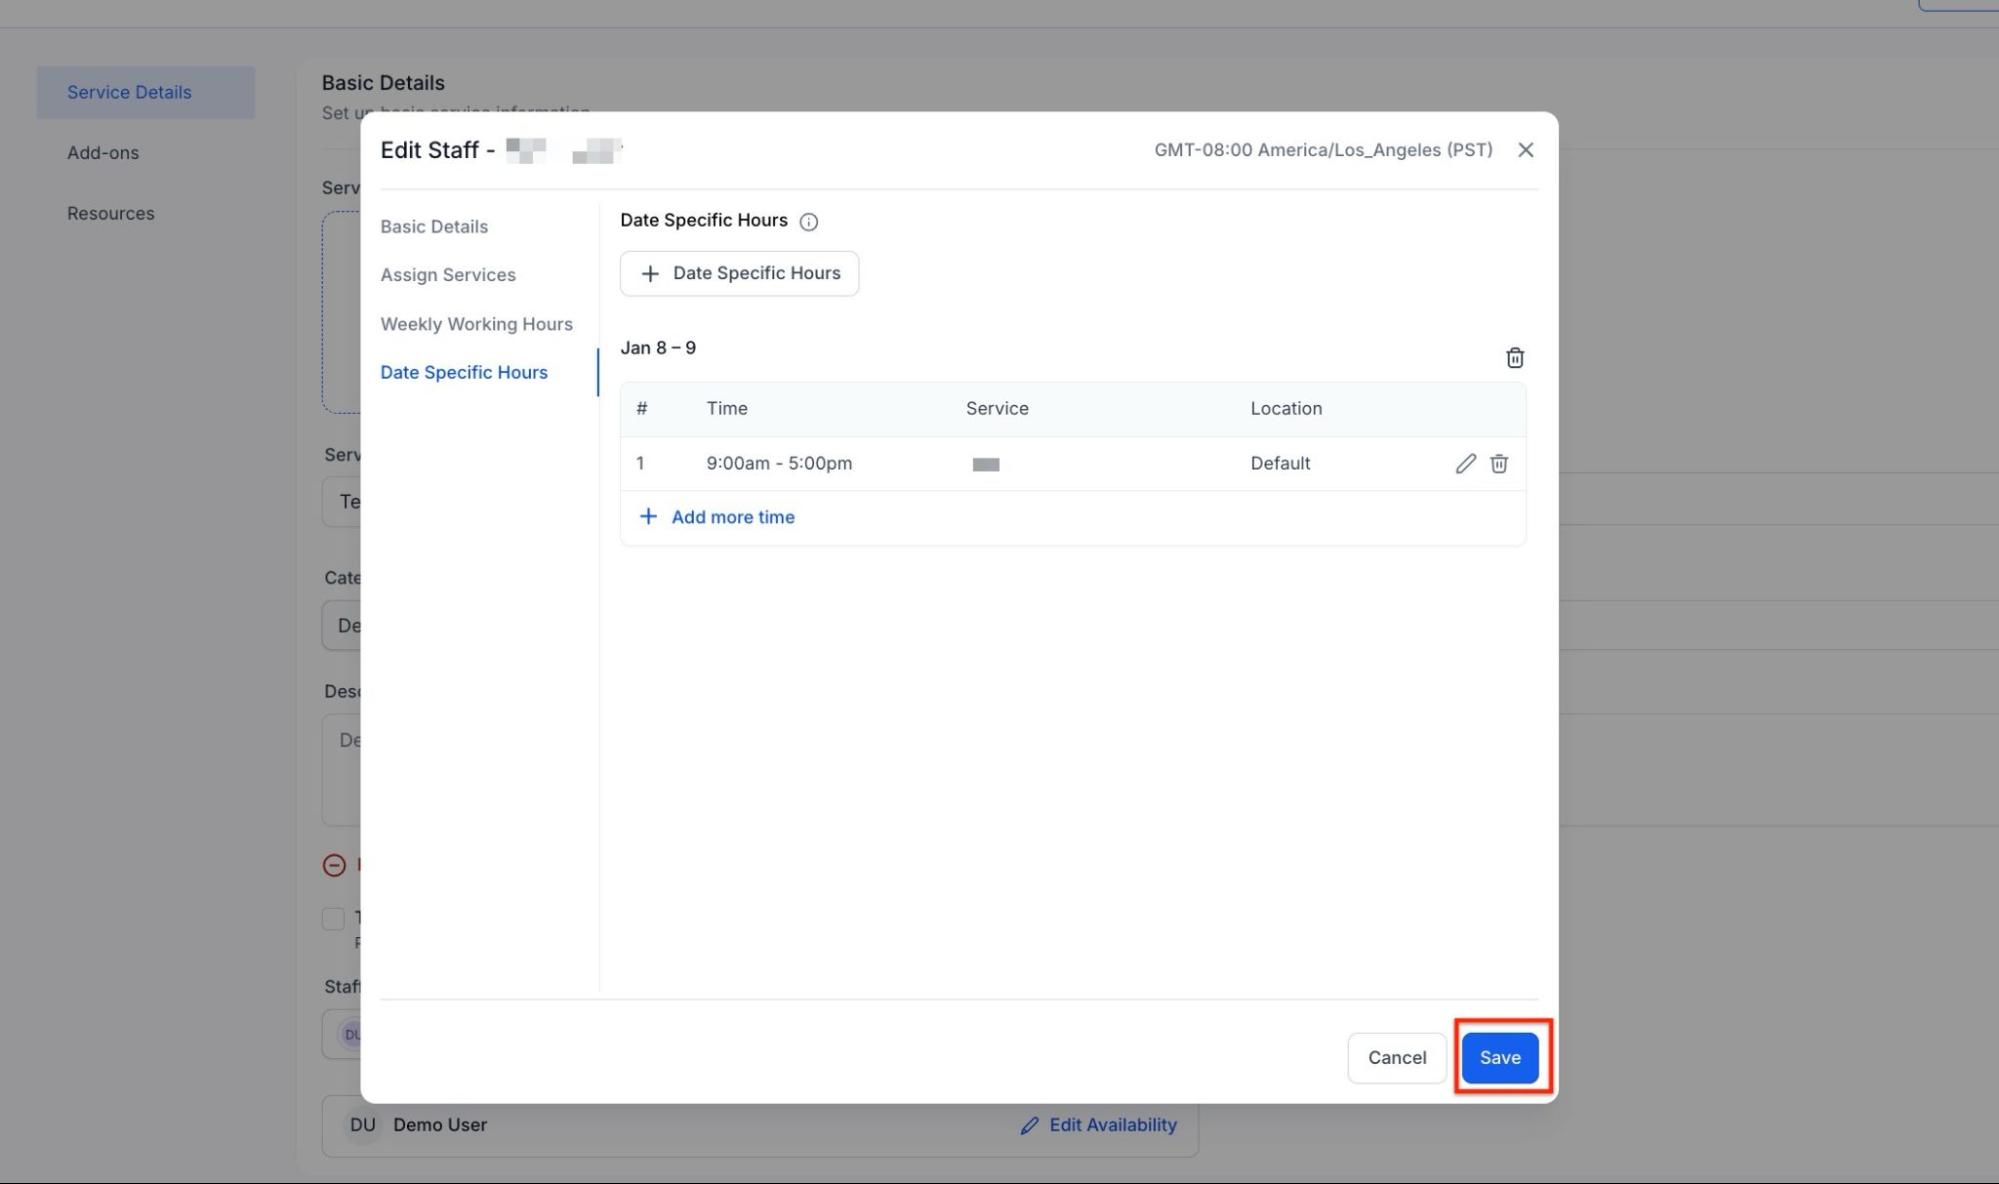
Step 3: Add Multiple Date-Specific hours
- In the Service Details tab: Edit Staff Member’s availability
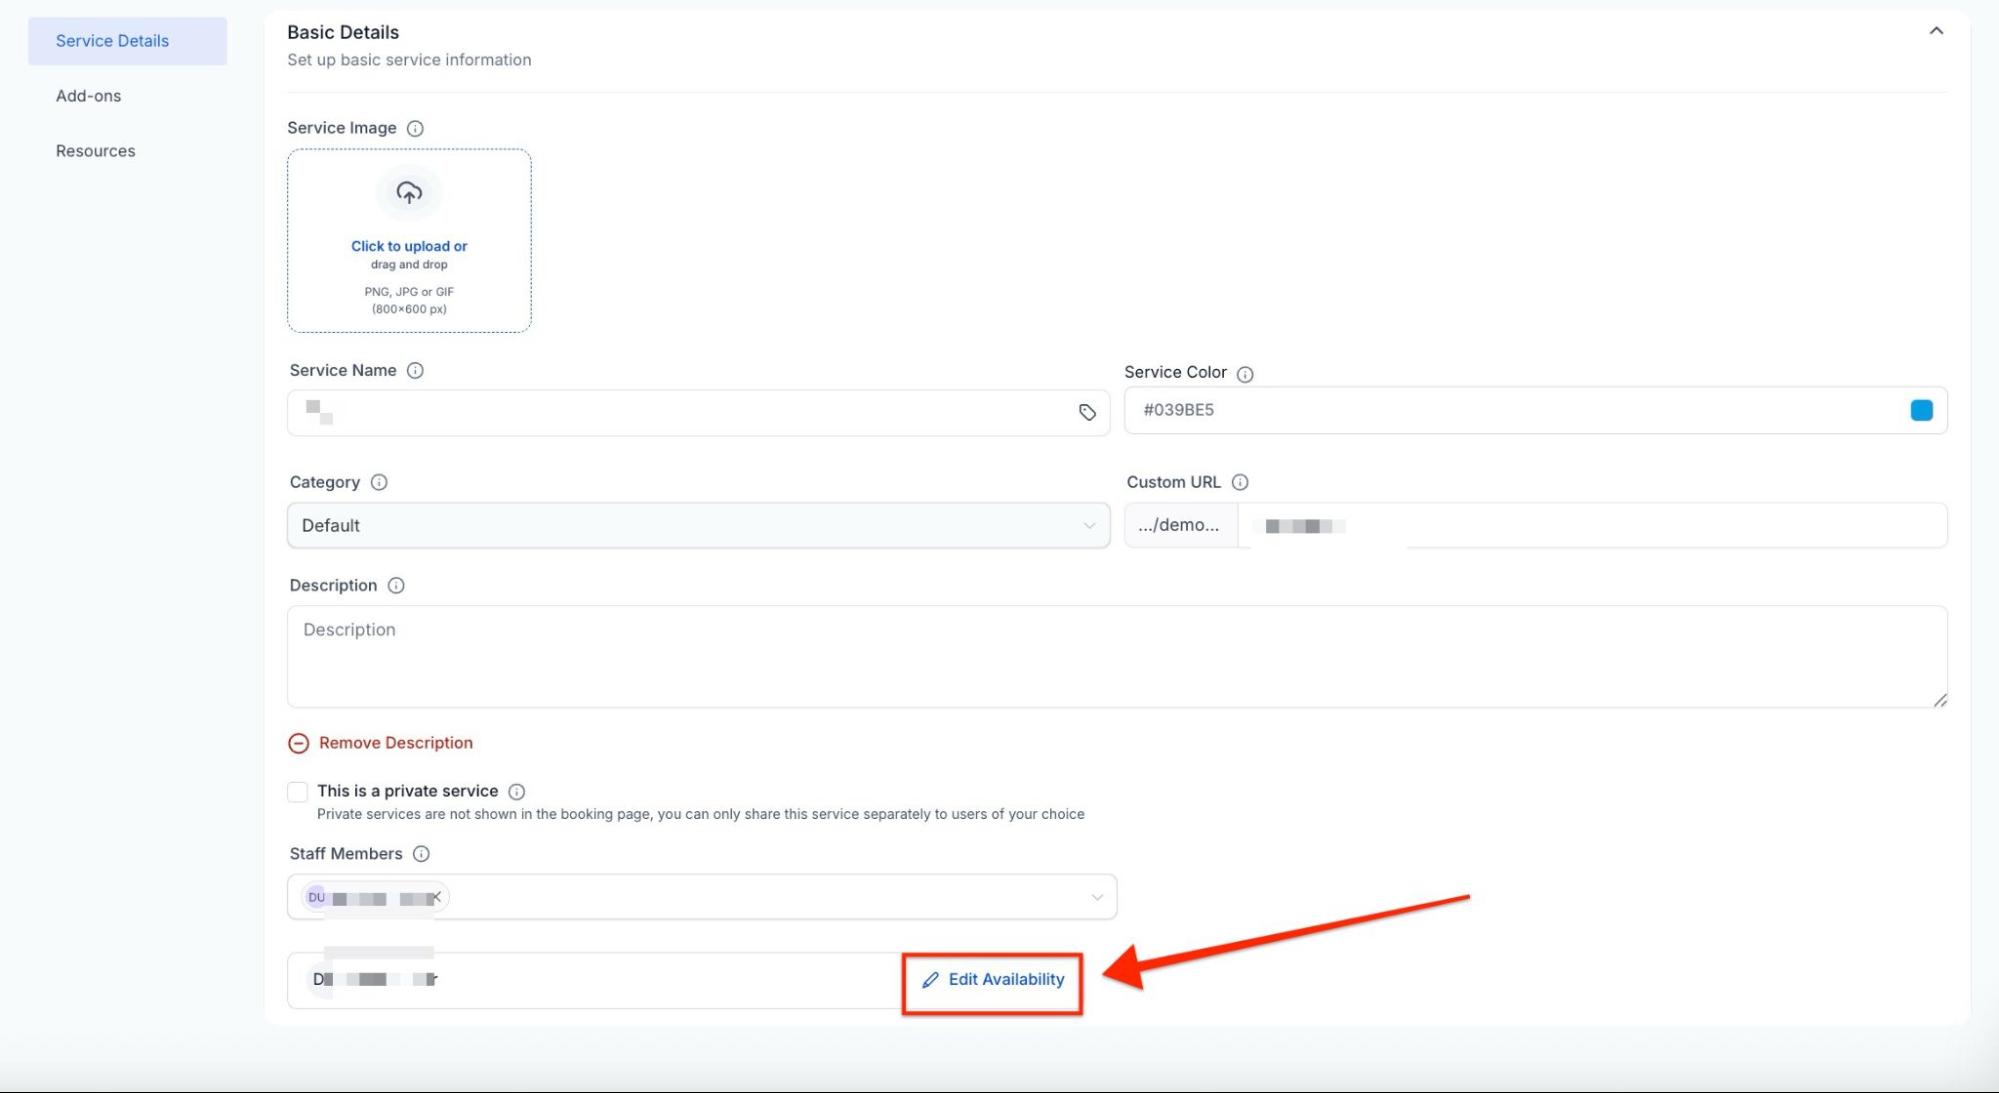
- Go to Date Specific Hours: Here, you will add the starting and ending on dates of your choice
Note: You can also set yourself unavailable during these hours - You can also choose Services and select the Location
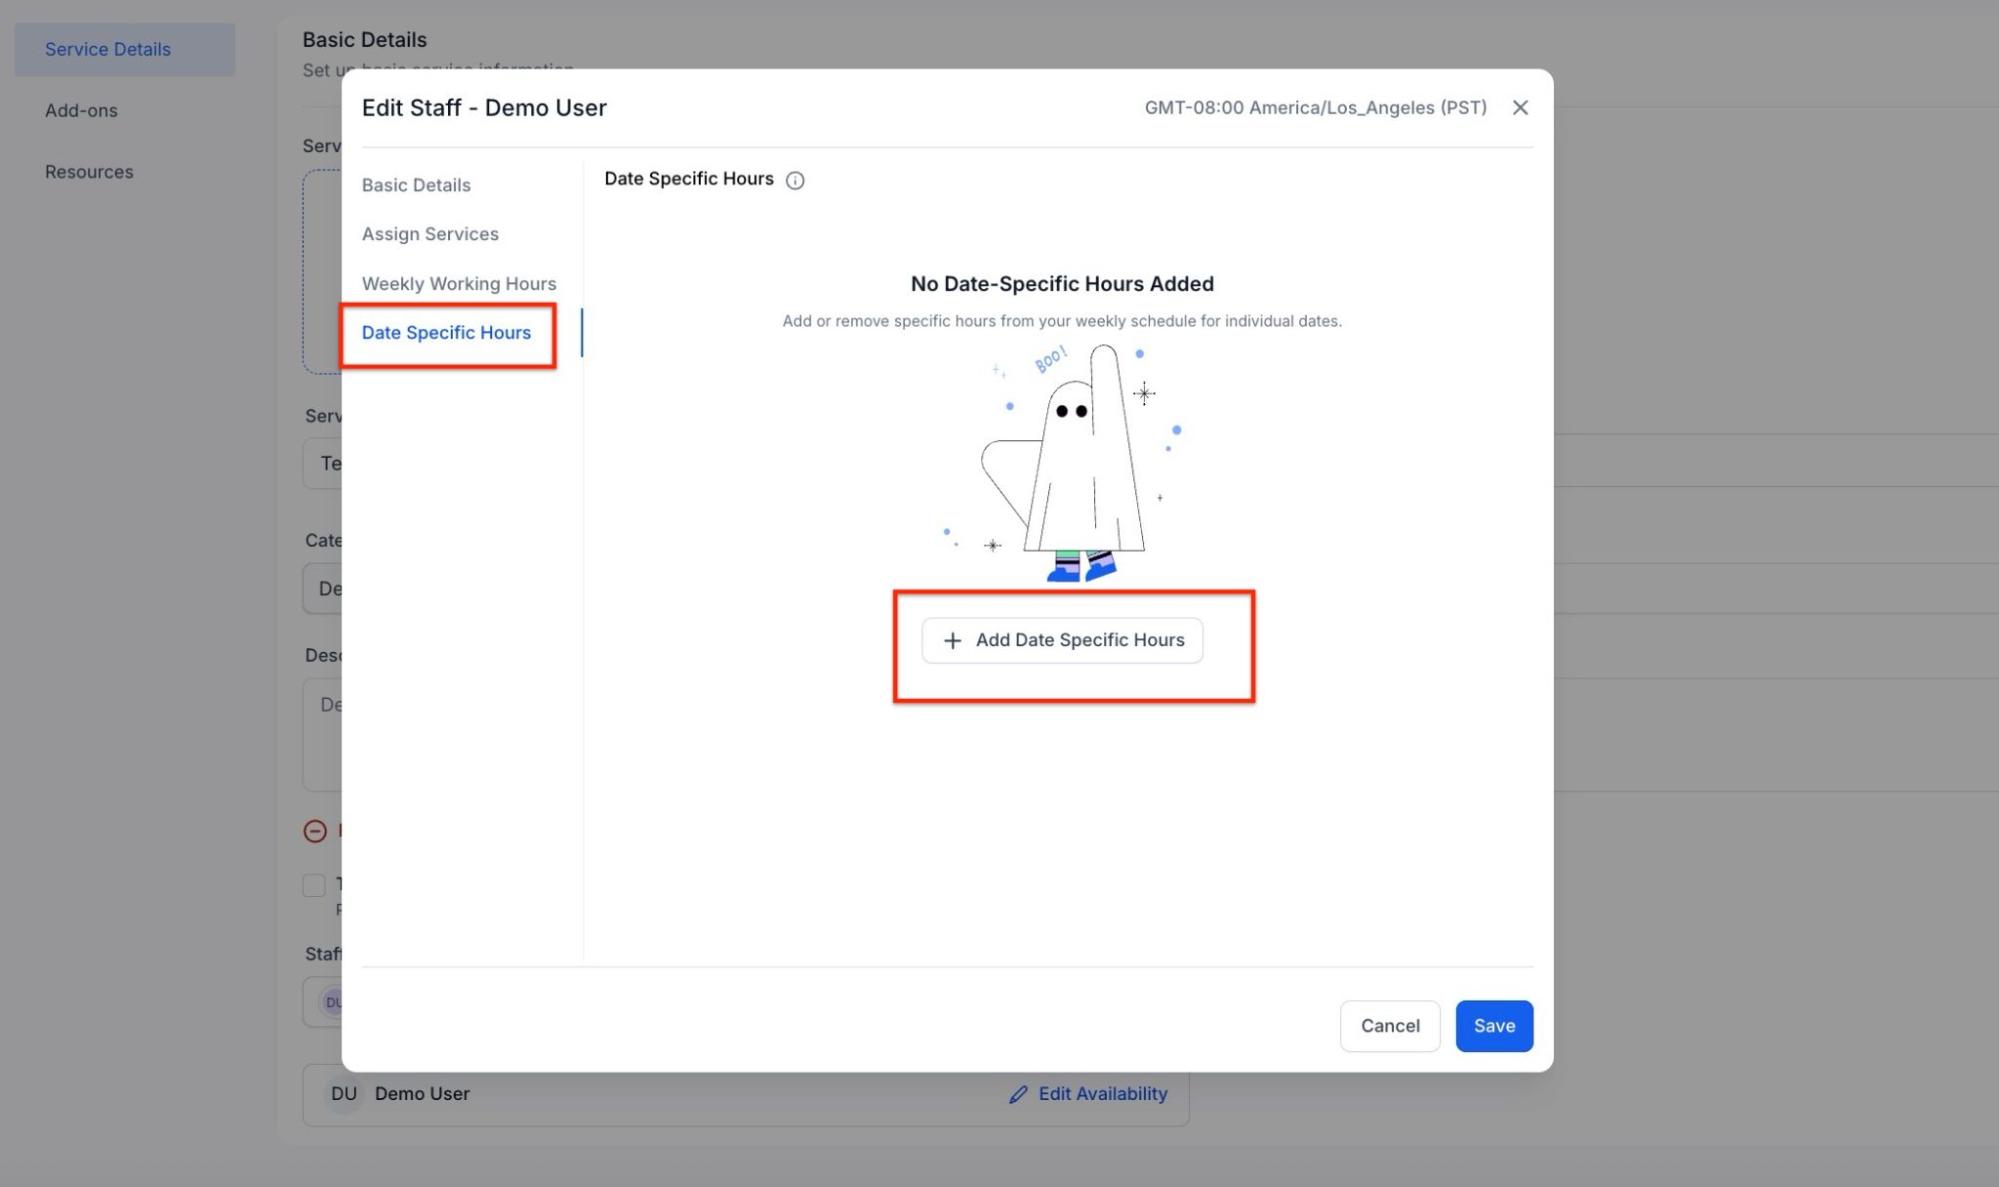
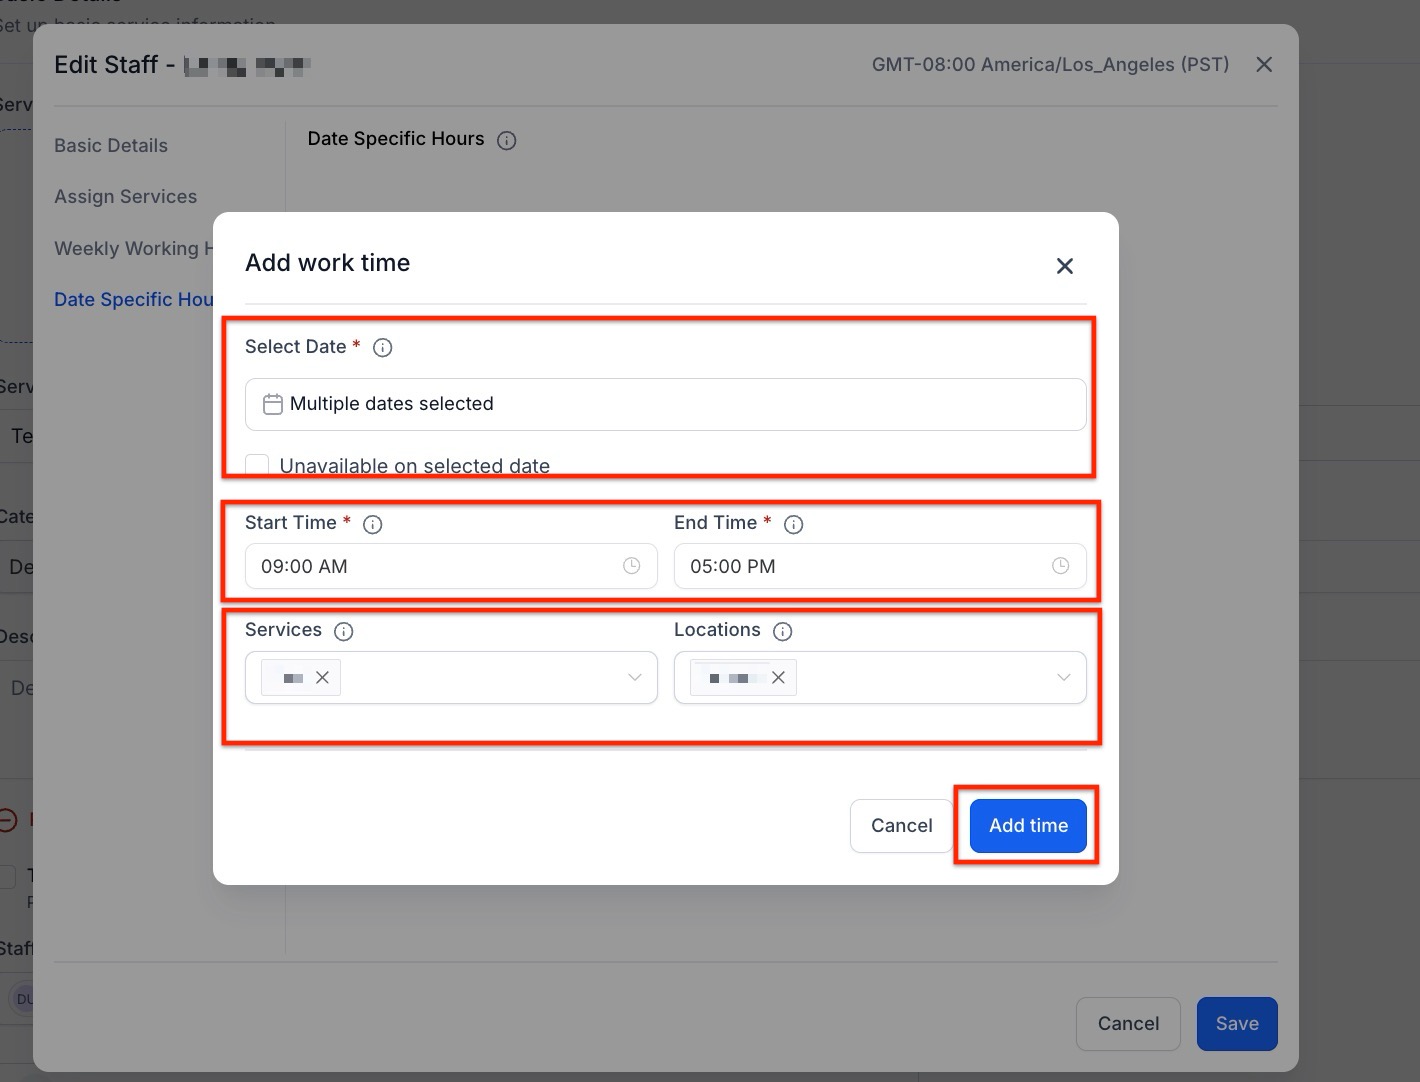
- Save: Once you have added Date-Specific hours, you can save the changes
Step 3: Configure Timing and Buffers
- Duration: Define the total length of the service.
- Processing Time: Split the appointment into three stages (Initial, Processing, and Final). This frees up staff to take other bookings during the middle “Processing” phase.
- Buffer Time: Include extra time before or after the session for setup or sanitation.
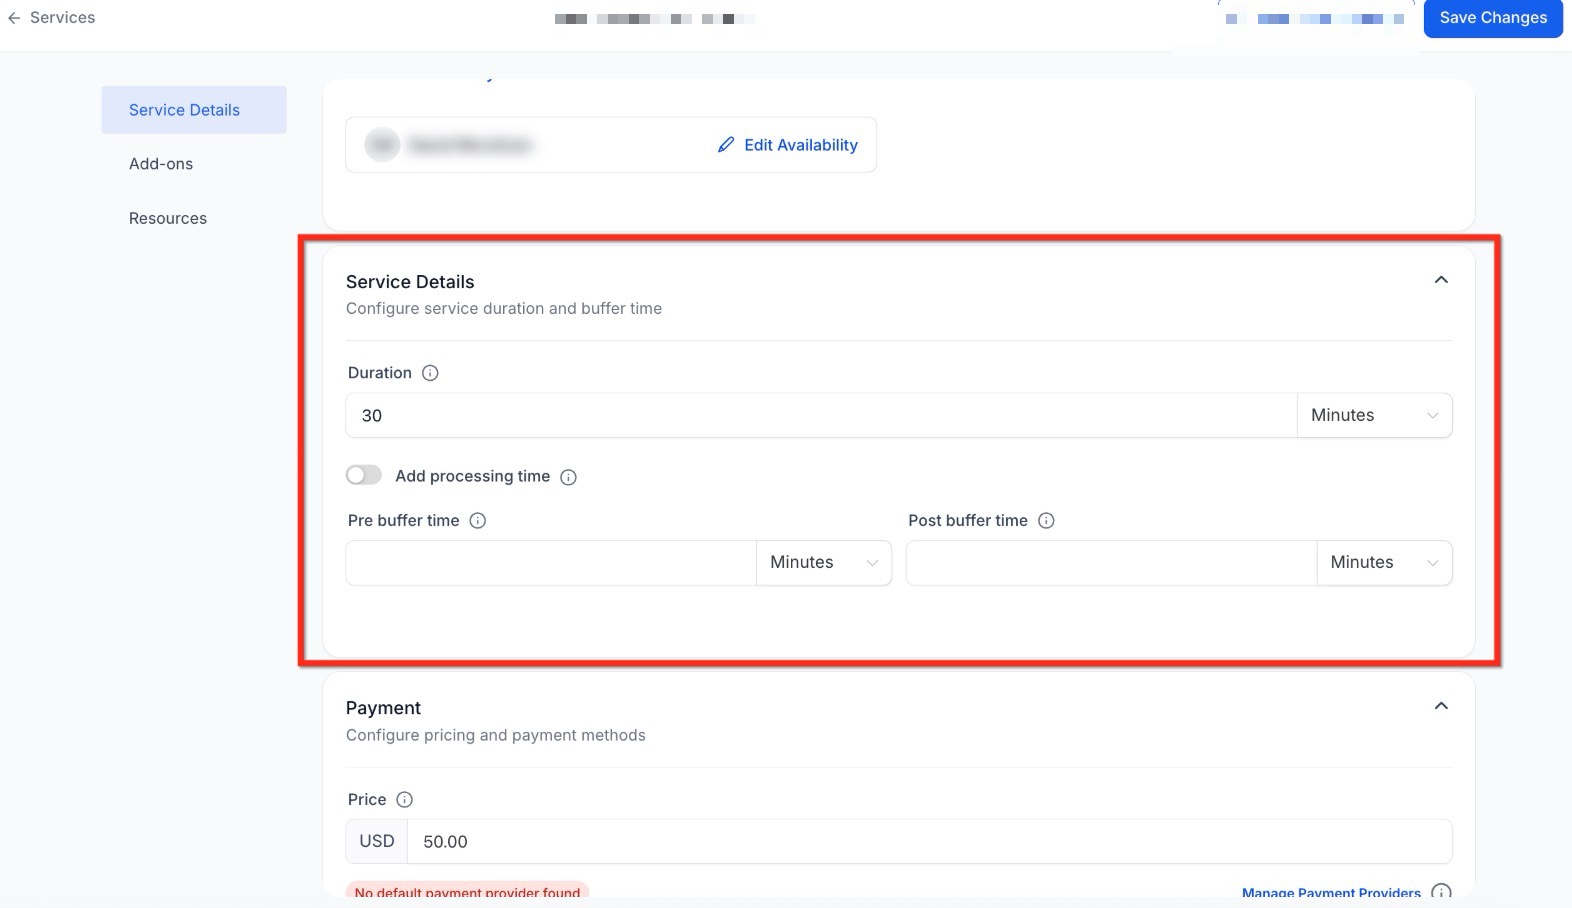
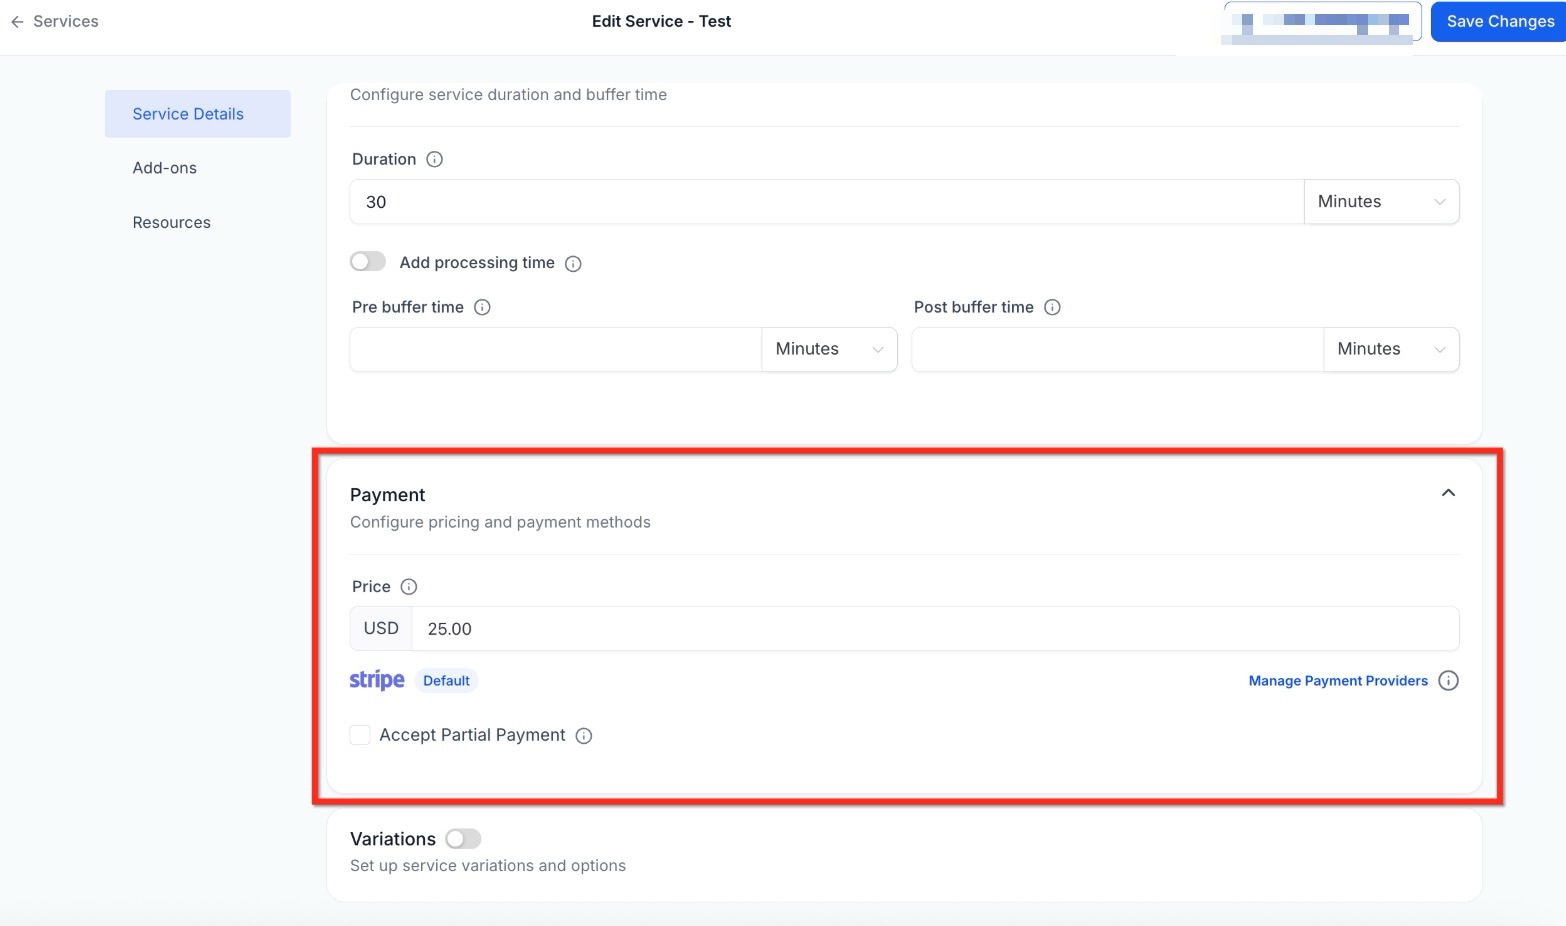
Step 4: Configure Payment Options
- Pricing: Set the total amount customers will be charged.
- Partial Payments: Enable deposits by allowing a fixed amount or a percentage upfront rather than the full balance.
Step 5: Add Different Options (Optional): Want to offer your clients more variety? Turn on Variations to list different versions of the same service.
- How to do it: Just fill in the Name, Duration, and Price for each choice. You can also include Processing Time if needed.
- Example: You could offer a “Quick Refresh” (30 mins for $120) alongside a “Deep Dive” (60 mins for $350).

Click Save Changes to finalize the setup. Use the View Booking Page link to preview the customer experience and ensure all details appear as intended.

Pro Tips for Success
- Buffer Strategy: Always add a 5 to 10 minute buffer after high intensity services to account for client changeovers and documentation.
- Internal Testing: Before launching a new service, use the “Private Service” toggle to test the booking flow yourself without it appearing on your public website.
- Visual Organization: Use the “Service Color” feature to color code your internal calendar by service type, making it easier to read your daily schedule at a glance.
- Resource Capacity: If you have a shared room that can hold multiple people, set the Resource Capacity higher than one to allow simultaneous bookings for different services in that same space.
Use Cases
Section titled “Use Cases”- Professional Consulting: A consultant uses Variations to offer a “Quick Audit” (15 minutes) and a “Deep Dive” (60 minutes) under one “Consultation” service header.
- Wellness Centers: A spa uses Resources to ensure that while they have five massage therapists, they only book three sessions at once because they only have three available massage tables.
- Photography: A photographer uses Add ons to allow clients to purchase “Extra Retouched Images” or “Express Delivery” during the initial booking checkout.
FAQs
Question: What is the Services panel, and how does it help manage bookings? Answer: The Services panel allows you to create and manage bookable services, helping customers schedule appointments online. It helps organize offerings, manage scheduling, assign staff, and integrate advanced features like variations, add-ons, and resources, ensuring a smooth booking process.
Question: How do I create and organize service categories? Answer: To create a new category, click the “New Category” button in the Services Panel. You can modify existing categories by using the three-dot icon to edit their name or settings. Services can be reordered by dragging and dropping them into your preferred sequence to improve customer navigation.
Question: What are variations, and how can they enhance my service offerings? Answer: Variations allow you to offer multiple options for the same service, such as different durations or price tiers. This feature lets you cater to different customer preferences, making it easier to present a range of choices under one service listing.
Question: What are resources, and how do they prevent double bookings? Answer: Resources refer to shared assets like rooms or equipment required for a service. By assigning resources to specific services and setting their capacity, the system ensures that no more clients are booked than the resources can accommodate, thus preventing double bookings.
Question: How can I set up payment options for my services? Answer: You can configure payment options by setting the total price for each service. Additionally, you can enable partial payments, allowing customers to pay a fixed amount or percentage upfront rather than the full balance. This feature can help manage cash flow and secure bookings.