Global Settings in Services
The Global Settings feature centralizes and streamlines your service configuration process, offering a simple yet powerful way to manage various aspects of your business. Whether you’re handling scheduling, payments, notifications, or third-party calendar integrations, Global Settings helps you save time by applying consistent rules across all services. This article will guide you through the key features and benefits, how to use them effectively, and answer common questions.
Key Features and Benefits of Global Settings
Section titled “Key Features and Benefits of Global Settings”Global Settings is a powerful tool that consolidates and simplifies the configuration of multiple settings across all your services. By making adjustments in one central location, you can apply these changes to every service, ensuring consistency across your operations. Below are the main sections of the Global Settings:
- Centralized Control: Allows you to apply booking, payment, scheduling, and notification rules across all services from one place.
- Consistent Customer Experience: Ensures a uniform experience for your customers across all services.
- Faster Updates: Change global behaviors like staff selection or payment visibility in one go without editing each service individually.
- Smoother Scaling: Easily add new services without having to reconfigure the scheduling approach.
How to Use Global Settings
Section titled “How to Use Global Settings”Follow the steps below to effectively navigate and configure your Global Settings.
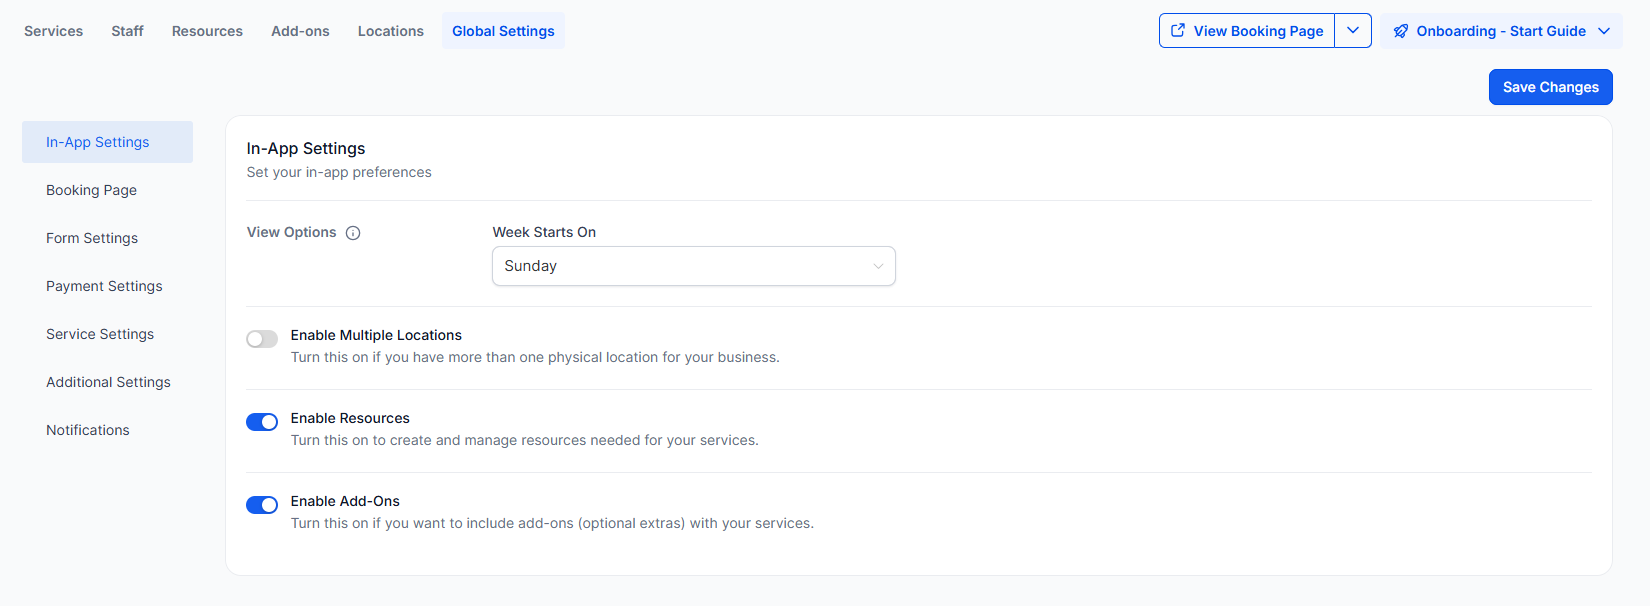
1-In-App Settings:
- View Options: Choose which day the calendar should start on (e.g., Monday, Saturday, or Sunday).
- Enable Multiple Locations: This option is available if your business operates in more than one location, allowing you to manage bookings for different locations on the same booking page.
- Enable Resources: Manage resources like rooms or tools to prevent double bookings.
- Enable Add-ons: Add extra services or upsell opportunities during the booking process.
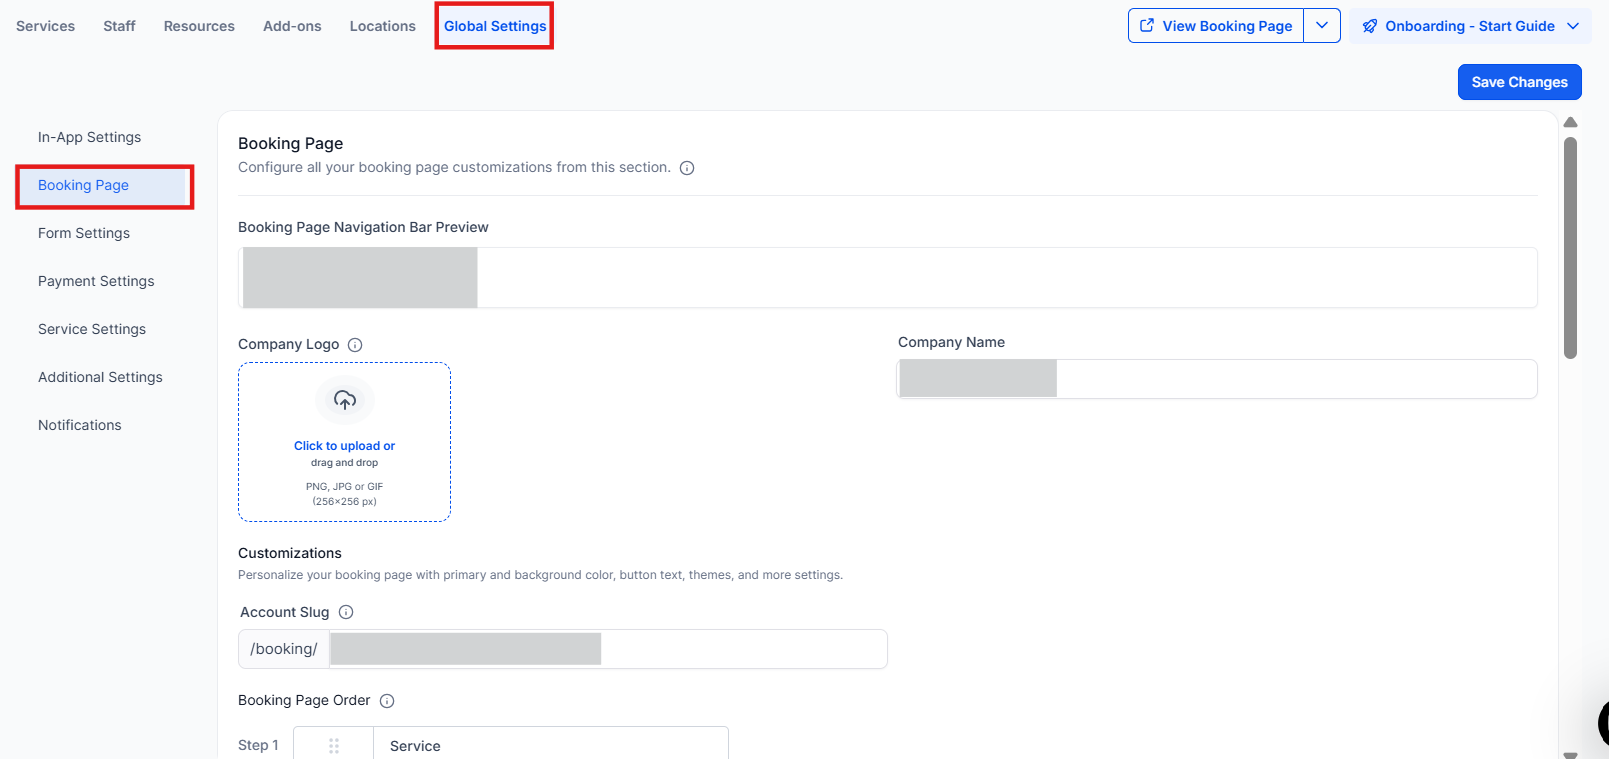
2-Booking Page Settings
- Customize Booking Page: Personalize your booking page by adding your company name, logo, and adjusting the theme (light or dark).
- Service Selection Button Label: Customize the label on your booking page button (e.g., ‘Book Now’).
- Language & Primary Color: Set the language of your booking page and customize the primary color for consistent branding.
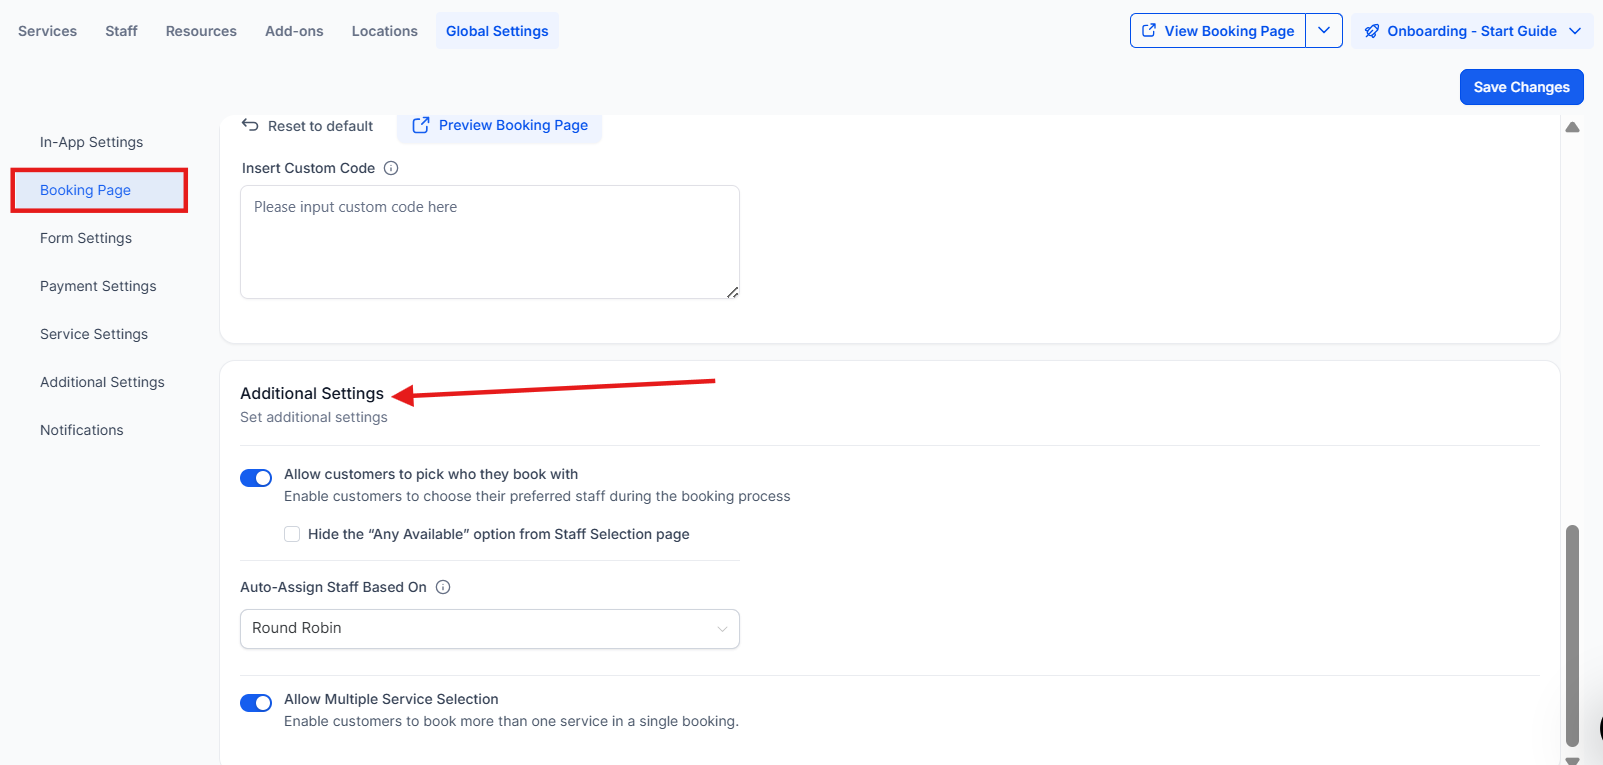
Additional Settings within the Booking page settings:
Section titled “Additional Settings within the Booking page settings:”- Allow Customers to Choose a Staff Member: Enable this setting if you want to give customers the option to select their preferred staff member when booking. If disabled, the system will automatically assign a staff member based on availability and round robin logic.
- Hide the “Any Available” Option: If staff selection is enabled, you can choose to hide the “Any Available” option. This ensures that customers must select a specific staff member for their appointment, rather than leaving it open to any available team member.
- Allow Multiple Service Selection: Enabling this option allows customers to book multiple services in a single session, streamlining the booking process for them.
- Auto-Assign Staff Based On: If a customer does not select a staff member, this setting will determine how the system assigns one automatically, based on predefined preferences like availability or round robin.
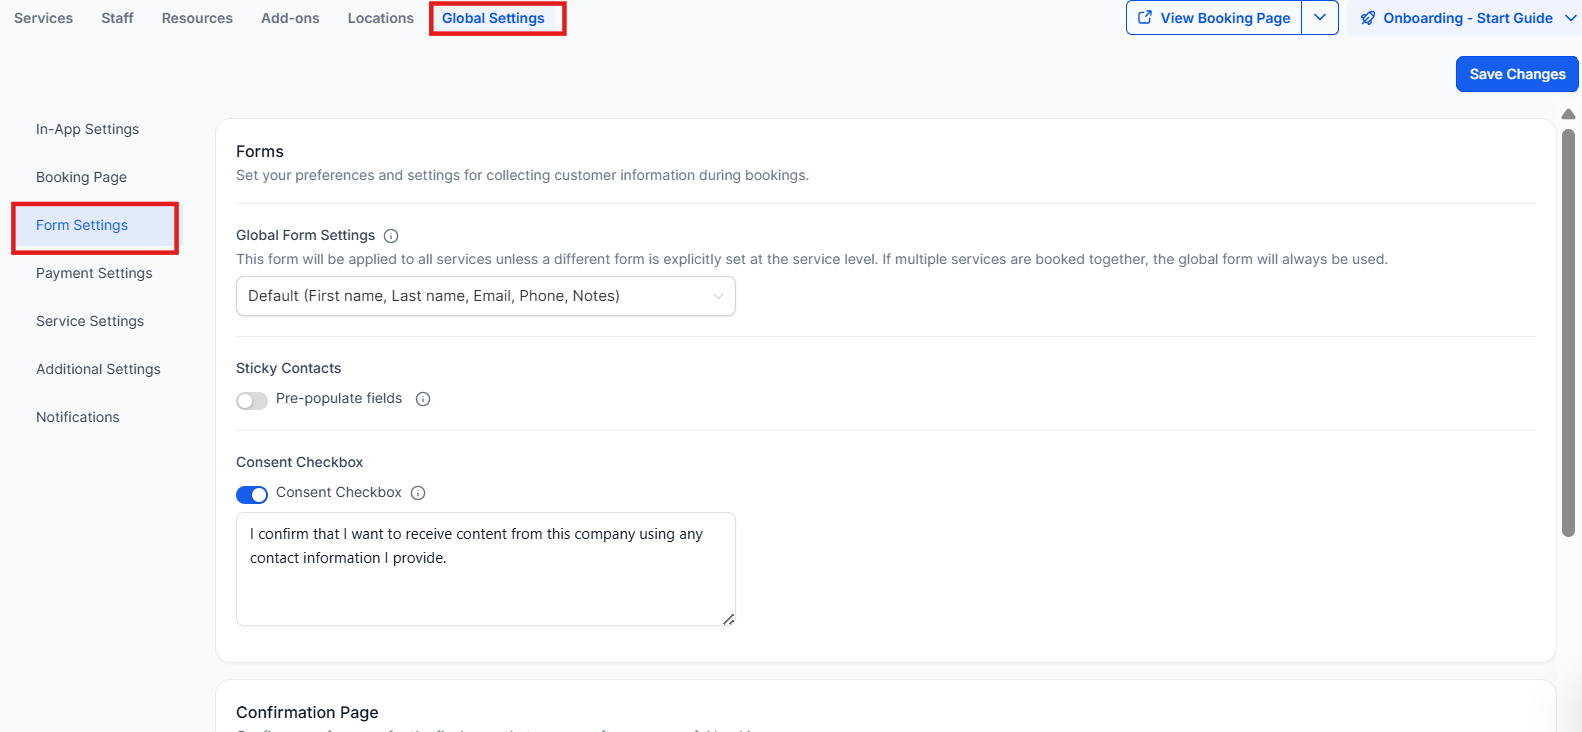
Booking page settings for Forms:
Section titled “Booking page settings for Forms:”- Select Form: Choose the form you want to display during the booking process. You can use the default form (collecting First Name, Last Name, Phone, and Email) or create a custom form through the “Sites > Forms” section. The form helps gather the customer’s information and create a corresponding contact in the system.
- Pre-populate Fields (Sticky Contacts): This feature enables the form to automatically fill in customer information from previous bookings using browser cookies. It’s useful for returning customers, saving them time. However, it should only be activated when customers fill out the form themselves. If multiple users share the same browser, the information may be overwritten.
- Consent Checkbox: This option allows you to add a consent checkbox in the booking form. It’s used to obtain customer consent during the booking process, and you can customize the consent message as needed. This feature is available only when using the default form.
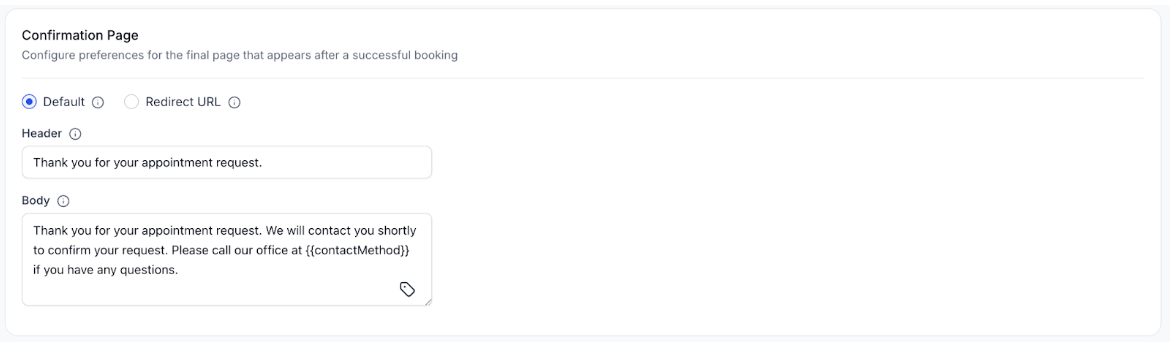
Booking page settings for Confirmation Page:
Section titled “Booking page settings for Confirmation Page:”- Custom Message or Redirect: After a booking is completed, you can choose to display a custom message on the default confirmation page or redirect the customer to another page. This allows you to provide additional information or guide them to a relevant next step after their booking is confirmed.
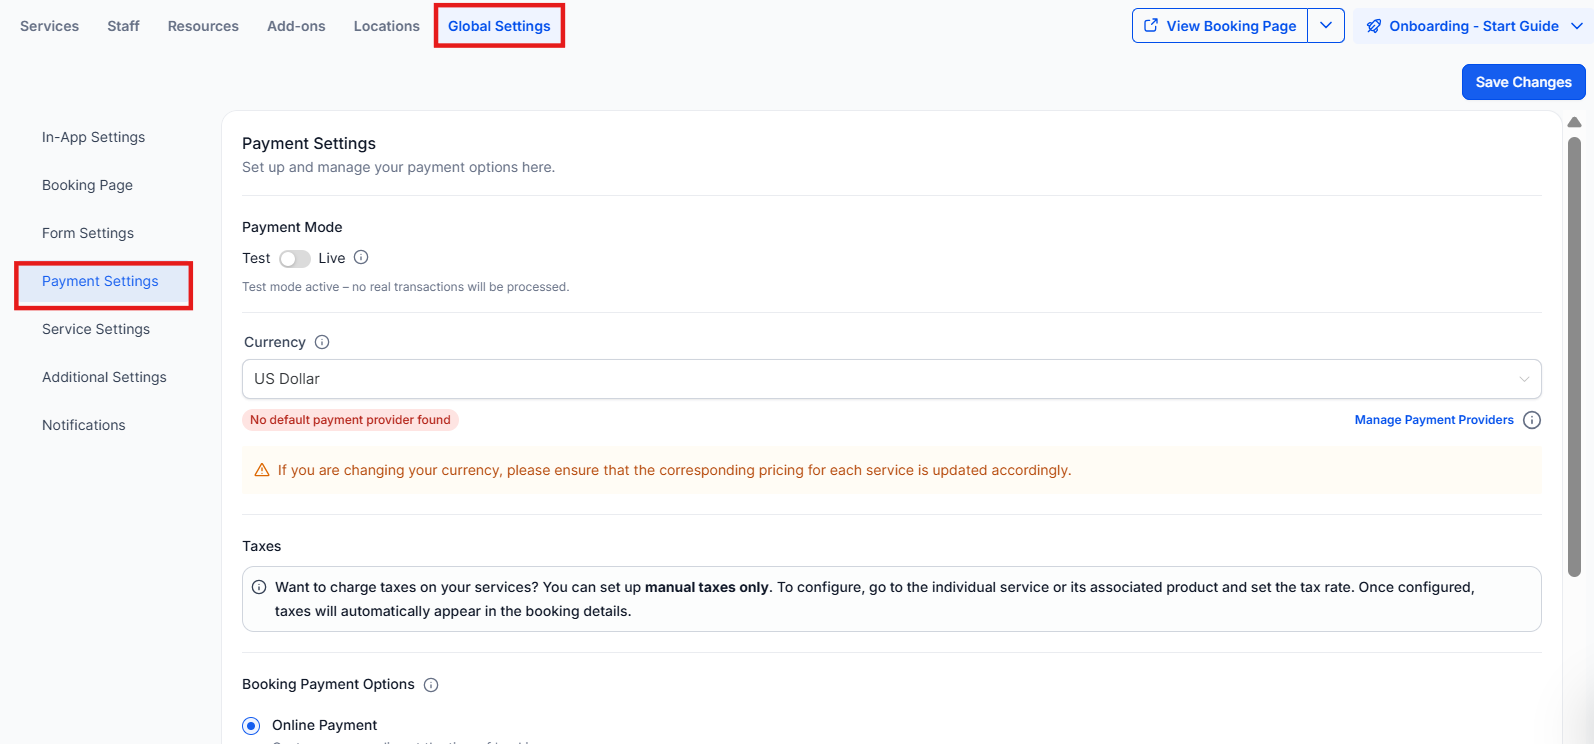
3-Payment Settings:
- Test Mode vs. Live Mode: Toggle between testing the booking process and accepting real payments.
- Currency Selection: Choose the currency for payments.
- Booking Payment Options: Set how payments will be handled on the booking page (e.g., pay now or pay in person).
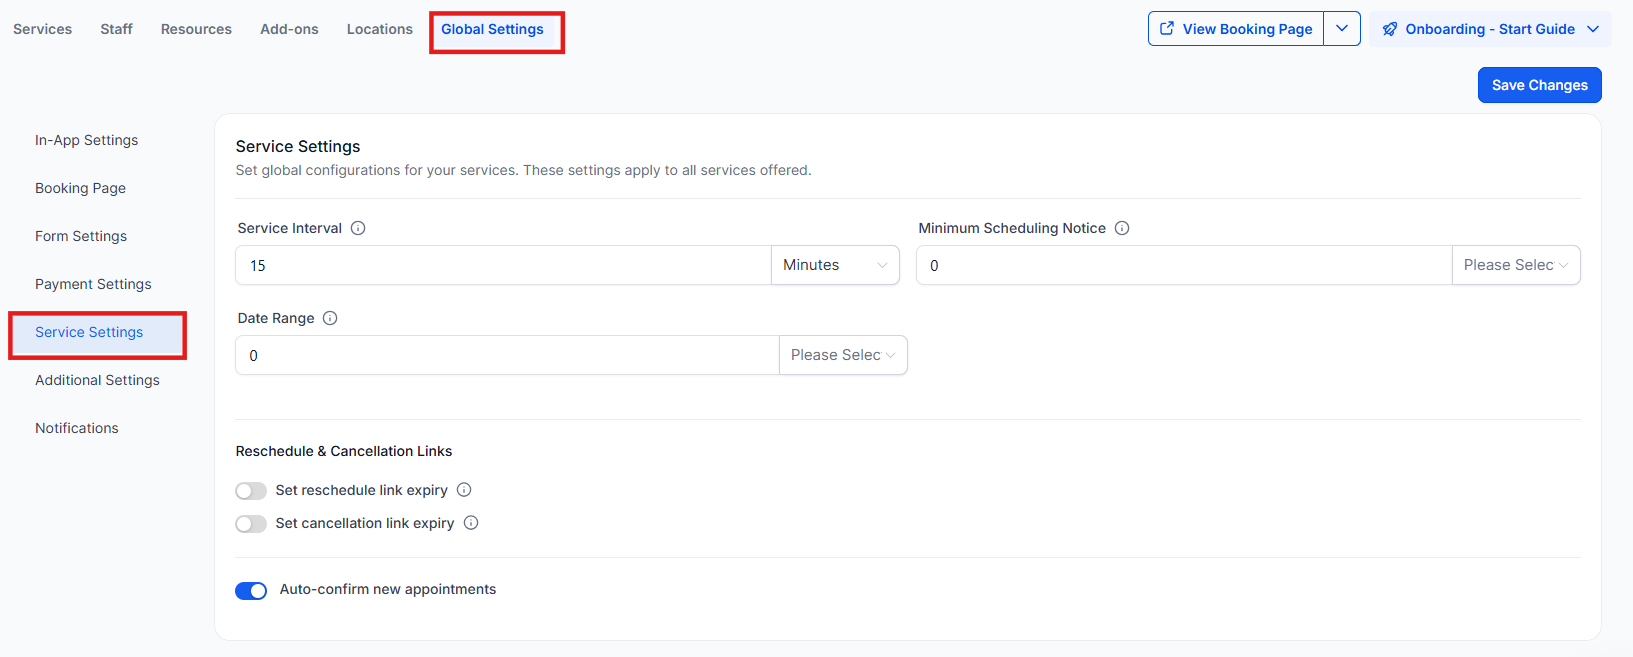
4-Service Settings:
- Service Interval & Minimum Scheduling Notice: Configure the availability of booking slots and the minimum time needed before an appointment can be scheduled.
- Cancellation & Rescheduling: Enable cancellation and reschedule options with configurable expiration times.
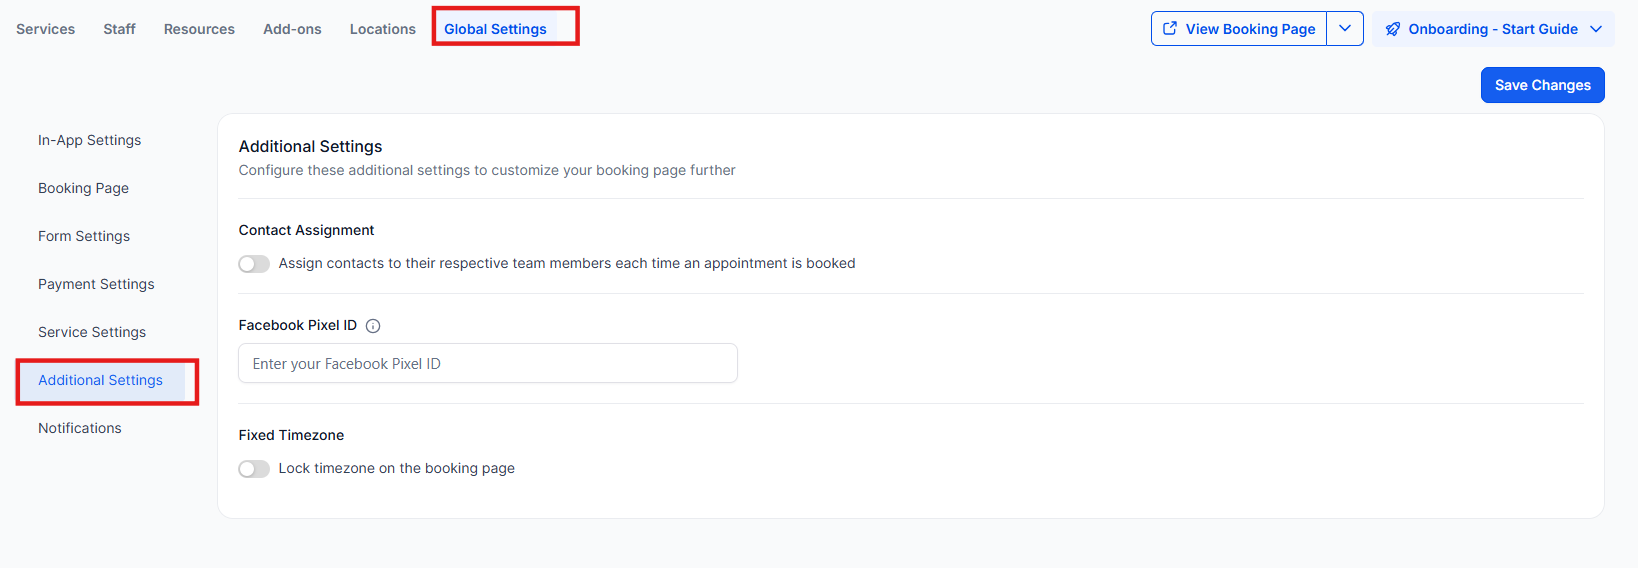
5-Additional Settings
Section titled “5-Additional Settings”Contact Assignment:
- Assign Contacts to Service Staff Automatically: This feature allows you to automatically assign a contact to the service staff member handling their appointment. For example, if a contact’s original assigned staff is User A, but the contact books an appointment with User B, the system will update the assigned user to User B.
- Prevent Reassignment for Existing Contacts: Enable this setting to prevent the reassignment of a contact who already has a designated staff member. This ensures that only contacts without an assigned staff member will have their details updated to reflect the staff member handling their appointment.
Facebook Pixel ID:
- Track Booking Activities: Add your Facebook Pixel ID in this section to monitor events triggered during the booking process, allowing you to track and analyze user behavior related to your services.
Lock Timezone on Booking Page:
- Fix Timezone for In-Person Appointments: Use this option to lock the timezone displayed on the booking page, ensuring that customers see appointment slots in your specified timezone. This is especially useful for in-person services, where the time zone should remain consistent regardless of the customer’s location.
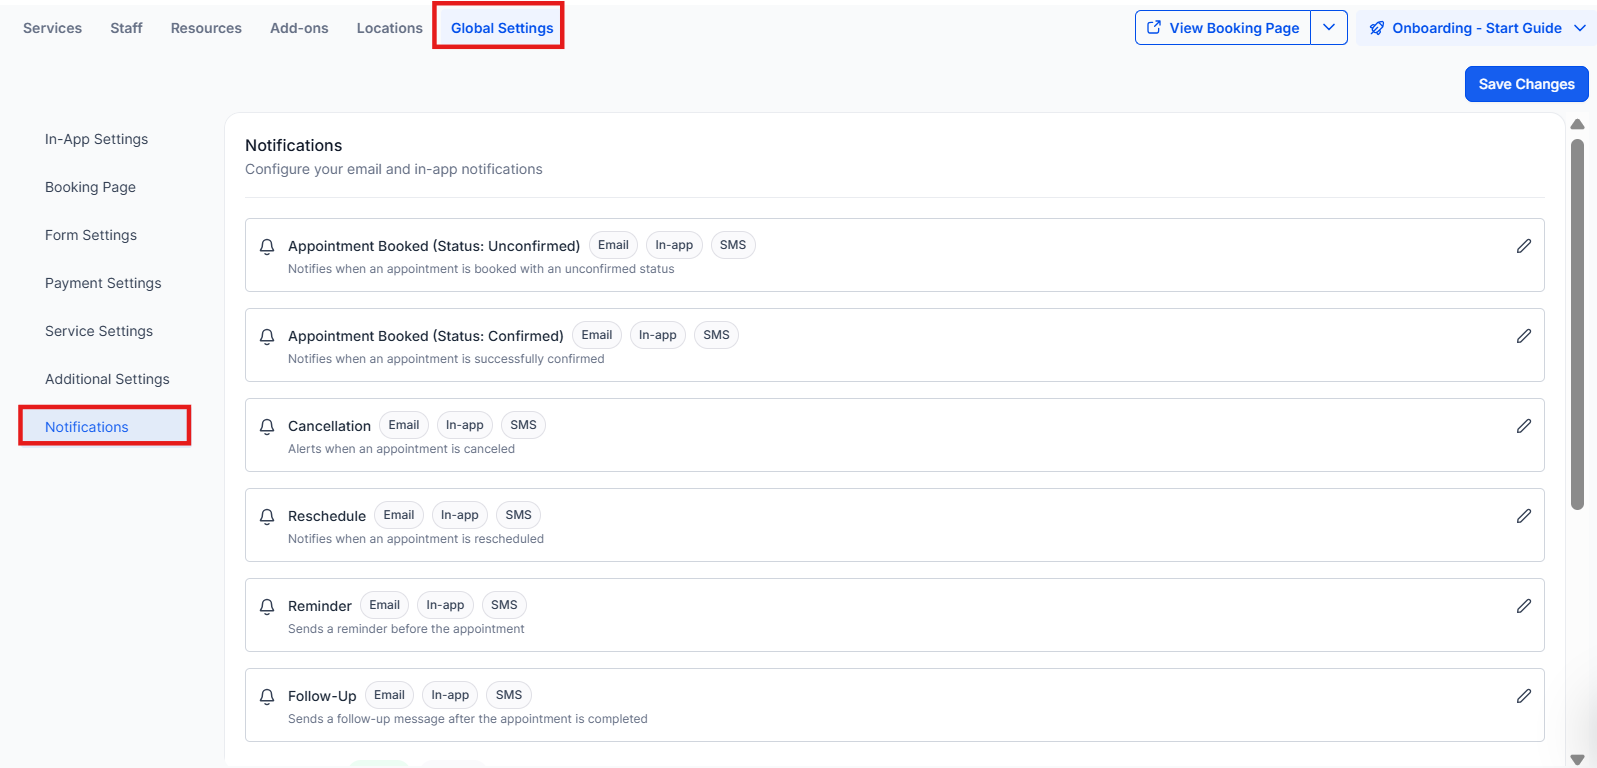
6-Notification Settings:
- Email Notifications: Set up automatic notifications to customers and staff for appointment confirmations, cancellations, or reminders.
- Follow-up Notifications: Automate follow-up emails to customers after appointments to encourage feedback or further engagement.
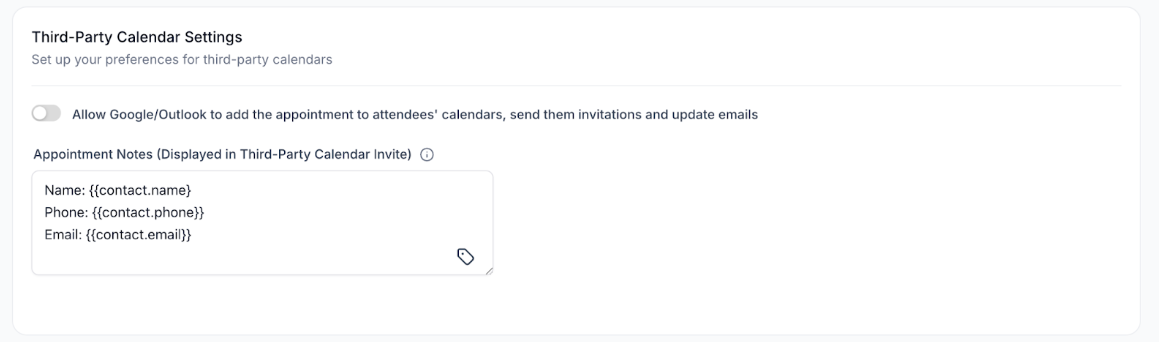
7-Third-Party Calendar Settings:
- Calendar Sync & Invites: Integrate with external calendars like Google or Outlook, and automatically add appointments to attendees’ calendars.
- Appointment Notes: Include important details directly in calendar invites (e.g., meeting links or instructions).
Pro Tips
Section titled “Pro Tips”- Use Wait Steps in Workflows: Most booking workflows require a “Wait” action set to “Event/Appointment Time” to trigger reminders 24 hours or 1 hour before the meeting.
- Allow Re-entry in Workflow Settings: If you want users to book more than one appointment without triggering the automation repeatedly, ensure the “Allow Re-entry” toggle is enabled.
- Appointment Custom Values: Automatically insert meeting date, time, and even the “Add to Calendar” link into confirmation emails.
- Filter by Appointment Status: Create different paths based on the appointment status (e.g., Confirmed vs. Cancelled or Show vs. No-show) by using the If/Else branch.
- Stale Appointment Handling: Trigger automation when an appointment remains “Pending” for too long without admin confirmation.
- Track Contact Source: Automatically update the “Contact Source” field in workflows to track which calendar or landing page is driving the most bookings.
**Question:What is the advantage of using Global Settings instead of editing each service individually?
Answer: Global Settings allow you to apply defaults across all services, making it easier to manage booking, payment, and scheduling behavior from one place.
**Question:When should I use Global Settings versus editing an individual service?
Answer: Use Global Settings for universal settings (e.g., booking page behavior, payments, notifications), and edit specific services for individual details like price, duration, and assigned staff.
**Question:Do direct links for specific services or staff reflect changes made in Global Settings?
Answer: Yes. Any changes made in Global Settings (e.g., layout, forms, payments, notifications) are automatically reflected in service, staff, and category links.
**Question:How can I preview how the booking page looks after updating Global Settings?
Answer: You can use the booking page preview to check the changes before sharing the link with customers. This ensures that updates in Global Settings are displayed correctly on the booking page.
**Question:Can I customize notifications for different types of appointments?
Answer: Yes, you can set up different notifications for appointment types such as Confirmed, Unconfirmed, Cancellations, and Reminders. These notifications can be sent via email or in-app, depending on your preference.