Add-ons in Services v2
Add-ons in Services v2
This article provides a comprehensive overview of the Add-ons feature within . Add-ons are designed to enhance the booking experience by allowing customers to personalize their services with optional extras. Whether you are looking to increase revenue through upselling or provide a more tailored experience for your clients, this guide covers the creation, management, and assignment of add-ons.
Add-ons are optional extras that can be attached to a service so customers can personalize their booking. They can be supplementary services or related products and may affect the total time and price of an appointment. By offering these enhancements, businesses can provide a more bespoke experience while maximizing the value of every time slot.
Use Case Examples
Section titled “Use Case Examples”- Wellness & Spa: A massage service could include an “Aromatherapy Upgrade” or “Hot Stone Addition.”
- Fitness: A personal training session might offer a “Nutritional Consultation” or “Body Composition Analysis” as an extra.
- Creative Services: A photography package could include “Additional Edited Photos” or “Express Digital Delivery” as an add-on.
Key Features and Benefits
Section titled “Key Features and Benefits”- Upsell Revenue: Capture more revenue at the moment of booking without the need for manual follow-up or sales calls.
- Personalized Bookings: Allow customers to build a service that fits their specific needs, increasing overall satisfaction.
- Transparent Pricing: Quantity-based pricing automatically calculates the exact cost at checkout based on the customer’s selections.
- Service-Specific Relevance: Add-ons only appear on the services they are assigned to, ensuring a clean and relevant booking interface.
- Efficient Management: Create an add-on once and link it to multiple services, reducing administrative overhead.
How to Create Add-ons
Section titled “How to Create Add-ons”Proper setup ensures add-ons display with the correct time, price, and visibility.
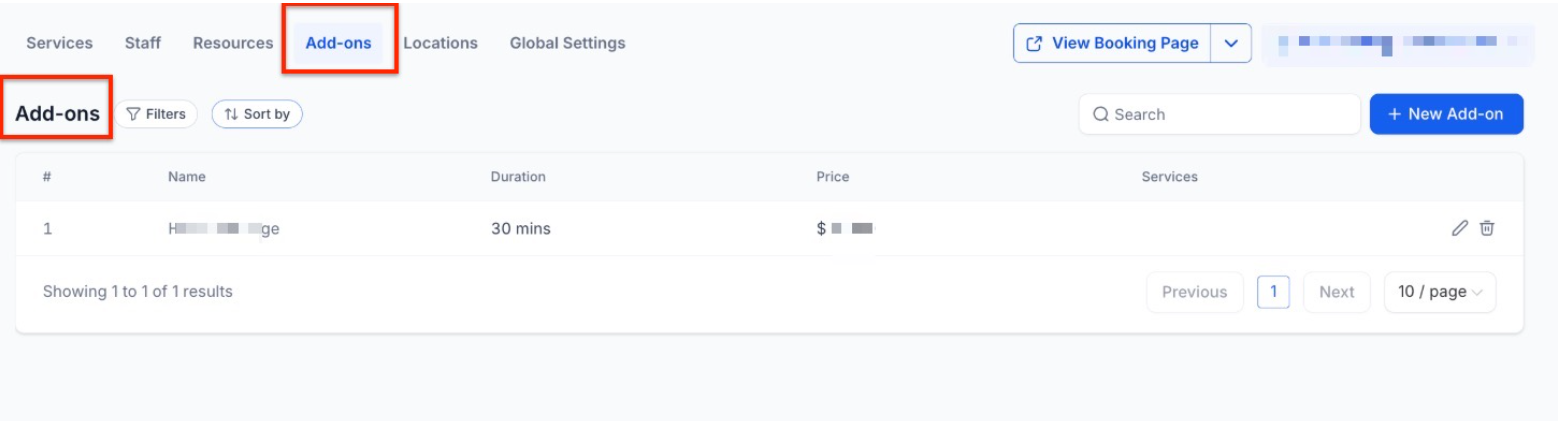
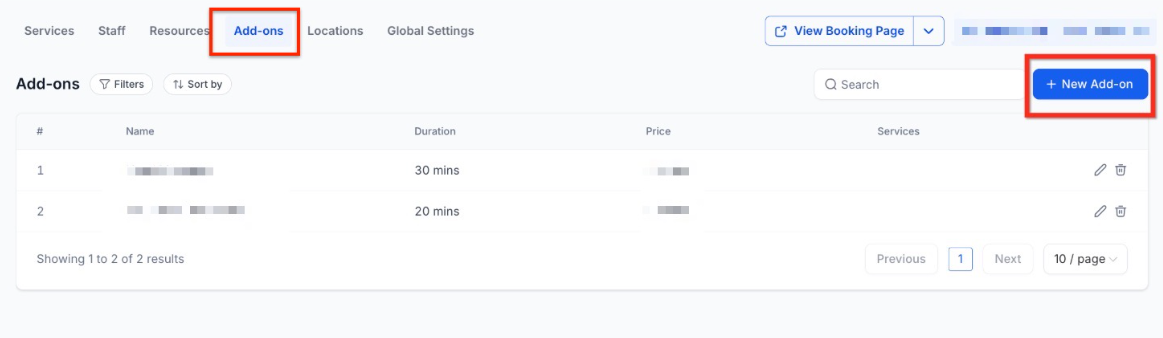
- Navigate to New Add-on: Go to the Services Panel (Calendar > Calendar Settings > Services). Open the Add-ons tab from the secondary navigation ribbon and click the + New Add-on button.
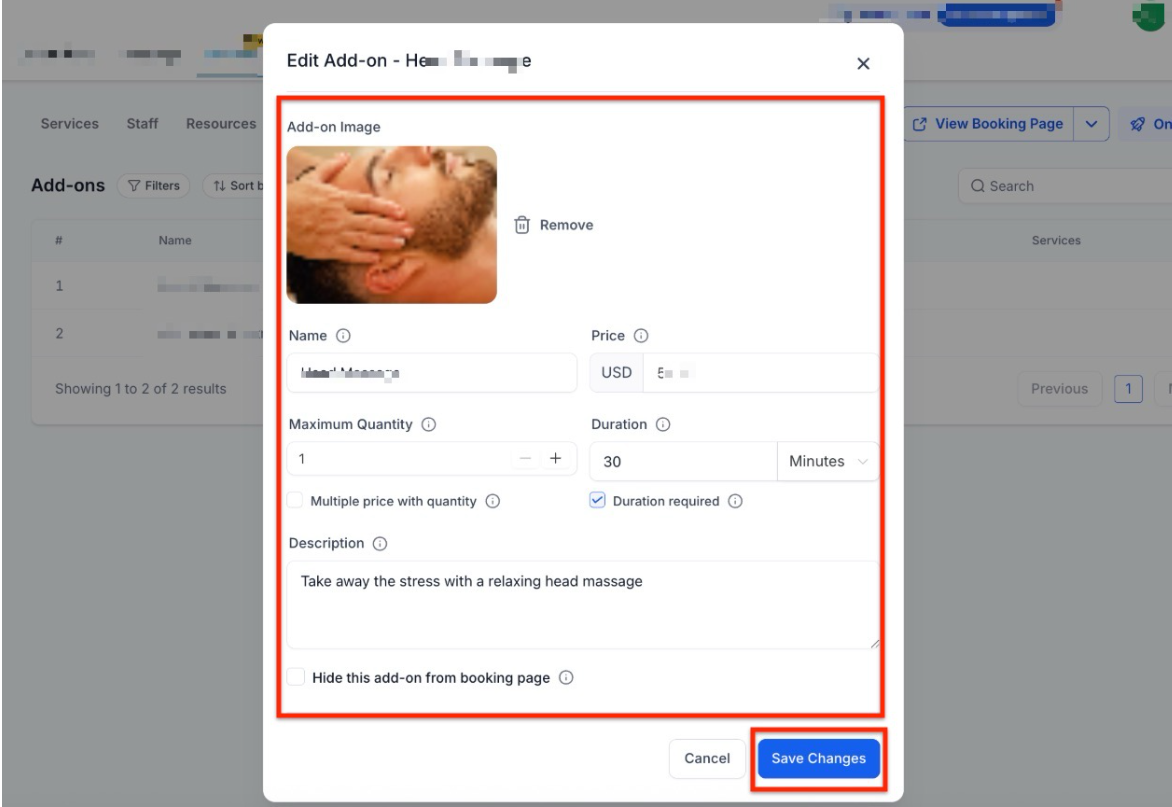
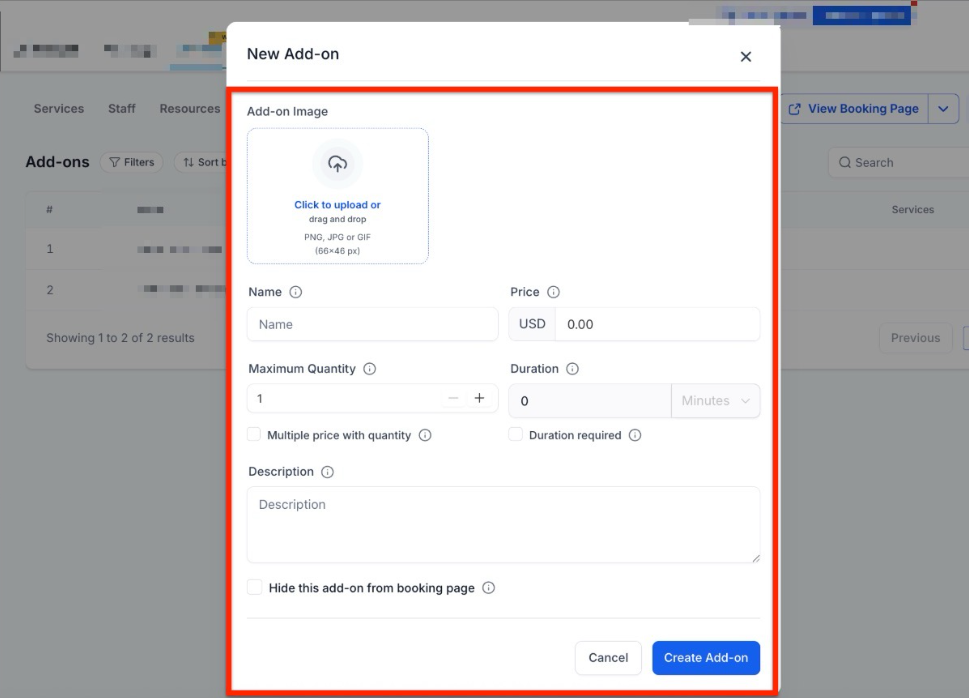
- Fill in Details: * Image: Upload a visual representation.
- Name: Use a clear, descriptive title.
- Price: Set the base cost.
- Duration: Enable this if the add-on adds time to the appointment.
- Maximum Quantity: Define the limit per booking.
- Multiple Price with Quantity: Toggle this to multiply the cost by the number of units selected.
- Description: Explain the value or details of the extra.
- Visibility: Choose “Hide from Booking Page” if the add-on is for internal staff use only.
- Save: Click Create Add-on to finalize.
Setting Up Your Add-ons
Section titled “Setting Up Your Add-ons”You can find and build your add-ons in two main ways:
The Add-ons Tab: It is a single list where you can see every add-on you own across all your different services.
- Inside a Specific Service: If you start creating an add-on while you’re already using a service, it will automatically link itself to that service.
Linking Add-ons to Your Services
Section titled “Linking Add-ons to Your Services”Just because you’ve created an add-on doesn’t mean it will automatically show up for every appointment. To make sure your customers see the right options when they book, you need to manually connect each add-on to the specific services where they belong.
How it works:
Section titled “How it works:”- Pick and choose: You can link an add-on to one service or several at once.
- Relevant options: Customers will only see an add-on if it is specifically attached to the service they are booking.
- Optional extras: These show up as simple “add-ons” that clients have the option to include before they finish their checkout.
Step 1: Open Your Service Settings
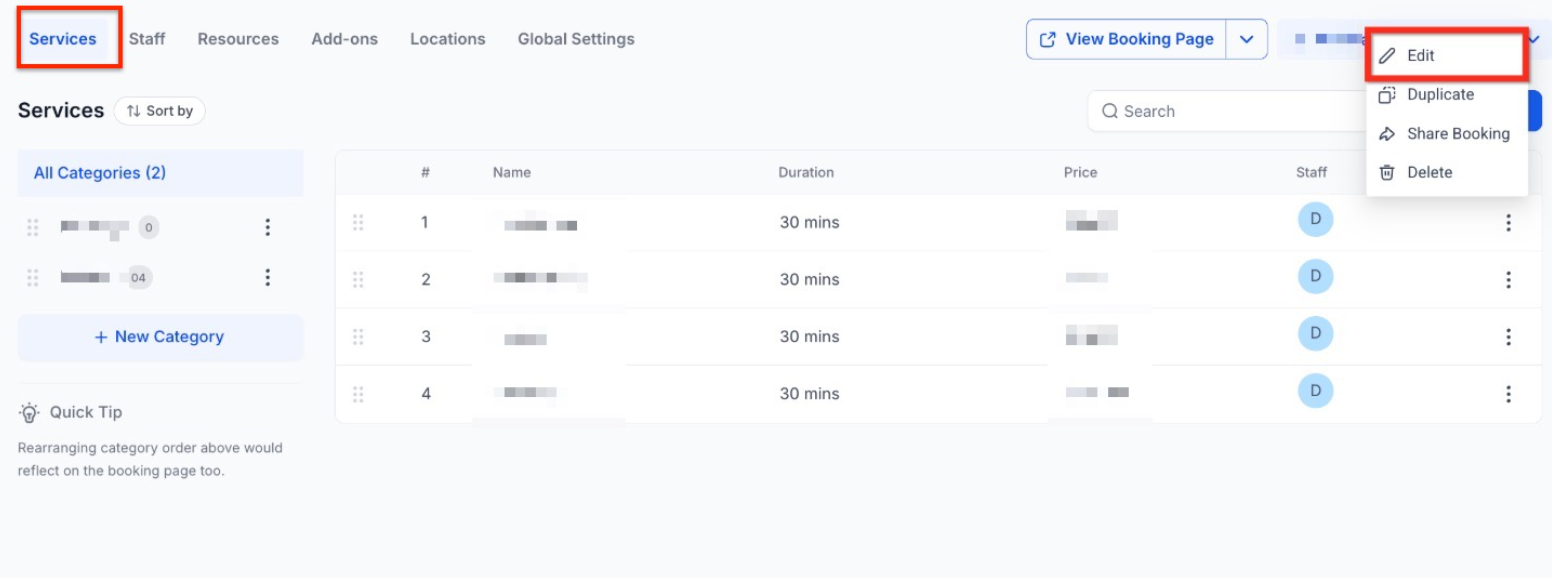
Section titled “Step 1: Open Your Service Settings”- Go to your Services Panel by clicking Calendar, then Calendar Settings, and finally Services.
- Find the service you want to update.
- Click the three dots (⋮) next to that service and select Edit to open the editor.
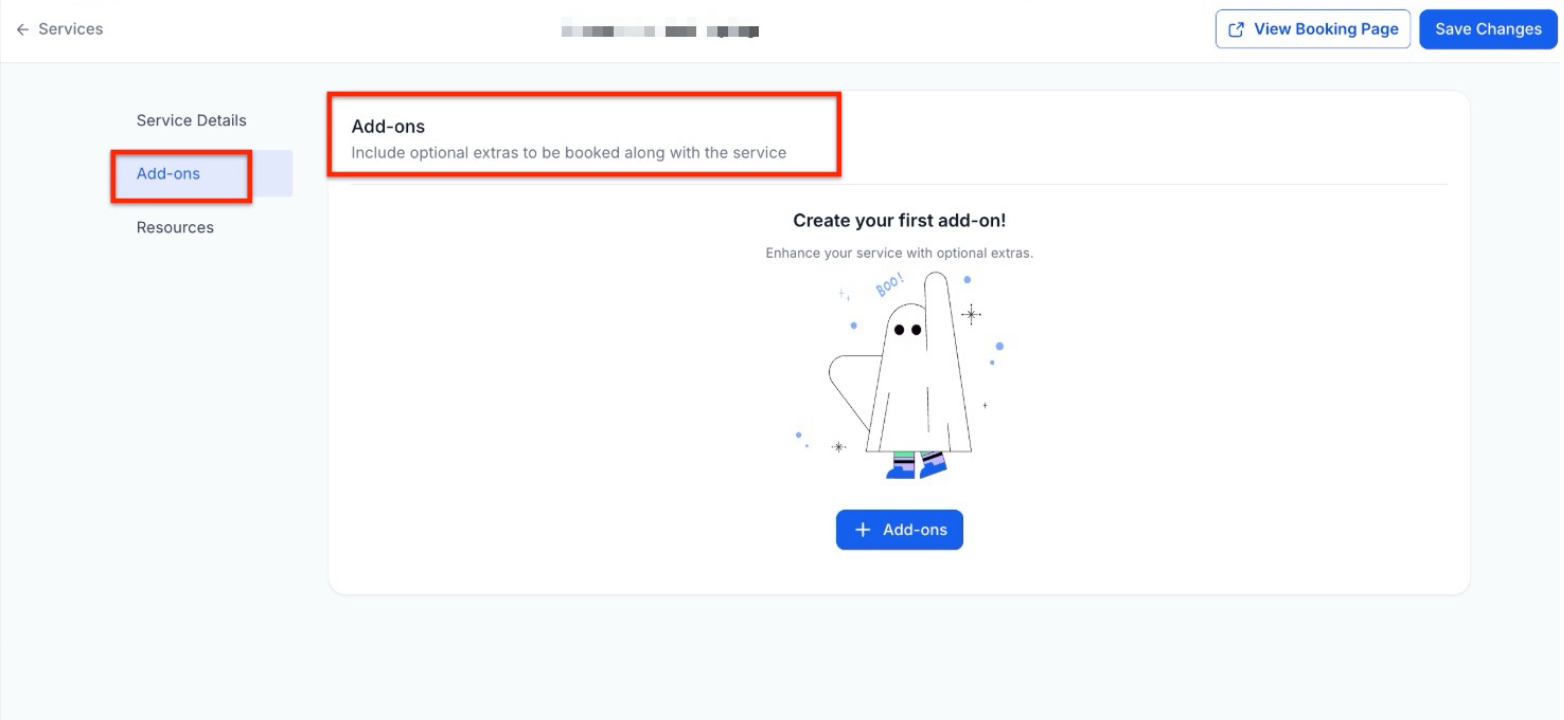
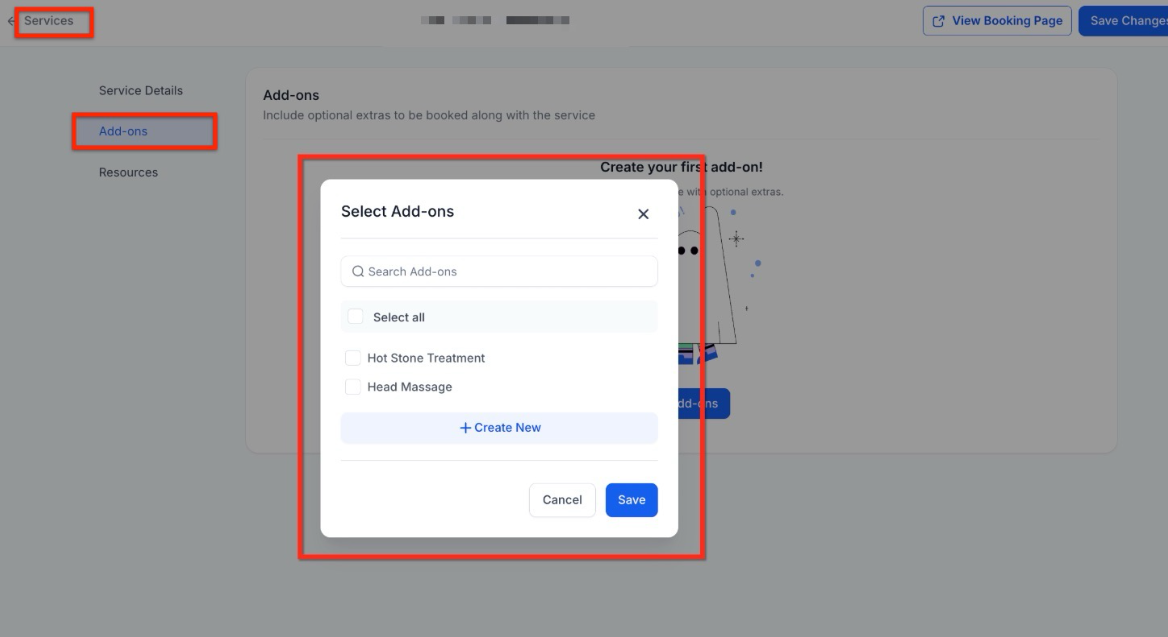
Step 2: Adding your first Add-on
On the left-hand navigation bar, you’ll see a section labeled “Add-ons.” Click that, then select the + Add-ons button to move forward.
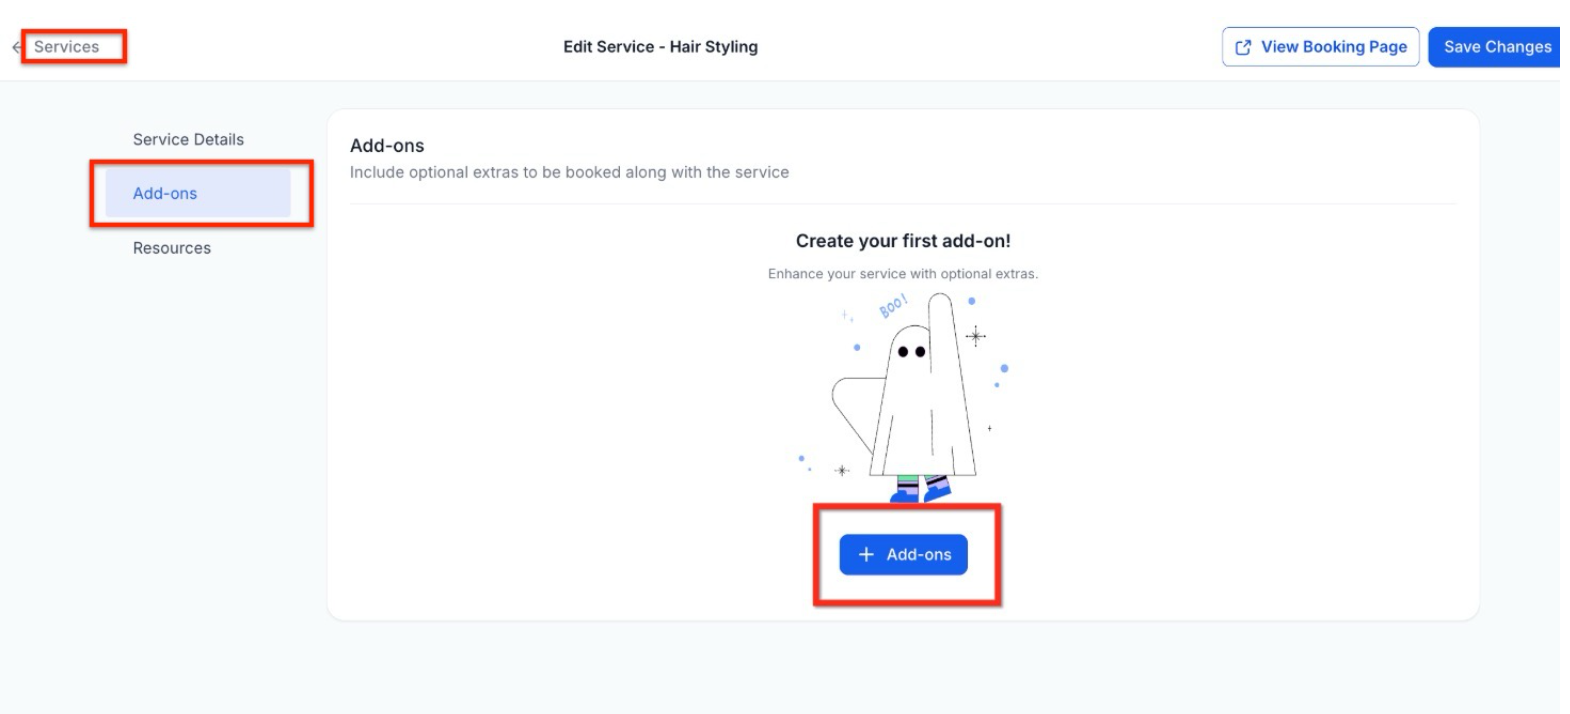
Step 3: Choose Add-ons
Select the Add-ons for this service or create a custom one from scratch. Click Save to apply your changes.
Managing Your Add-ons
Section titled “Managing Your Add-ons”Keeping your service list up to date ensures your customers always see the right prices and options. If you need to change a name, adjust a cost, or remove an item you’ve stopped offering, follow these steps:
How to Edit or Remove an Add-on
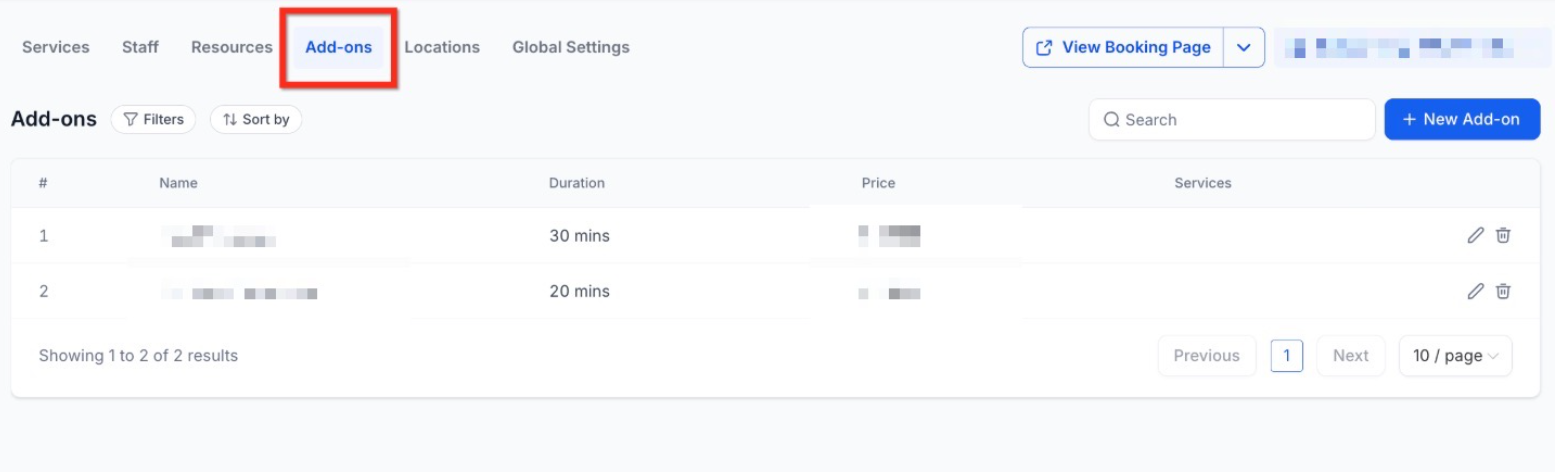
Section titled “How to Edit or Remove an Add-on”1. Go to your Add-ons settings Head over to the Services Panel by clicking on Calendar > Calendar Settings > Services.
2. Select the Add-ons tab Once you’re in the Services section, look for the Add-ons tab in the top menu bar and click it to see your current list.
Step 2: Making Changes (Edit or Delete Add-ons)
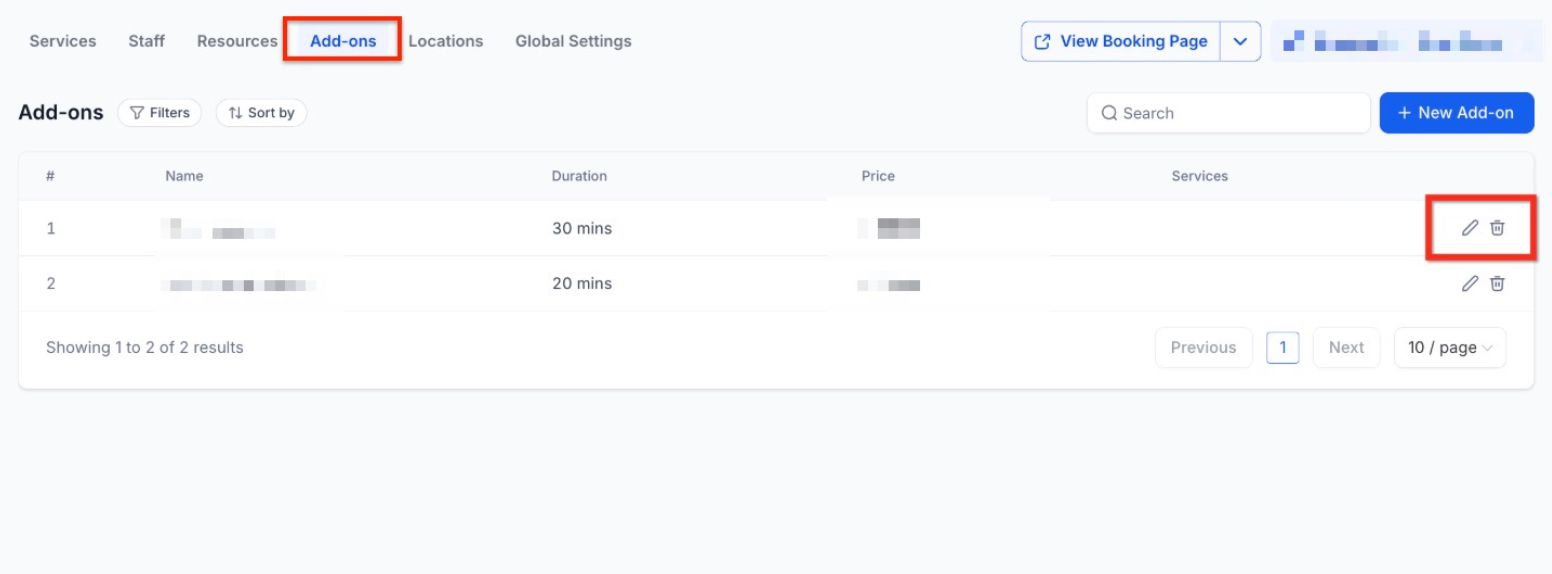
Section titled “Step 2: Making Changes (Edit or Delete Add-ons)”This section displays all your current add-ons. You have two main options:
- To change an add-on: Select the Edit button (the pencil icon). This opens up the editor so you can adjust the settings.
- To remove an add-on: Select the Delete button (the trash can icon) to get rid of it permanently.
Step 3: Refresh your info
Adjust the information however you like. Once it looks good, click Save Changes (the blue button) to make sure your progress isn’t lost.
Setting Up New Add-ons
Section titled “Setting Up New Add-ons”Getting your add-ons configured correctly is key to making sure your pricing and availability look right to your customers. Here is how to get a new one up and running:
Step 1: Navigate to + New Add-on
Section titled “Step 1: Navigate to + New Add-on”- Head to your Services: Go to your Calendar, click on Calendar Settings, and then select Services.
- Locate the tab: Look at the top menu bar and click on the Add-ons tab.
- Start a new one: Click the + New Add-on button found in the top right corner of the screen.
Step 2: Set Up Your Add-on
Section titled “Step 2: Set Up Your Add-on”Now, just fill in the blanks to finish creating your add-on. Here is what you’ll need to do:
- Add-on Image: Pick a photo that shows what the customer is getting.
- Name: Give it a simple title, like “Aromatherapy Upgrade.”
- Price: Put in the cost for this extra service.
- Duration: If this add-on takes extra time, check this box. It will automatically add those minutes to the total appointment time.
- Maximum Quantity: Decide the limit on how many of these a customer can buy at once.
- Multiple Price with Quantity: Turn this on if you want the price to scale up (for example, if one costs $10, two will cost $20).
- Description: Write a short blurb explaining why this add-on is great.
- Hide from Booking Page: Use this if you want the add-on to stay private for staff use only.
When you’re finished, just hit the Create Add-on button to save your work.
Pro Tips for Success
Section titled “Pro Tips for Success”- Visual Appeal: Always use high-quality images; customers are significantly more likely to purchase an add-on if they can see what they are getting.
- Internal Adjustments: Use “Hidden” add-ons to account for specialized equipment usage or internal prep time that you don’t want the customer to see as a line item but need to track for scheduling.
- Strategic Buffers: If an add-on requires cleanup time, include that in the “Duration” toggle to ensure your calendar doesn’t double-book you during the transition.
FAQs
Question: Can one add-on be linked to multiple services? Answer: Yes. Once an add-on is created in the central Add-ons tab, it can be assigned to as many different services as needed.
Question: Does an add-on automatically increase the appointment length? Answer: Only if the “Duration” setting is enabled and a time value is entered. If disabled, the add-on will only affect the price.
Question: Can I limit how many times a customer selects a specific add-on? Answer: Yes, you can set a “Maximum Quantity” during the setup process to prevent over-booking or to manage limited inventory.
Question: What happens if I delete an add-on? Answer: Deleting an add-on removes it from all assigned services and the booking page. It will no longer be available for future bookings.
Question: Can staff add extras to an appointment that aren’t visible to customers? Answer: By selecting the “Hide from Booking Page” option, you create internal add-ons that only staff members can see and apply when managing the calendar.
Question: Where can I find the master list of all the add-ons I’ve created?
Answer: You can view every add-on you own in one place by navigating to the Services Panel (Calendar > Calendar Settings > Services) and selecting the Add-ons tab from the secondary navigation ribbon.
Question: How does the “Multiple Price with Quantity” setting affect the final cost of an appointment? Answer: When this toggle is enabled, the base price of the add-on is multiplied by the number of units the customer selects. For example, if an add-on costs $10 and the customer selects a quantity of two, the system will automatically calculate the total as $20 at checkout.
Question: What is the “Sticky Contacts” feature, and when should I avoid using it? Answer: The “Pre-populate Fields (Sticky Contacts)” feature uses browser cookies to automatically fill in a returning customer’s information from previous bookings to save them time. However, you should avoid activating this if multiple users share the same browser, as one person’s information could be overwritten by another’s.