Configure Payment Provider by Channel
Article Summary: Learn how to assign specific payment processors to different sales channels in your account. This guide shows you how to gain more control over your revenue streams by choosing where each provider is used for both live and test transactions.
Overview
Section titled “Overview”allows you to set a default payment provider for each individual channel (such as your online store, invoices, or calendars). Previously, you were limited to one global default for your entire account.
You can override that global default on a per-channel basis. This means you can use one processor for your online store and a different one for your professional invoices. You can also independently manage Live Mode and Test Mode for every channel to ensure your testing never interferes with real customer payments.
Practical Use Case
Section titled “Practical Use Case”Imagine you run a business that offers both high-ticket consulting and low-cost digital products. You might prefer using a processor with lower fees for your large Invoices, but stick with a widely recognized provider for your Online Store to maximize customer trust. By configuring providers by channel, you can automatically route payments to the best processor for that specific part of your business.
Instructions (Step-by-Step)
Section titled “Instructions (Step-by-Step)”- To begin, log in to your dashboard.
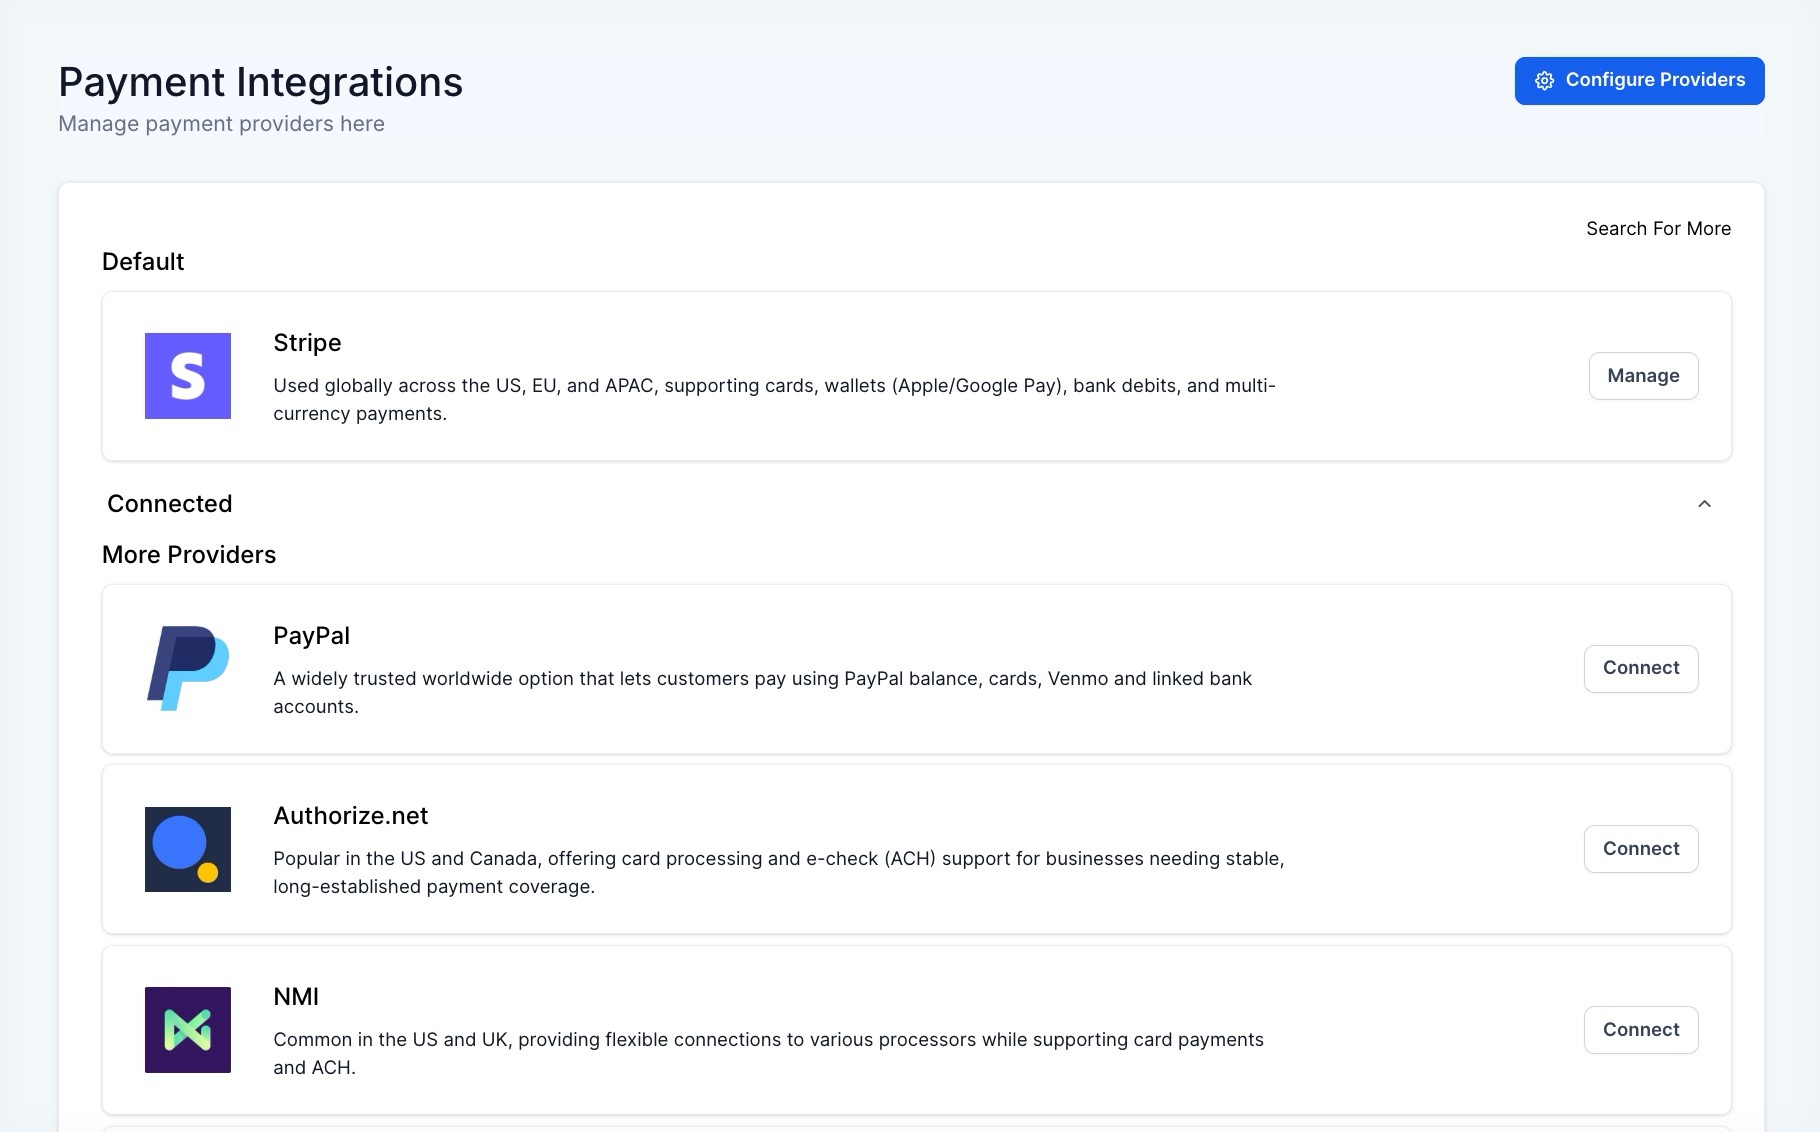
- Click Payments in the left-hand navigation menu.
- To view your connected gateways, click the Integrations tab at the top of the page.
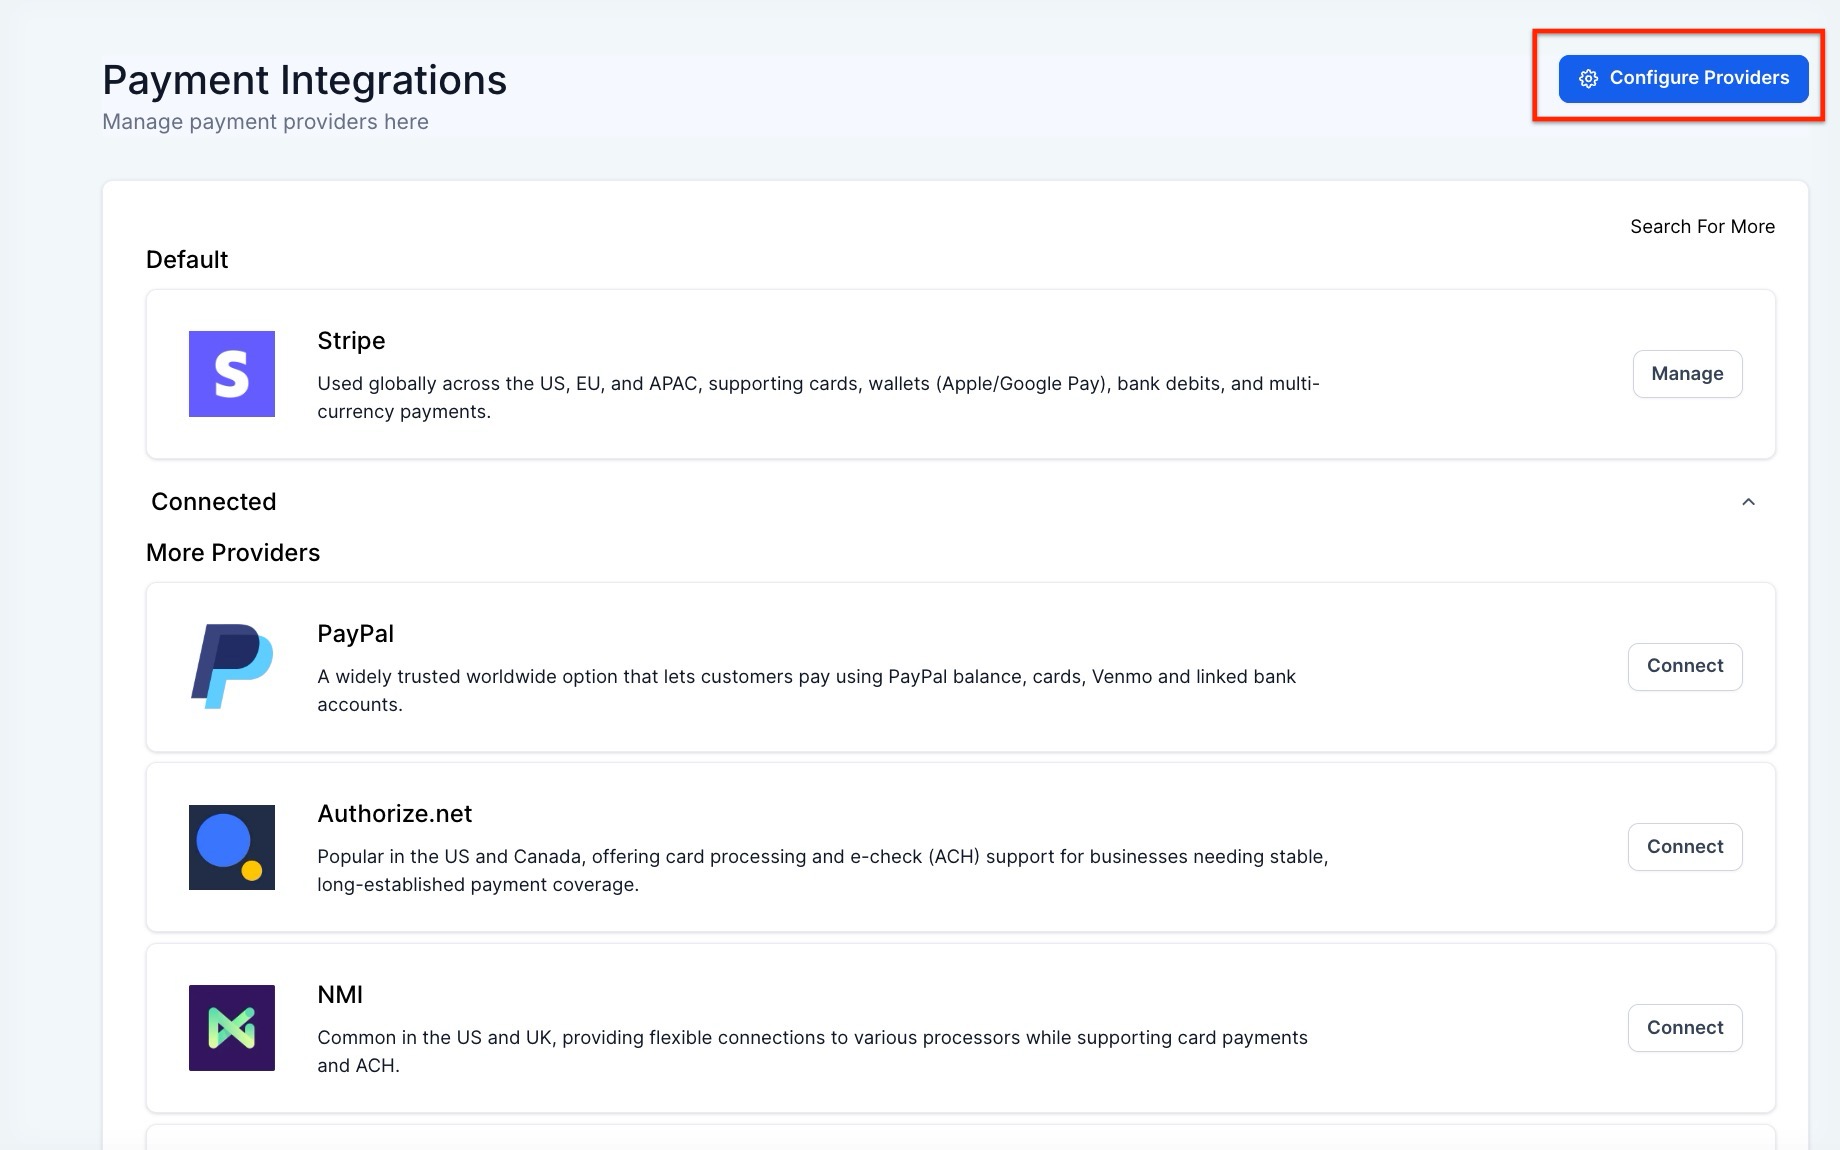
4. To open the channel settings, click the Gear Icon in the top right labeled Configure Providers.
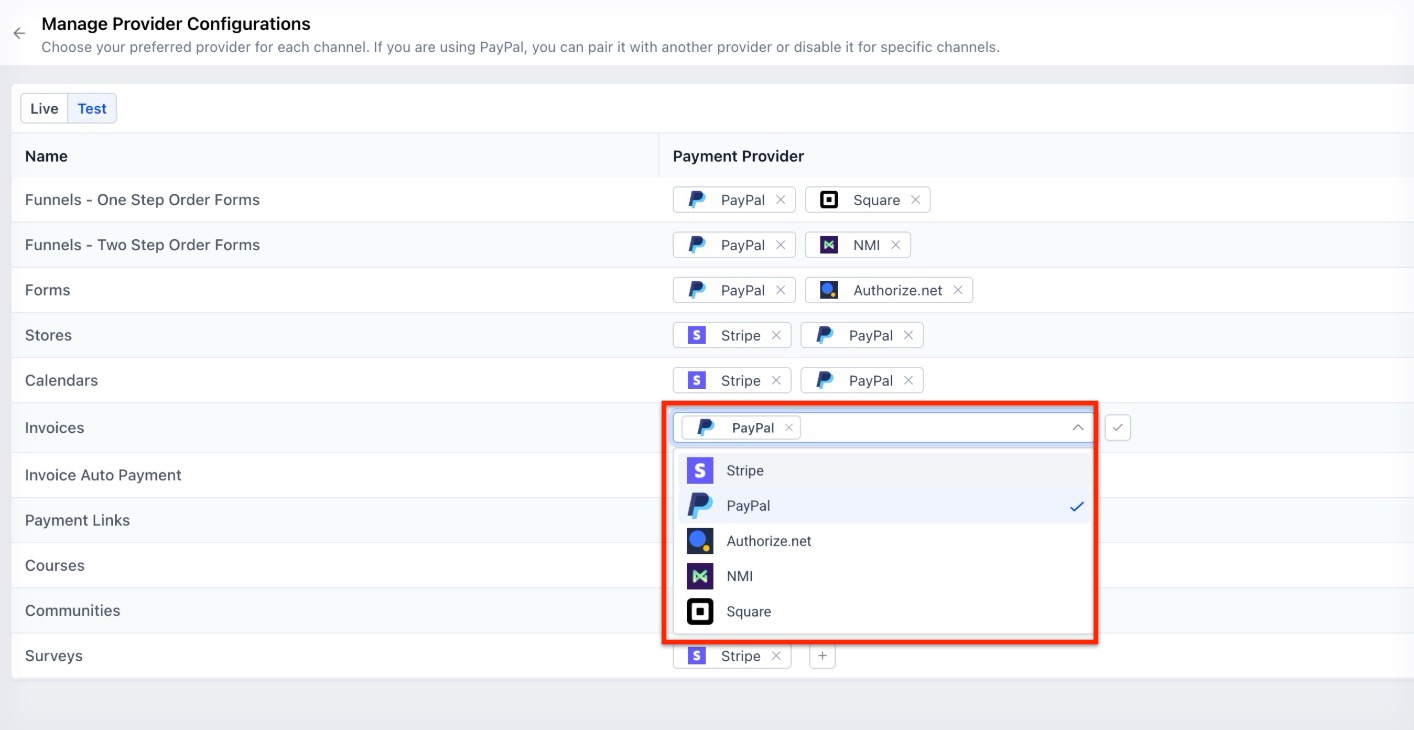
5. To assign a processor, click the Dropdown Menu next to the specific channel you wish to update (e.g., Stores, Calendars, or Invoices).
Note: You must already have the provider connected to your account for it to appear in this list.
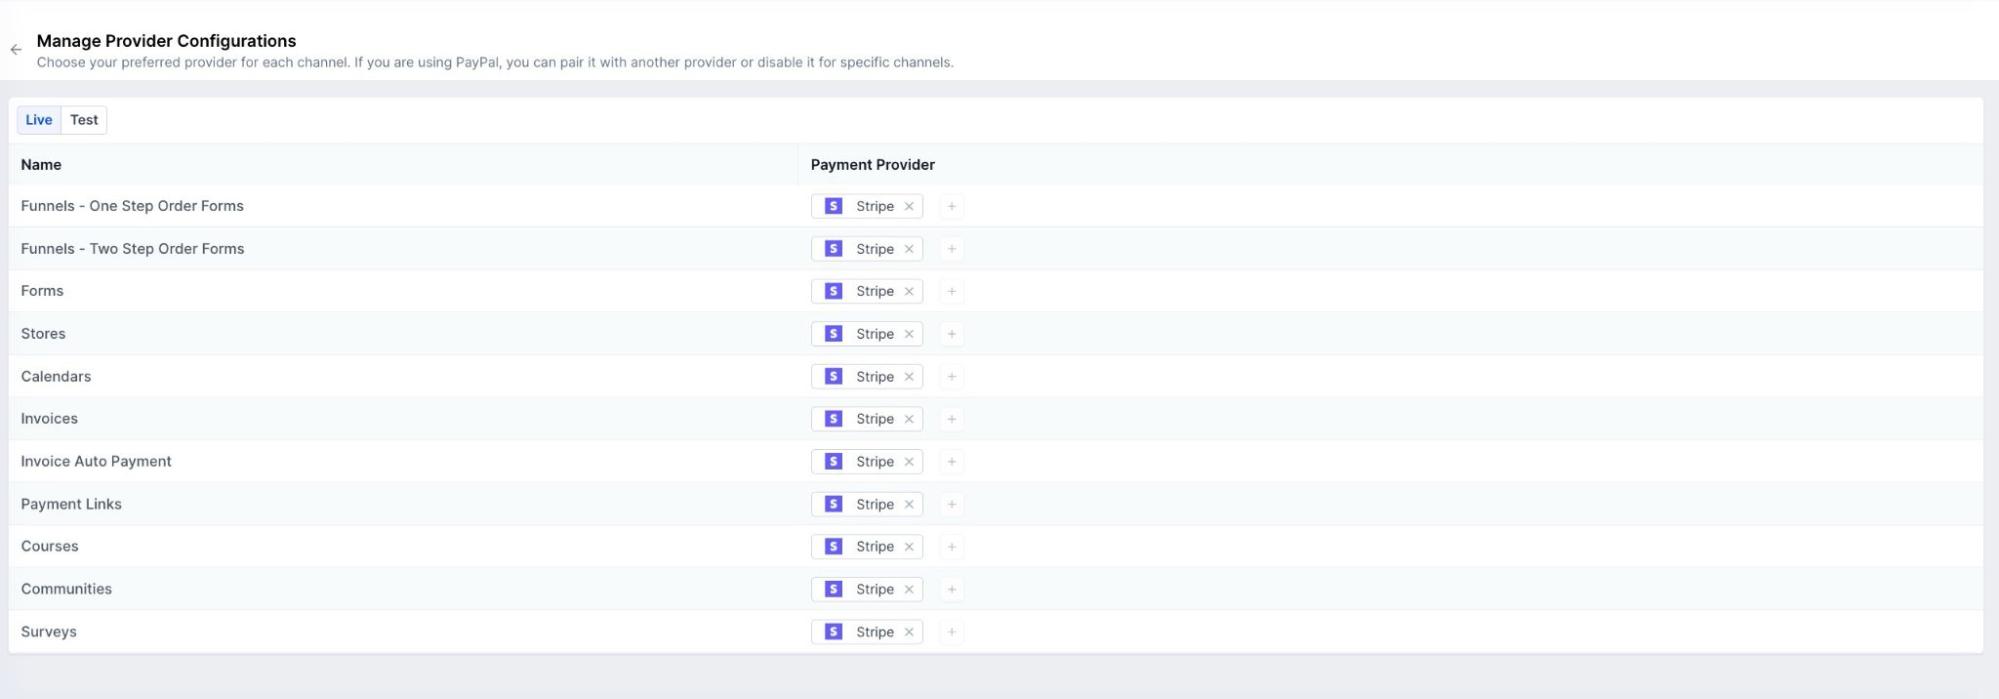
6. To manage your environments, toggle between the Live and Test tabs within the configuration window.

7. To apply your settings, select the desired provider for each mode and click Save.
Question: What happens if I don’t set a provider for a specific channel?
Answer: If you do not select a specific provider for a channel, will use your account’s global default payment provider.
Question: Can I use two different providers for the same channel?
Answer: Currently, you can set one default provider per channel for Live mode and one for Test mode. However, the system is being updated to allow different providers for specific “offerings” (like different stores) in the future.
Question: Why don’t I see my payment provider in the dropdown list?
Answer: You must first connect the provider to your account. Go to Payments > Integrations and ensure your provider is fully authorized and “Connected” before trying to assign it to a channel.
Question: Will changing the provider affect existing recurring subscriptions?
Answer: Changing the default provider for a channel usually affects new transactions. Existing subscriptions are typically tied to the processor used during the initial checkout.
Question: Is there a limit to how many channels I can configure?
Answer: No, you can configure settings for all supported channels, including Funnels, Forms, Stores, Calendars, Invoices, Payment Links, Courses, and more.
Question: Can I test my checkout without affecting my live payment processing?
Answer: Yes. The configuration window features separate Live and Test tabs. This allows you to assign a provider to “Test Mode” for a specific channel while your real customers continue to use the “Live Mode” provider uninterrupted.