Using The LeadConnector Mobile App: Invoicing
Using The LeadConnector Mobile App: Invoicing
Using the LeadConnector Mobile App allows you to take the convenience of your system on the go with you, using features right from your phone. When it comes to managing invoices on the go, subaccount admins and users can simply create, view, and manage invoices directly from their mobile devices, either from the dedicated Invoices section or the Point-of-Sale (POS) area. Auto-Payments also streamline recurring invoice management, ensuring payments are processed automatically without follow-ups. This article will guide you through the key features, benefits, and easy steps to use the invoicing flow.
Key Features and Benefits
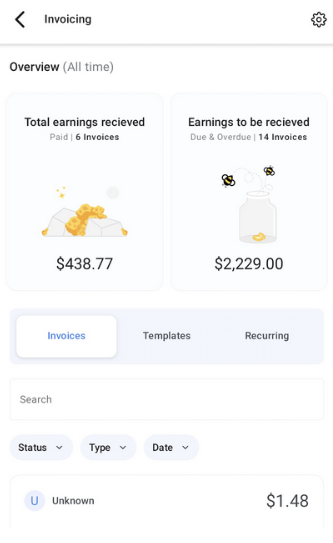
Section titled “Key Features and Benefits”- Invoice Dashboard: Gain a clear overview of your earnings, with visual representations of amounts collected versus outstanding payments.
- Invoice Listing: Easily access and filter all invoices (draft, due, paid, etc.) in one place, whether created on mobile or web.
- Interactive Invoice Cards: Perform quick actions such as editing, recording payments, or converting invoices to templates with simple tap, long-press, or swipe gestures.
- 4-Step Invoice Creation Flow: Create invoices in under 45 seconds with a streamlined process:
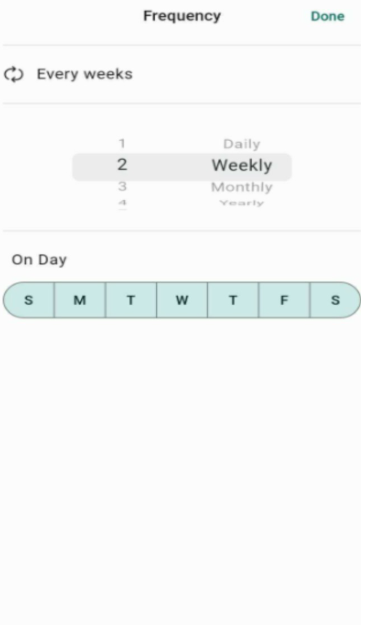
- Initial Details: Add the recipient, start date, due date, and set payment frequency for recurring invoices.
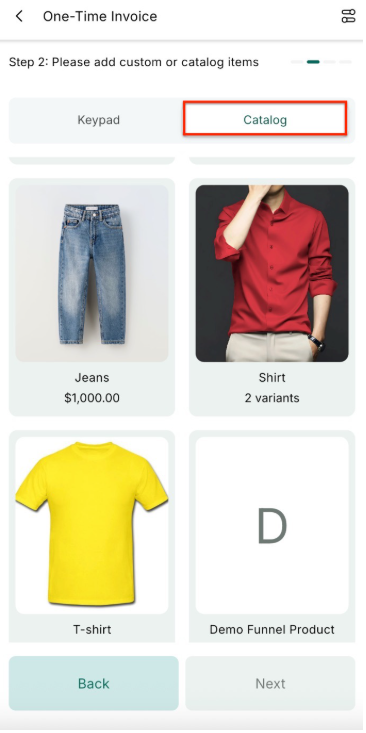
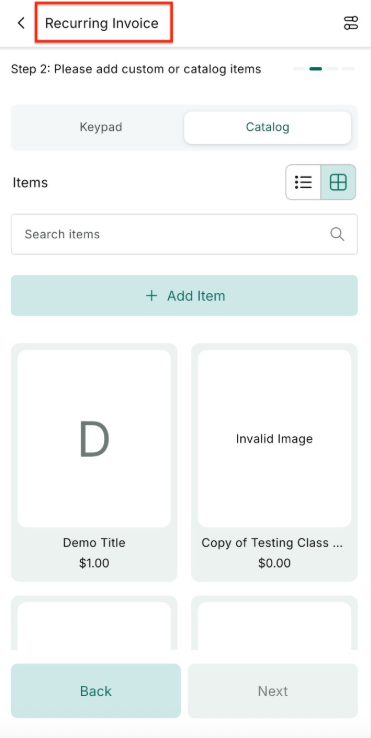
- Items: Select products from your catalog or add custom items, including taxes and quantities.
- Terms and Notes: Review and set invoice terms, including late fee conditions.
- Review and Send: Make final adjustments, add discounts, and preview the invoice before sending it out via email or SMS.
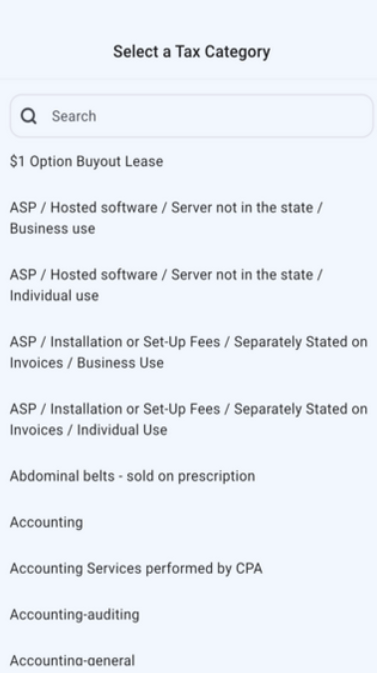
- Real-Time Tax Selection: Easily apply taxes linked to products using the mobile or web product settings.
- Automatic taxes - Mobile app: This helps reduce manual errors and supports accurate, region-specific tax compliance.
- Partial Quantity Support: Add precise quantities with up to two decimal places, perfect for services or products sold in fractions.
- POS to Invoice Conversion: Quickly generate invoices from POS transactions, with all essential details auto-filled.
- Auto-Payments: This allows you to automate recurring invoice collections, ensuring seamless, on-time payments without manual follow-ups.
Using the icons at the bottom of the app, you can toggle between the various available features/sections.
Click on the Invoices tab to view and manage your Invoices.
View Invoices and Download Receipts for point-of-sale transactions
Section titled “View Invoices and Download Receipts for point-of-sale transactions”This feature on the mobile app allows you to view invoices and download receipts for point-of-sale transactions. This enhancement is ideal for making in-person sales, such as at live events or farmers’ markets. You can share a receipt with a customer immediately via text, email, or other methods without needing to print anything.
How to Use:
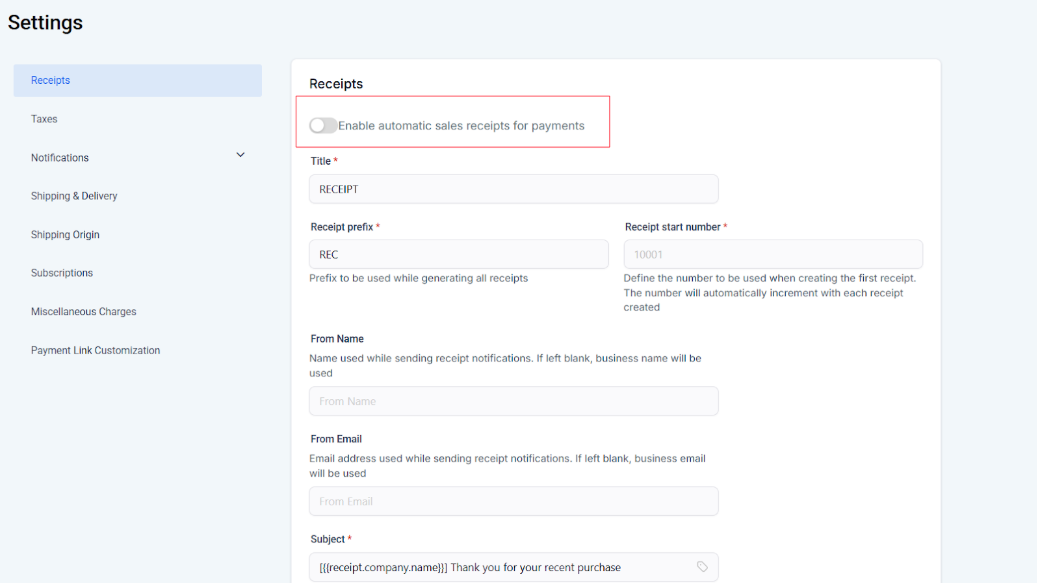
1. Enable Automatic Sales Receipts:
- Log in to the web app, navigate to Payments > Settings, and enable automatic sales receipts.
- Customize your receipt settings, including the title, prefixes, from name, email, and email template. Save your changes.
2. Make a Sale on the Mobile App:
- Open the mobile app and go to the point of sale section.
- Select an item or enter a price, add a contact, and complete the sale.
- Share the receipt immediately through various methods, including text or email, by downloading it from the transaction details.
Check out these pro tips for navigating through the Invoices section:
- View a summary of due and overdue invoices at the top.
- Use the Magnifying Glass to search for a particular invoice.
- Use the Filter icon to filter through invoices, customizing the filters as you wish.
- Customize the settings in the top right using the gear icon.
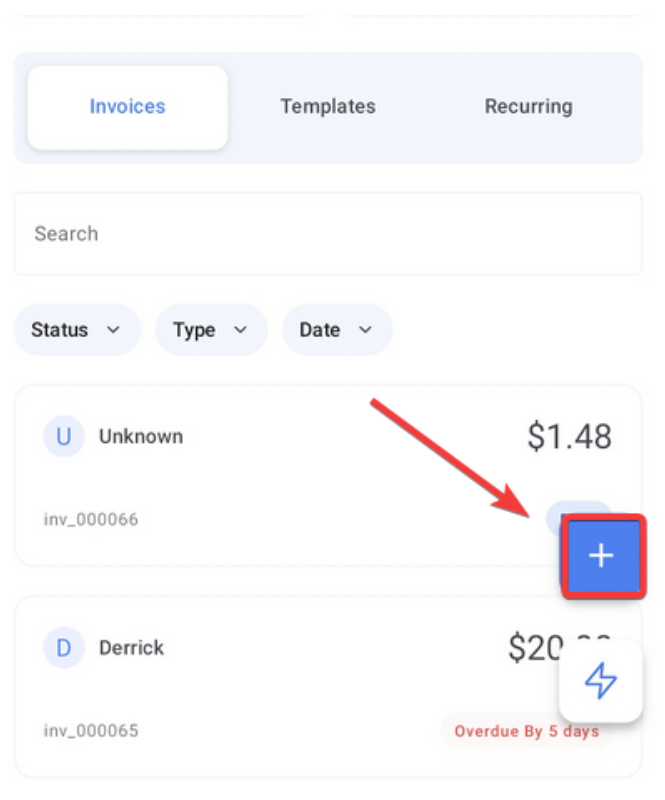
- Click + in the bottom right to create a new invoice.

How to Use the Mobile Invoicing Feature
Section titled “How to Use the Mobile Invoicing Feature”1. Access the Invoices Section:
- Open the mobile app and tap the app icon on the bottom right.
- Select “Invoices” to view the dashboard with collected and pending payments.
2. Create a New Invoice:
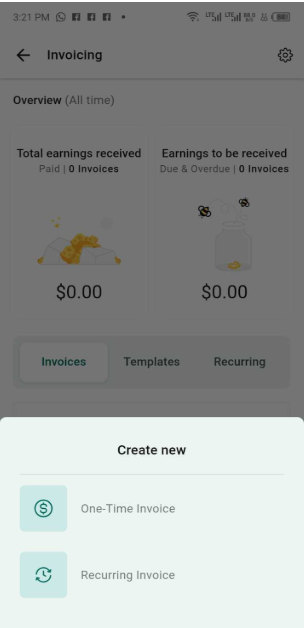
- Tap the floating ”+” button at the bottom right.
- Choose between a one-time or recurring invoice.
3. Fill Out the Invoice Details:
- Enter the recipient’s information, start date, and due date.
- For recurring invoices, set the payment frequency.
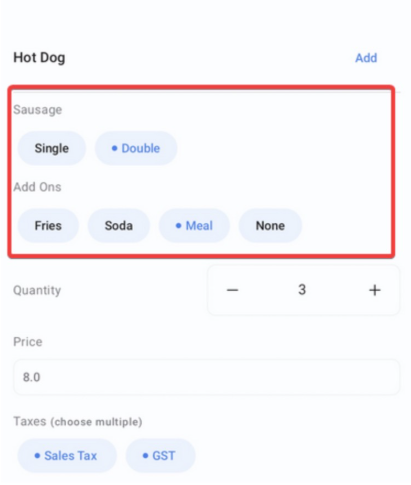
4. Add Items and Taxes:
- Select products from your catalog or add custom items.
- Include a one-time setup fee for products when creating a recurring invoice. The setup fee will be applied to the first invoice, while subsequent invoices will only reflect the regular recurring costs. Ensure you have a recurring product assigned to the invoice.
- Adjust the quantity and select applicable taxes.
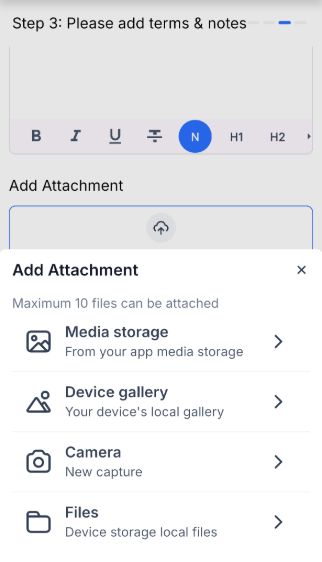
Attachments in Invoices
This allows you to attach supporting documents, such as project photos or compliance certificates, directly to your invoices. By integrating media with financial data, ensures clients receive complete context alongside their cost breakdown, fostering professional and transparent communication.
While creating or editing an invoice, scroll to the attachments section and select “Add Attachment.” You can capture a new photo via your camera or upload existing files from your device gallery or local storage. Review the list and remove any unnecessary files before finalizing the document.
5. How to set Auto-Payments for Recurring Invoices
Auto-Payment streamlines the management of recurring payments, allowing you to automatically collect payments without needing follow-ups. Here’s a simple guide on how to use it:
Create a Recurring InvoiceSet up a recurring invoice or POS schedule, selecting the customer, adding the items, and specifying the billing frequency (e.g., monthly, quarterly).
Add the Customer’s Payment MethodEnsure the customer has a payment method on file. You can select from a saved card or a card captured through methods like tap-to-pay or online checkout.
Enable Auto-PaymentWhen scheduling the recurring invoice or POS transaction, toggle the Auto-Payment option on. This will ensure that payments are automatically collected on the due dates without the need for follow-up reminders.
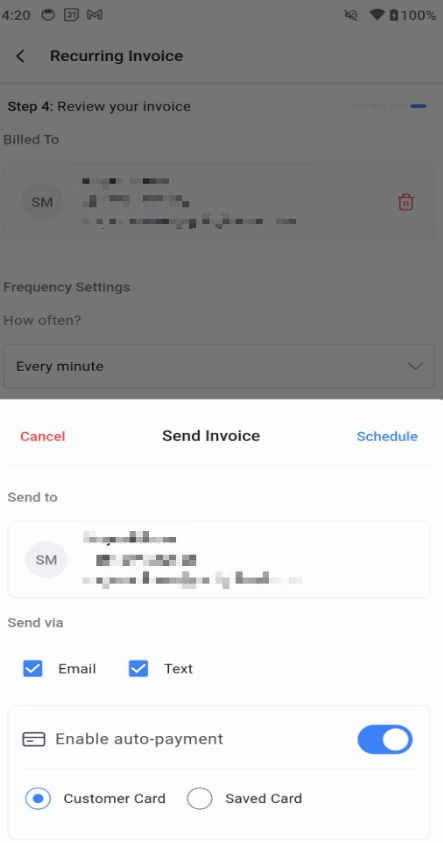
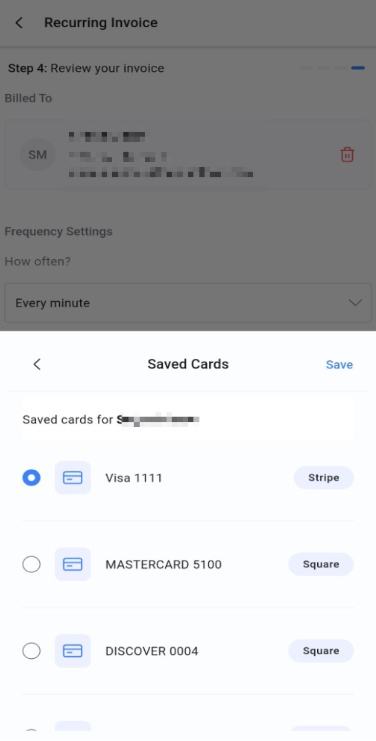
Choose the Payment MethodSelect the payment method for the recurring transaction:
-
Saved Card: Choose a card that is already saved for the customer.
Customer Card: If the customer has previously made payments via tap-to-pay or online checkout, select their saved card.
Review and SendDouble-check the details of the invoice or transaction to ensure everything is correct, especially the selected payment method. Once confirmed, send the invoice or schedule the transaction.
Automatic Payment CollectionAfter enabling Auto-Payment, payments will be processed automatically on each billing date. There is no need for manual action on each payment.
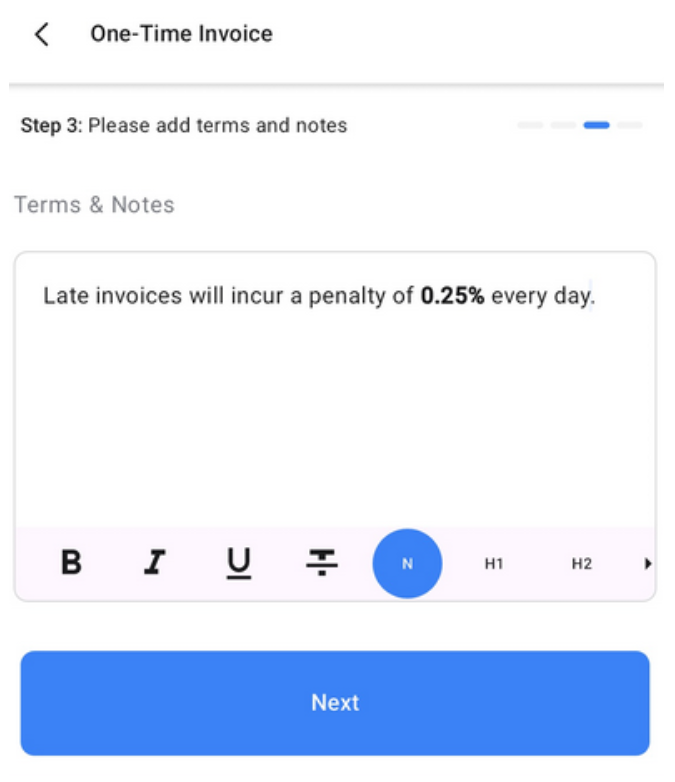
6. Set Terms and Notes:
- Define your invoice terms, including any late fee conditions.
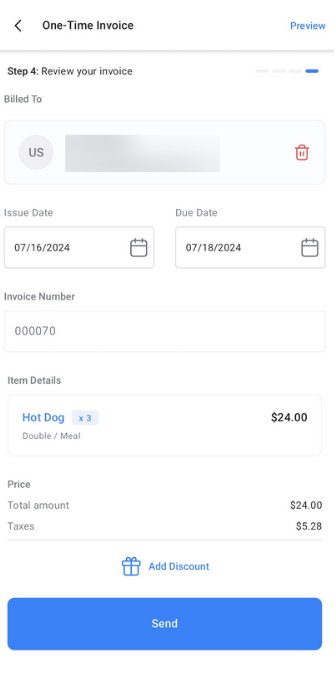
7. Review and Send:
- Review all details, apply discounts, and preview the invoice.
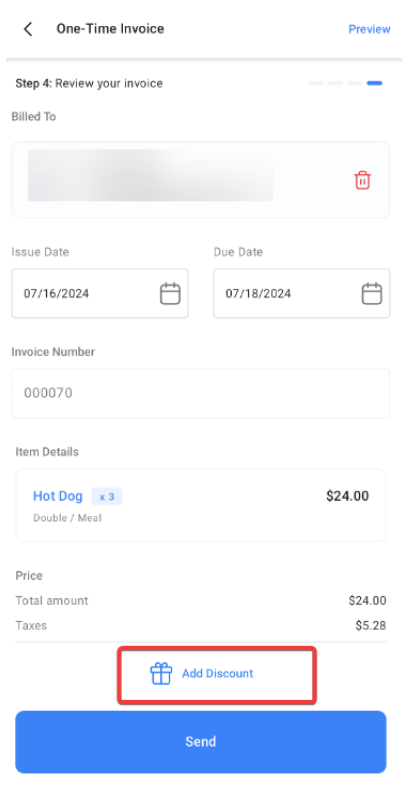
- Choose the delivery method (email, SMS, or both) and send.
8. Manage Invoices:
- Swipe left on any invoice card to reveal actions like editing or recording payments.
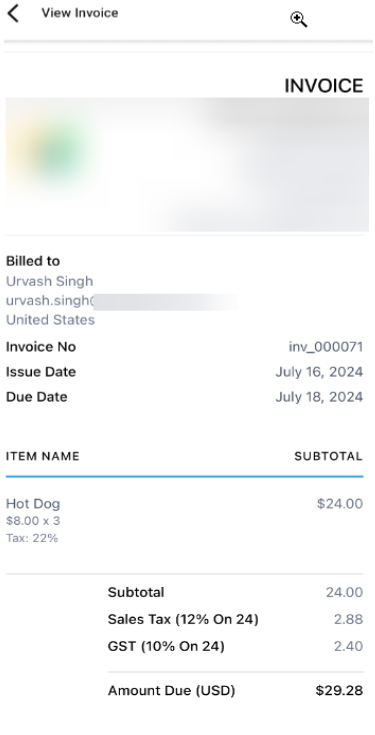
- This is the final look of the invoice.
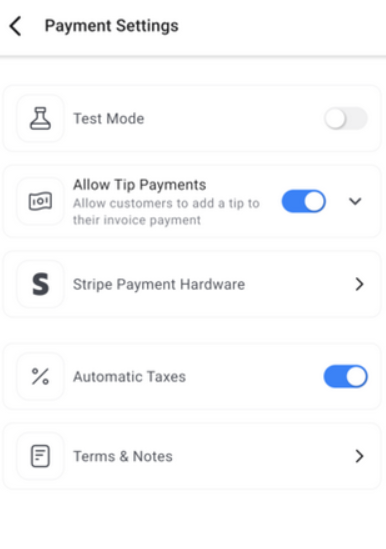
Automatic Taxes for Mobile Payments enables automatic tax calculation on invoices, estimates, and POS transactions based on the customer’s location and your preset tax rules. This helps reduce manual errors and supports accurate, region-specific tax compliance. To use, set up Automatic Taxes in your web tax settings, configure nexus regions, and toggle it on during transaction creation in the mobile app.
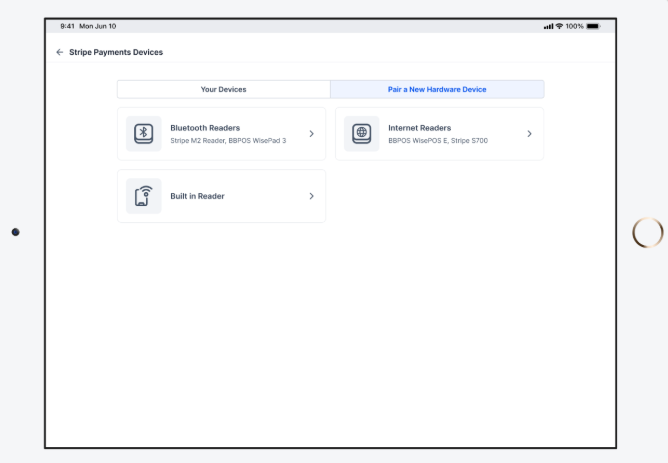
Hardware Support for Payment Terminal on Mobile and Tablet
Section titled “Hardware Support for Payment Terminal on Mobile and Tablet”Mobile payments support payment terminals. These allow users to connect select Stripe-sold terminals to the mobile app for payment acceptance. Businesses can accept payments by tapping, inserting, or swiping cards on devices, including the Stripe M2 reader, BBPOS WisePOS E, and Stripe S700
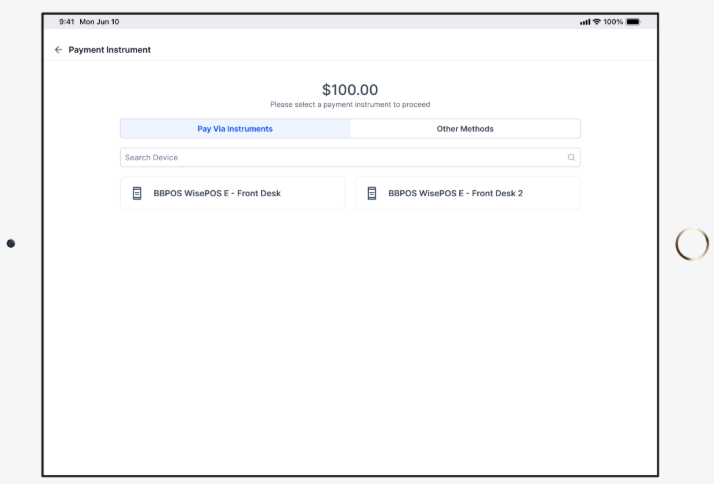
You can add as many Stripe internet-based readers as needed, and each will appear on the Payment Instruments screen during checkout.
A hardware settings page has been added to help users easily manage terminal connections and updates. This simplifies the payment process for businesses, allowing them to process transactions directly through their mobile devices.
To use this feature:
Prerequisites: (1) Connect your Stripe account by navigating to Payments → Integrations on the web platform.
(2) Ensure the mobile device (or iPad) and the Stripe reader are connected to the same Wi-Fi network during registration and checkout.
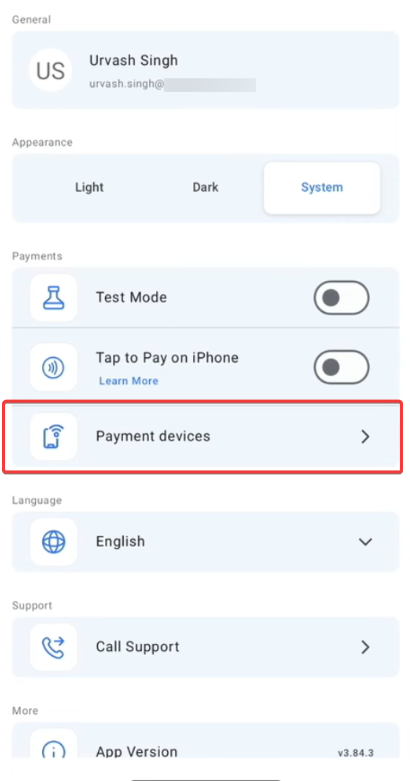
Click on the gear icon to go to Settings > Payment Device and ensure the terminal is connected through the mobile app’s settings page, and keep the app open during device updates.

Now, when you need to make a payment, simply click “Pay via Instruments”. The rest of the steps are the same for all payment instruments.
Availability is only for LeadConnector app version v3.103.4.
Pro Tips
Section titled “Pro Tips”-
Link Taxes to Products: Before creating invoices, ensure taxes are linked to products in the product settings. This will streamline tax selection during invoice creation.
-
Use Templates for Recurring Invoices: Save time by creating invoice templates for frequently used formats. Access these templates in the Invoices section.
**Pro Tips for Efficiency:**Verify Payment Method: Confirm that the correct payment method is selected before sending the invoice to avoid payment issues.
Keep Payment Methods Up to Date: Regularly check and update the customer’s saved cards to prevent any failed payments.
By using Auto-Payment, you can simplify the recurring billing process and ensure timely payment collection.
Question: Can I create recurring invoices? Answer: Yes, when creating a new invoice, you can choose the recurring option and set the payment frequency.
Question: How do I apply partial quantities in an invoice? Answer: Tap the quantity field while adding items, and enter the relevant amount with up to two decimal places (e.g., 1.25 or 4.50).
**Question:What payment options can I record for an invoice? Answer: You can record payments using tap-to-pay, cash, saved cards, or manual entry.
**Question:How do I convert a POS transaction into an invoice? Answer: During a POS transaction, add items and select “Convert to Invoice” on the payment screen. The invoice will be auto-filled with details from the transaction.
Question: Can I change the payment method after setting up Auto-Payments? Answer: Yes, you can change the payment method at any time before sending the invoice or POS schedule. Just update the payment details, and Auto-Payment will use the new method for future payments.
Question: What happens if a payment fails?
Answer: If a payment fails, you will need to manually follow up with your customer to update their payment information. Ensure all payment details are up to date to minimize the chances of failure.
Question: What happens if I don’t link taxes to products?
Answer: If taxes aren’t linked in the product settings, you’ll need to manually add applicable taxes during invoice creation, which can slow down the process.
Take advantage of the LeadConnector mobile app today so you can conveniently use your system on the go, from virtually anywhere.
Question: How do setup fees work with recurring invoices on the mobile app?
Answer: You can include a one-time setup fee for products when creating a recurring invoice. This fee is applied only to the first invoice, while all subsequent invoices in the cycle will reflect only the regular recurring costs.
Question: How do I know if a customer has viewed the invoice I sent from my phone?
Answer: You can track the status of any invoice directly from the Invoice Dashboard. Icons on the invoice card will update to show if the invoice is “Sent,” “Viewed,” or “Paid,” giving you instant transparency into your collections.
Question: What hardware is required to use the Payment Terminal feature on the mobile app? Answer: You can use select Stripe-sold terminals, specifically the Stripe M2 reader, BBPOS WisePOS E, and Stripe S700. To ensure they work, both your mobile device and the reader must be connected to the same Wi-Fi network, and your Stripe account must be integrated via the web platform.