Using the LeadConnector Mobile App: Documents & Contracts
Using the LeadConnector Mobile App: Documents & Contracts
Managing documents and contracts on the go is now easier than ever. With the ability to create and send pre-defined templates directly from your mobile app, you can streamline workflows, improve efficiency, and maintain professionalism wherever you are. This feature is perfect for businesses that need quick access to templates for contracts, estimates, or other documents, ensuring a seamless experience for both users and clients.
Important Note: You can only create documents using pre-saved templates from the web platform as the mobile app currently does not support creating a document from scratch.
Key Features and Benefits
Section titled “Key Features and Benefits”1. Mobile Accessibility
Section titled “1. Mobile Accessibility”- Create and send documents directly from your mobile app, eliminating the need for a desktop.
2. Predefined Templates
Section titled “2. Predefined Templates”- Use templates saved on the web platform to ensure consistency and reduce the time spent drafting documents.
3. Versatile Sending Options
Section titled “3. Versatile Sending Options”- Share documents via email or generate unique links for secure access.
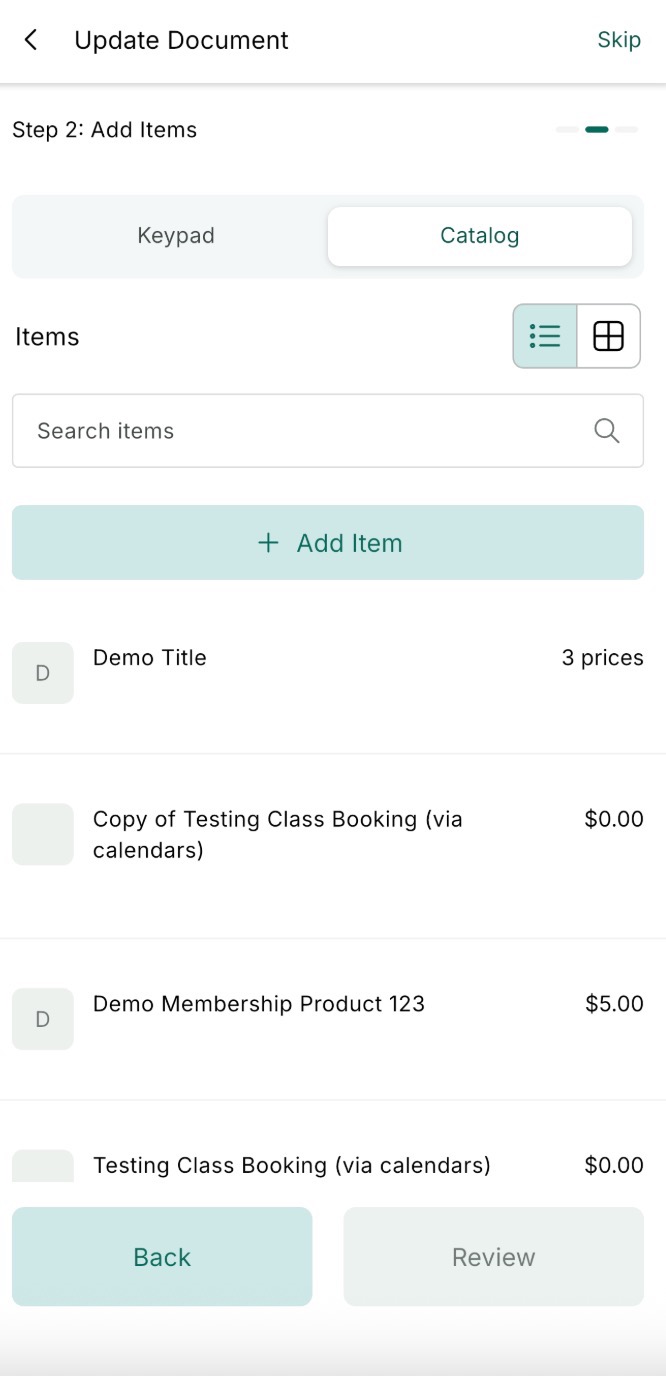
4. Optional Product Catalog Integration
Section titled “4. Optional Product Catalog Integration”- Include items from your product catalog in documents, quotes, or estimates as needed, adding a layer of flexibility.
5. Simplified Document Management
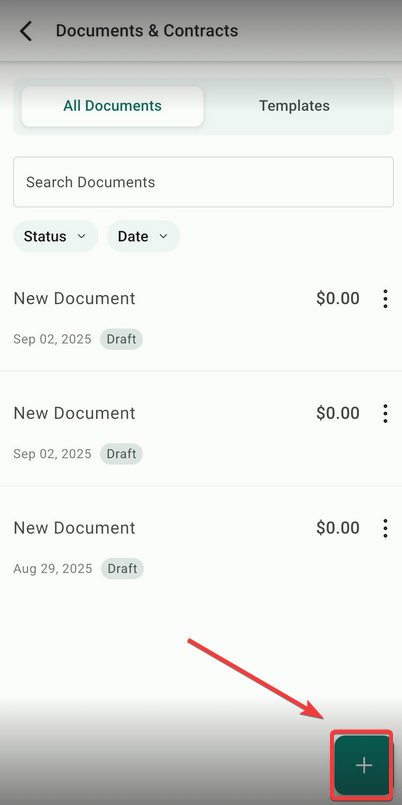
Section titled “5. Simplified Document Management”- Access all draft and sent documents under the “All Documents” tab for quick tracking and updates.
How to Use This Feature
Section titled “How to Use This Feature”Step 1: Access Documents and Contracts
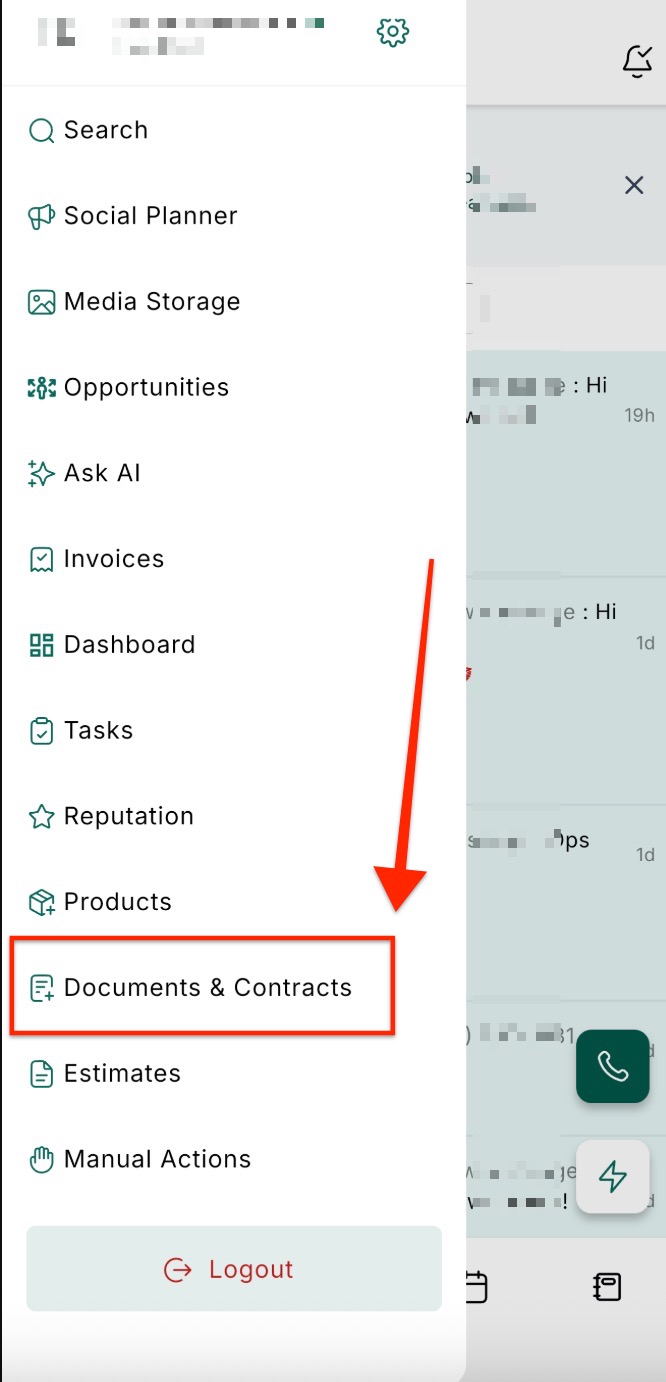
Section titled “Step 1: Access Documents and Contracts”- Open the mobile app and ensure your preferred account is selected.
- Navigate to Documents and Contracts from the left-hand navigation bar.
Step 2: Choose an Option
Section titled “Step 2: Choose an Option”- To view documents: Go to the All Documents section to see drafts and sent documents.

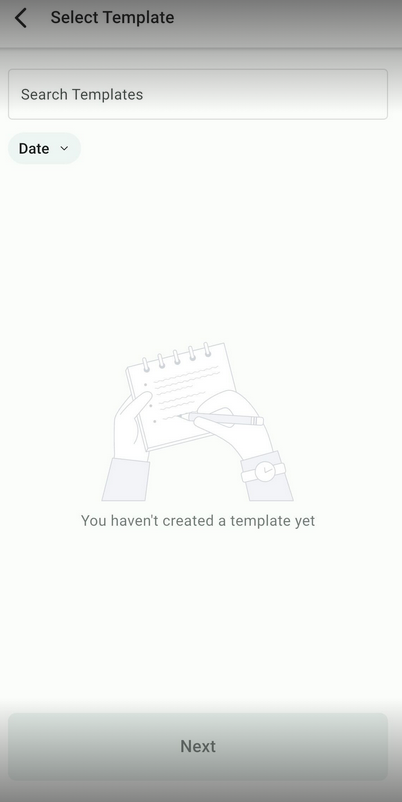
- To create a document: Switch to the Templates tab and view your saved document templates.
Step 3: Create and Send a Document
Section titled “Step 3: Create and Send a Document”1. Tap the ”+” button at the bottom right of the screen.
2. Add the necessary contact(s) for the document.
3. Select the appropriate document template from the list.
4. (Optional) Add items from the product catalog if required for a quote or estimate.

5. Review the document details to ensure accuracy.
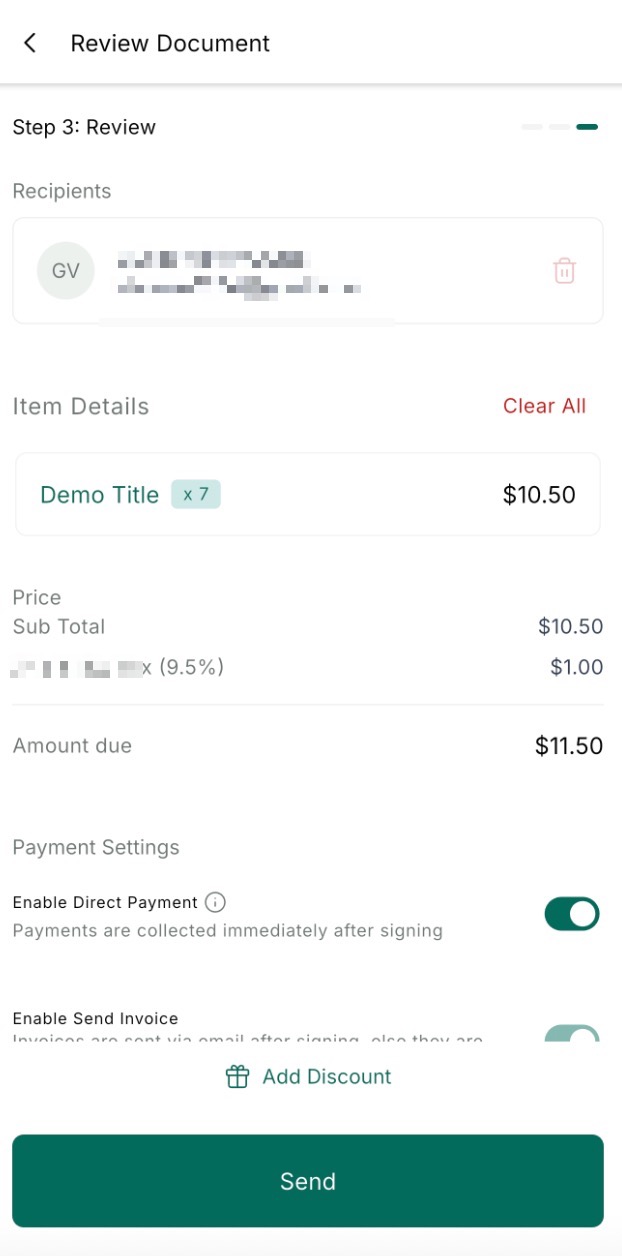
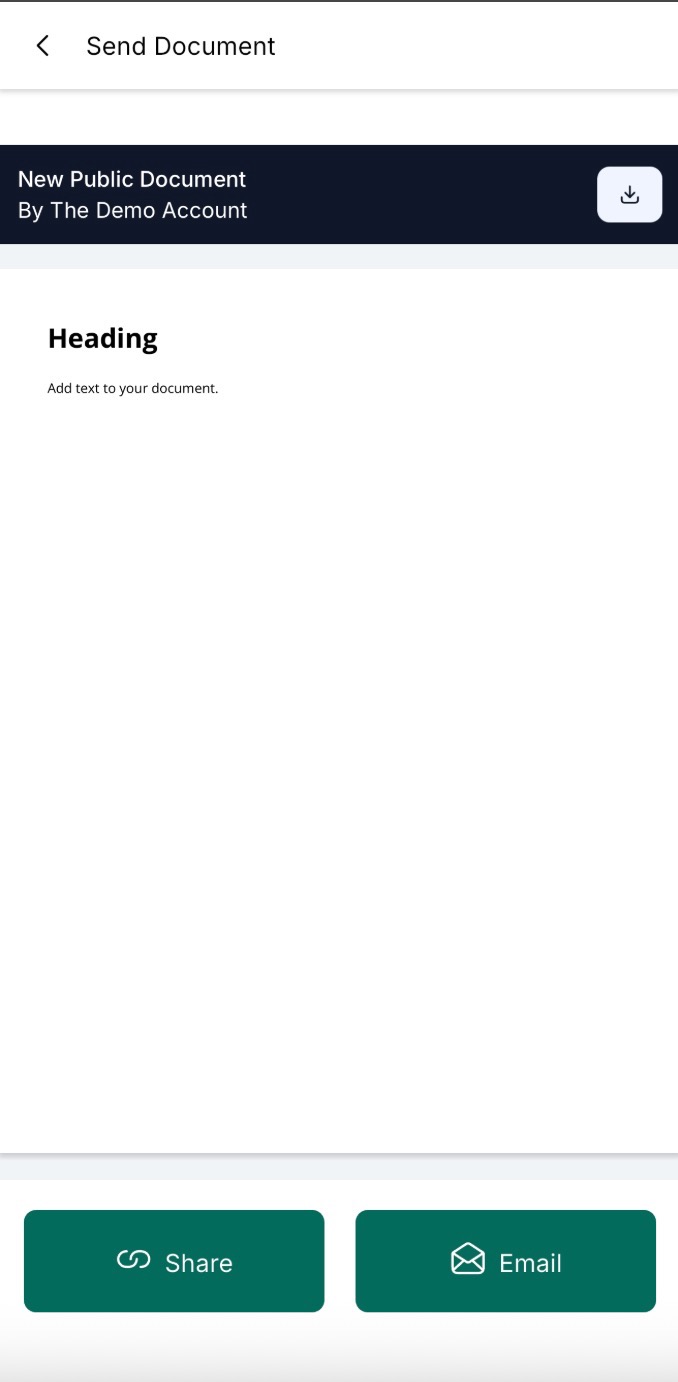
6. Send the document via email or generate a unique link for sharing.
In-Person Signatures for Mobile Payments
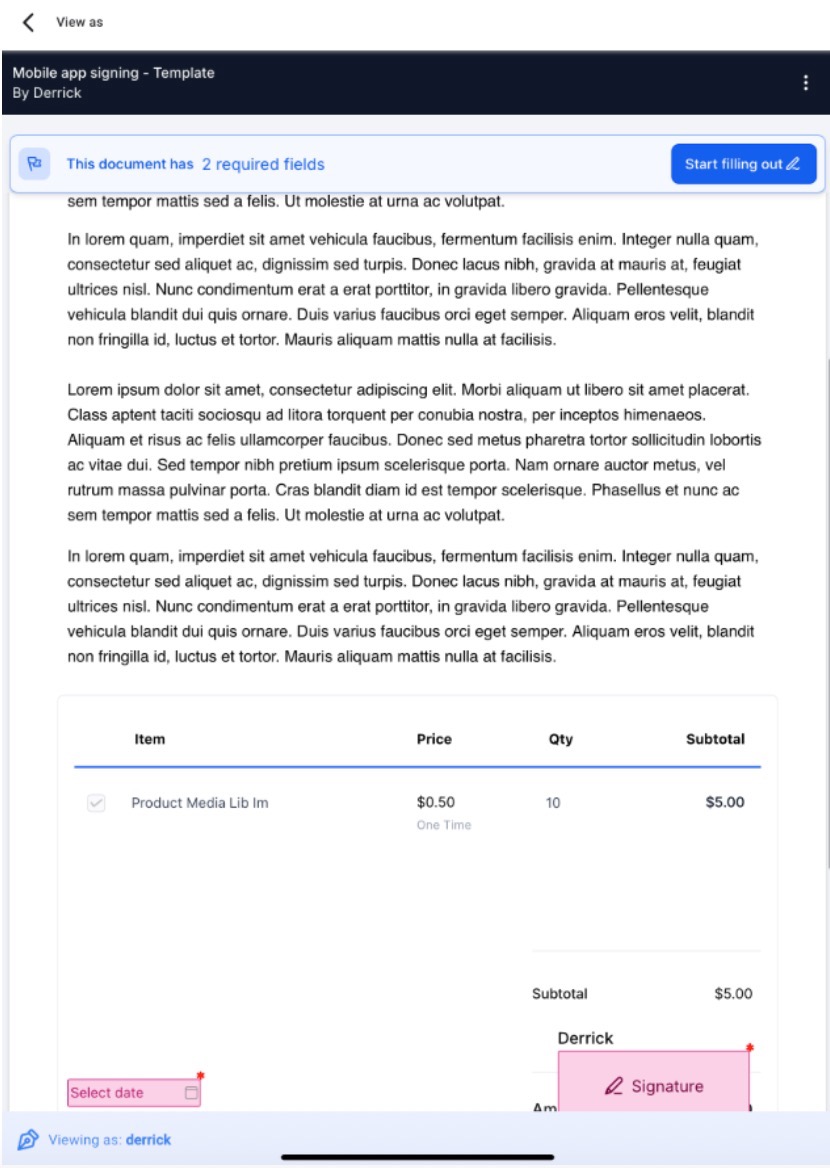
Section titled “In-Person Signatures for Mobile Payments”The in-person signing feature allows users to accept signatures directly within the mobile app, simplifying the document completion process. You can create a document with signature fields (within the Web app), open it for signers, and collect their signatures using text or free-hand drawing on your device. This process is done in person.
-
Create a document using a template with signature fields (within the Web app) and publish it.
-
After preparing the document for publishing, tap the share button to copy the link, then exit the editor and return to the “All Documents” tab.
-
Open the document from the All Documents tab and use the View as option to select a recipient.
-
Note: Refresh the tab to ensure the document is marked as “Sent” before proceeding with signatures.


- Hand your device to the recipient to sign directly within the app.

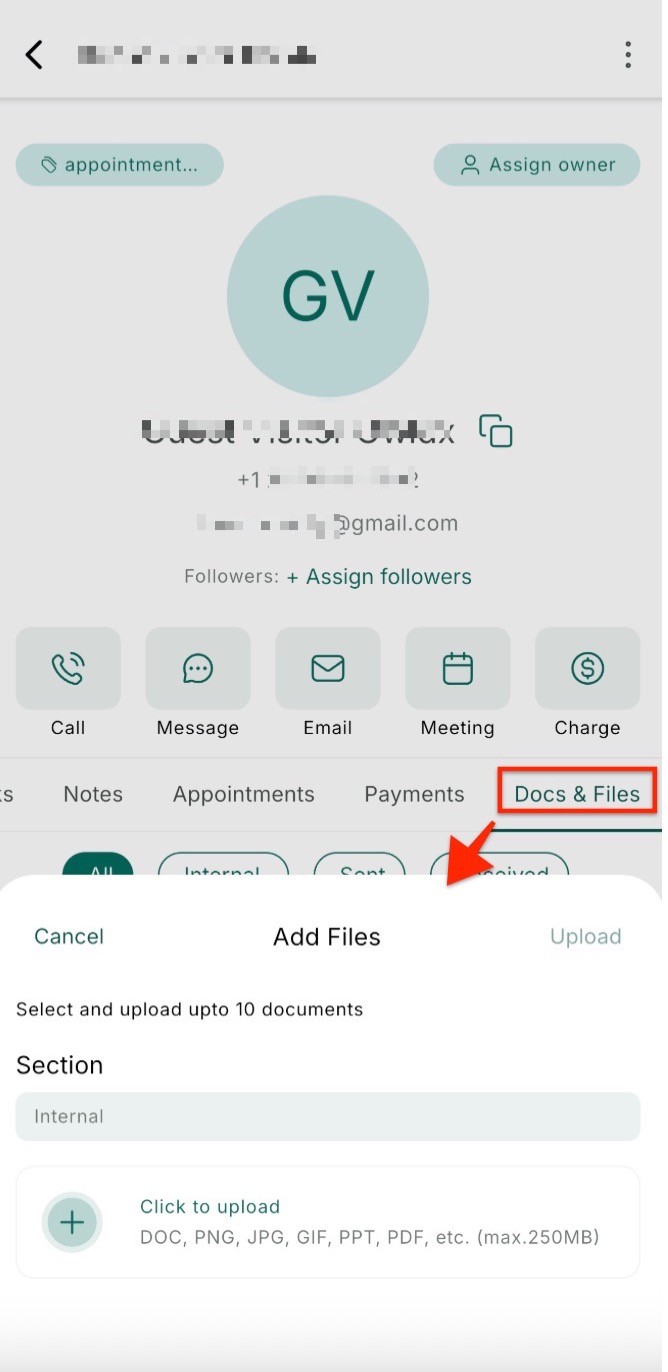
Organize and Manage Documents with the Docs and Files Tab
Section titled “Organize and Manage Documents with the Docs and Files Tab”The Docs and Files tab in the contact profile allows you to manage and organize all your important documents in one place. Whether you’re sending contracts, sharing estimates, or tracking signed agreements, this feature helps you keep everything neatly sorted into folders like Internal, Sent, Received, and Custom Fields. You can upload up to 10 files at once (up to 250 MB), making it easier to access and manage documents for each contact.
How to use it:
- Open any contact profile.
- Swipe to the Docs and Files tab.
- Tap Upload to add your documents.
- Browse by folder or preview files with a single tap.

Pro Tips
Section titled “Pro Tips”- Prepare in Advance: Ensure all templates are saved on the web platform, as the mobile app does not currently support creating documents from scratch.
- Review Before Sending: Double-check document details, especially if adding items from the product catalog, to avoid errors.
- Use Unique Links for Secure Sharing: Generating a link is ideal for sharing documents securely with clients who prefer direct access.
- Organize Documents: Regularly update and manage drafts and templates to maintain a clean and efficient workflow.
Question: Can I create a new document from scratch on the mobile app? Answer: No, you can only create documents using pre-saved templates from the web platform.
Question: How do I access my templates on the mobile app? Answer: Navigate to the Templates tab under Documents and Contracts to view and use your saved templates.
Question: Can I include products in the document? Answer: Yes, you can optionally add items from your product catalog while creating the document.
Question: What are the sending options for documents? Answer: You can send documents via email or generate a unique link to share with the recipient.
Question: Where can I find my sent and draft documents? Answer: All sent and draft documents are available under the All Documents section in the Documents and Contracts tab.
Question: How do I collect in-person signatures using the mobile app? Answer: To collect in-person signatures, create a document using a template with signature fields and publish it. Navigate to the All Documents tab, tap the three dots on the document tile, select View as, and choose the recipient. Hand your device to the signer to complete their signature directly within the app.
Question: How many files can I upload at once to a contact’s profile, and is there a size limit?
Answer: You can upload up to 10 files at a time, with a total size limit of up to 250 MB.
Question: How are files organized within a contact’s profile?
Answer: Documents are neatly sorted into specific folders, including Internal, Sent, Received, and Custom Fields, to help you keep track of different document types.
Question: Can I organize my documents into specific categories within a contact’s profile?
Answer: Yes. The Docs and Files tab automatically sorts your documents into folders such as Internal, Sent, Received, and Custom Fields, making it easy to track different document types for every contact.