Using The LeadConnector Mobile App: Contacts
The LeadConnector mobile app allows you to manage and interact with your contacts conveniently while on the go. With the app, you can easily access contact information, perform key actions, and stay on top of all your customer interactions. This article guides you through the main features, benefits, and steps to make the most out of the Contacts section, ensuring that your customer management is seamless wherever you are.
Key Features and Benefits
Section titled “Key Features and Benefits”- Quick Access to Contacts: Navigate through your contact list and access all relevant information quickly from your mobile device.
- Business Card Scanner: Add new contacts effortlessly by scanning business cards. The app automatically extracts the details for you to edit and save.
- Contact Management: Manage and update contact details, tasks, notes, and appointments directly from the app.
- Advanced Search and Filtering: Use the search and filter options to locate contacts based on specific criteria.
- Integrated Communication: Instantly call, text, or email contacts directly from their profile.
- Plus Sign Icon Menu: Add new contacts, send SMS, emails, create opportunities, or schedule appointments based on the page you’re on.
- Lightning Bolt Icon Menu: Perform quick actions such as making calls, sending SMS, review requests, and more, ensuring swift access to critical tasks.
- Bluetooth Control on Android: Improved Bluetooth control for Android users, allowing seamless use of Bluetooth headphones for calls within the app.
- WatchOS Integration: You can now receive calls directly on supported smartwatches, enhancing accessibility and ease of use.
- Enhanced Call Features: New options for call transfers, including the ability to merge calls or transfer active calls to other staff members, providing greater flexibility in managing communications.
- Bulk Actions and Tagging: Multi-select contacts to add tags in bulk, improving organization and making updates more efficient.
- Activity Tracking: Consolidates all events related to a contact—appointments, surveys, page visits, and more—into one activity tab for easy tracking.
- Tags - One-Click Access: The addition of Tags, prominently visible at the contact level, provides easy, one-click access to view and perform all tag-related actions.
- Custom Fields - Organization and File Access: The organization of multiple folders under custom fields has been streamlined for a clearer flow of information. Additionally, the file attachment process supports access from media, camera, and other resources, not just mobile phone files.
- Quick Actions - Floating Button for Key Functions: A floating quick actions button allows users to instantly access opportunities, workflows, DND, and tags from any screen within the contacts module.
- Maps Integration - Address Redirection: Clicking on an address properly redirects to either Google Maps or Apple Maps, providing seamless navigation options.
- Hide Empty Fields - Toggle for Enhanced Organization: A toggle option to hide empty fields, allowing users to view only populated fields at the folder level for better organization.
- Notes - Note-Taking with Rich Content Support: The notes section supports HTML content and hyperlinking, enabling the inclusion of website links and the creation of richer, more functional notes.
How to Use the Contacts Section
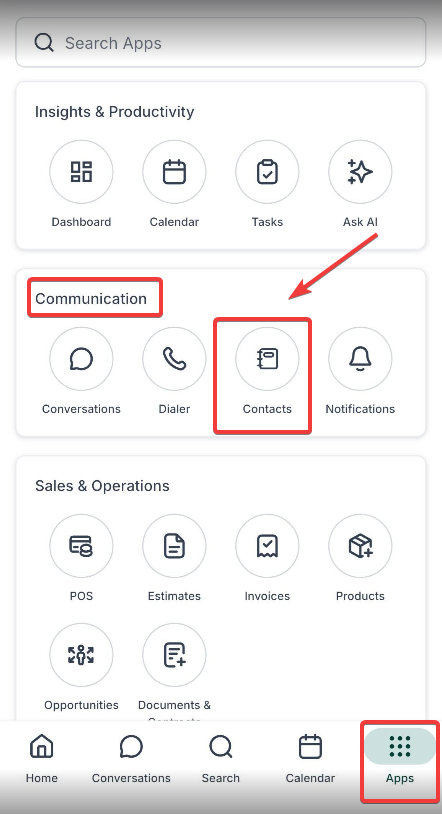
Section titled “How to Use the Contacts Section”1. Access the Contacts Section:
- Open the mobile app and tap the Contacts icon from the bottom navigation menu. Inside the app, go to the Communications tab and then select the Contacts icon.
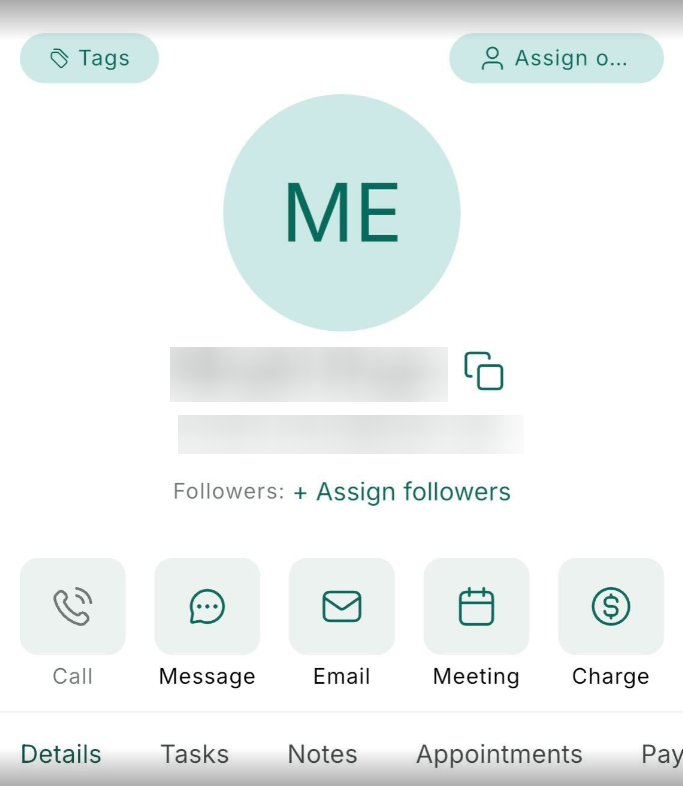
2. View and Manage Contact Information:
- Select a contact to view their details, including custom values, activity history, and key metrics.
- Use the long-press feature on a contact tile to instantly call, email, or schedule an appointment.
- Apply tags or other updates for better organization. You can also manage opportunities, add contacts to workflows, and update tasks and notes linked to a contact.
3. Search for a Specific Contact:
- Search for a contact by name, email, or any other identifier.
.jpg)
- Filter by Smartlists.
.jpg)
4. Create a New Contact:
- Tap the ”+” icon in the bottom right to create a new contact. Enter the details such as name, phone number, email, and additional information.
.jpg)
.jpg)
5. Use the Business Card Scanner:
- To add a contact using a business card:
- Go to the Contacts page, tap the ”+” icon, and select “Scan Business Card.”
.jpg)
- Alternatively, tap the scan icon on the top right of the contact creation screen:
.jpg)
or access it from the lightning bolt quick actions menu.
.jpg)
- Align the business card within the scanner box, and the app will automatically extract the details.
- You can edit the scanned details using the chips at the bottom or manually input information using the keyboard before saving.
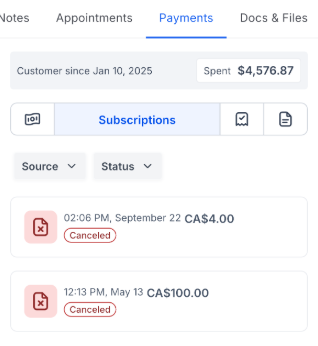
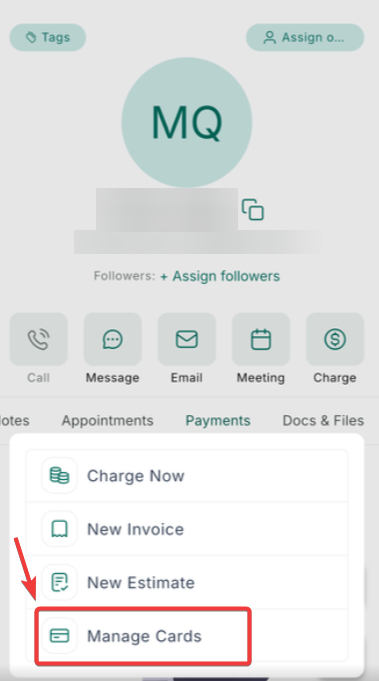
6.Payments tab in Contacts:
- Open a contact and navigate to the Payments tab.
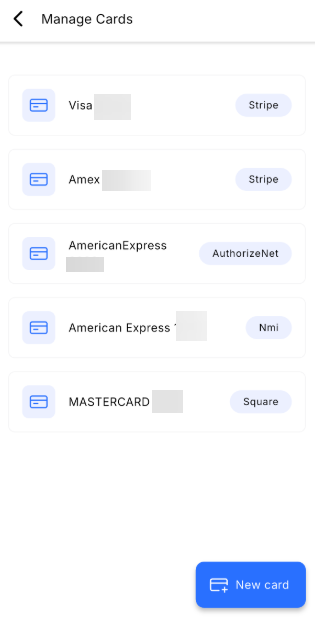
- Click on Actions, then select Charge Now, New Invoice, New Estimate, or Manage Cards on File.
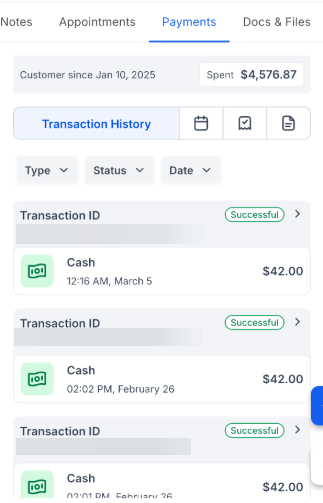
- Use the filter options to view Transactions, Invoices, Estimates, or Subscriptions.
7. Call Native Contacts:
- After installing the mobile app, you can make outbound calls to your phone contacts (not just the contacts in the app). Simply press and hold the call button in your phone’s contact list and choose the LeadConnector app to make the call.
- Enter the card information and save it to the contact.
8. Manage Inbound Calls:
- Configure incoming calls to ring specific users’ mobile apps from the Desktop App by setting up routing and forwarding options under “My Staff.”
.png)
- Spam Management: When you receive an incoming spam call or even a missed one, the app will display a “Spam Likely” tag across the entire call experience—from the incoming screen to call logs and details. This feature is designed to make your mobile phone smarter by alerting you to potential spam calls right on both Android and iOS.
.png)
8. Transfer and Merge Calls:
- During an active call, use the transfer feature to connect the call to another staff member
.png)
- Or merge calls to manage group conversations directly from the app.
.png)
Additional Features:
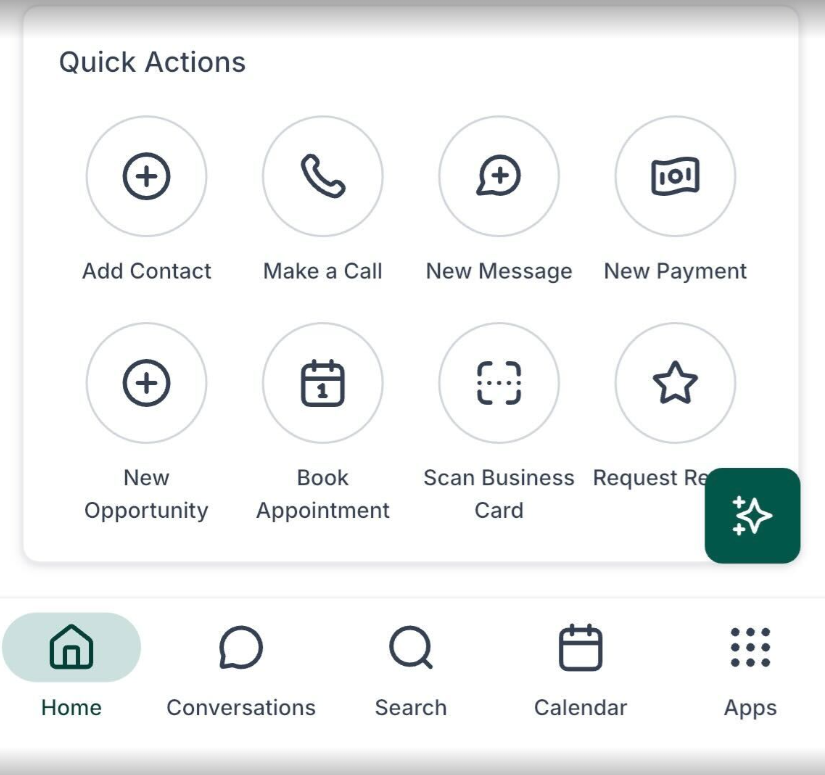
1. Comprehensive Contact Management:
Quick Actions: Instantly access critical features like opportunities and tags with the floating button.
.jpg)
.jpg)
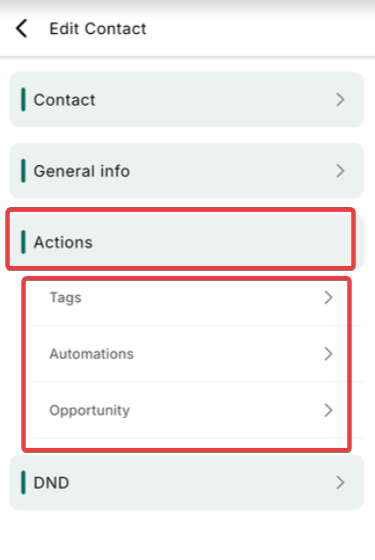
2. Tags Visibility:
Easily manage and view tags directly at the contact level for improved organization.
.jpg)
3. Custom Fields and File Access:
Streamline the organization and enhance file attachment processes to include media and camera sources.
4. Maps Integration:
Seamlessly navigate using Google Maps or Apple Maps directly from contact addresses.
.png)
5. Document Viewer:
View attached documents directly from the contact screen for immediate access.
.jpg)
6. Hide Empty Fields:
Use the toggle to display only populated fields, reducing clutter.
7. Note-Taking:
Incorporate HTML content and hyperlinks in notes for richer, more functional documentation.
8. Docs and Files Tab
The Docs and Files tab in the contact profile allows you to manage and organize all your important documents in one place. Whether you’re sending contracts, sharing estimates, or tracking signed agreements, this feature helps you keep everything neatly sorted into folders like Internal, Sent, Received, and Custom Fields. You can upload up to 10 files at once (up to 250 MB), making it easier to access and manage documents for each contact.
How to use it:
- Open any contact profile.
- Swipe to the Docs and Files tab.
- Tap Upload to add your documents.
- Browse by folder or preview files with a single tap.
.jpg)
.jpg)
.jpg)
9. Quick Actions during Call:
Save time by instantly accessing important features like note-taking, task management, calendar scheduling, and payment logging without leaving the call screen. After the call, you can quickly follow up with one-tap access to all your updates.
.png)
Pro Tips for Navigating the Contacts Section
Section titled “Pro Tips for Navigating the Contacts Section”- Optimized Tab Navigation: Use the four available tabs (Contact, Notes, Tasks, and Appointments) within any contact record to get a comprehensive view of all interactions, scheduled activities, and important details related to that contact.
- Quick Filters: Save commonly used filter settings as Quick Filters for easy access in the future, enabling efficient management of your contact list.
- Efficient Contact Sharing: Use the “Share Contact (VCF)” option to quickly share a contact’s information with others, allowing seamless transfer of data into phone contact lists.
Question: How do I add a new contact in the LeadConnector mobile app? Answer: You can add a new contact by tapping the ”+” icon in the Contacts section and filling out the necessary details such as name, email, and phone number before saving.
Question: What is the Business Card Scanner feature? Answer: The Business Card Scanner allows you to scan business cards to create new contacts automatically. The app extracts the card’s details, which you can edit before saving.
Question: How can I find a specific contact quickly? Answer: Use the search icon at the top right to search for a contact by name, email, or any other key detail.
Question: Can I update custom contact fields? Answer: Yes, you can update custom fields that have already been created. However, creating new custom fields must be done via the Desktop App.
Question: How do I configure incoming calls to be answered through the mobile app? Answer: Set up call routing and forwarding options under “My Staff” in the Desktop App, where you can choose the channels (Web App, Mobile App, or Phone Number) for incoming calls.
Question: How can I use the new call transfer and merge features?
Answer: You can transfer active calls to other staff members or merge two calls directly within the app. This allows for better call management and collaboration when needed.
Question: Can I receive calls on my smartwatch using the app?
Answer: Yes, with the new update, calls can be received directly on supported smartwatches, enhancing mobility and accessibility for users on the go.
Question: Can I take notes during a call? Answer: Yes, quick actions let you log notes, tasks, calendar events, or payments without leaving the call screen.
Question: How can I declutter a contact’s profile if many custom fields are unused?
Answer: You can use the “Hide Empty Fields” toggle. When enabled at the folder level, the app will only display fields that contain data, hiding any that are currently empty to provide a cleaner and more organized view.
Question: Can I call the personal contacts stored on my phone using the LeadConnector? Answer: Yes. After installing the app, you can call your phone’s native contacts through the system. Simply go to your phone’s contact list, press and hold the call button for the desired contact, and select the LeadConnector as the application to place the call.