How To Add a Chat Widget to your Membership Section
How To Add a Chat Widget to your Membership Section
If you are using the chat widget feature, you can add it to the Membership section of , allowing your contacts to access it while using the Membership area.
Follow these steps to add your chat widget to your Membership section. (Check out our other tutorials if you need assistance creating and setting up your chat widget).
Step 1: Grab your Chat Widget code
Section titled “Step 1: Grab your Chat Widget code”- Navigate to Sites > Chat Widget
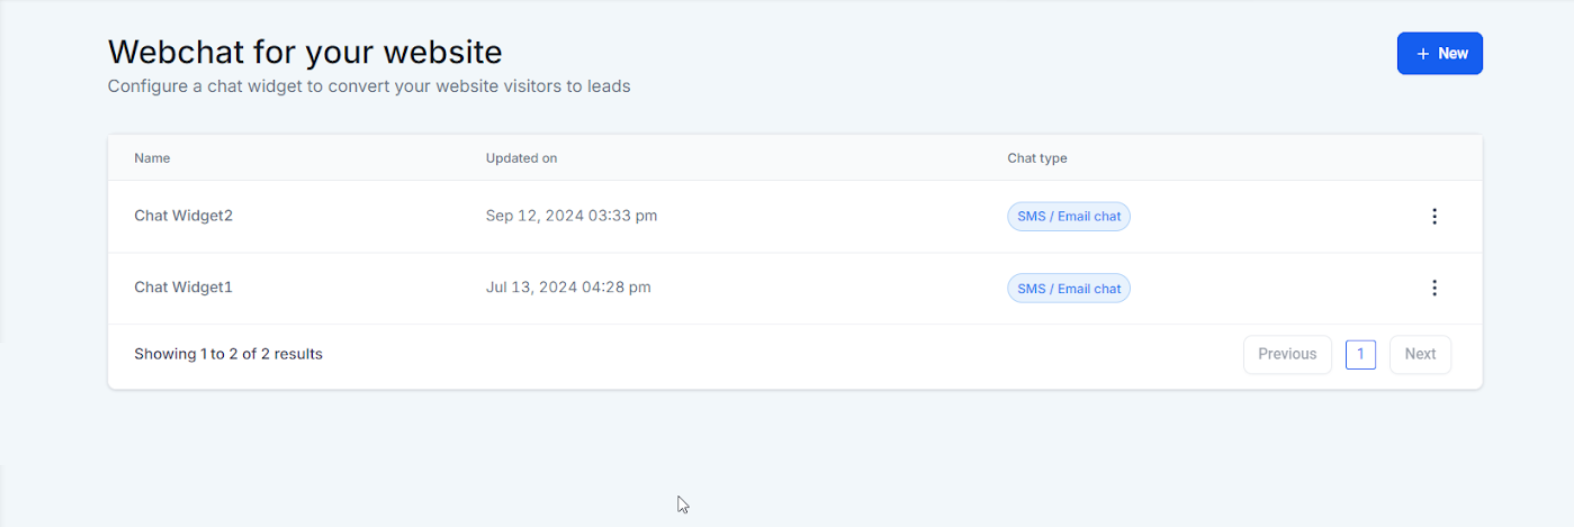
- Click on the three dots and select edit
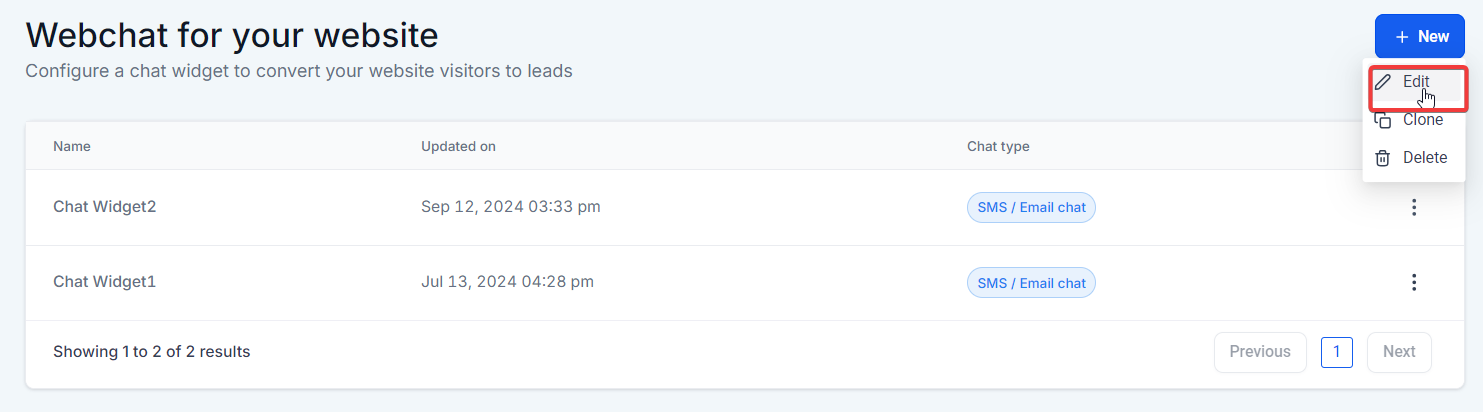
- Click “Get Code”
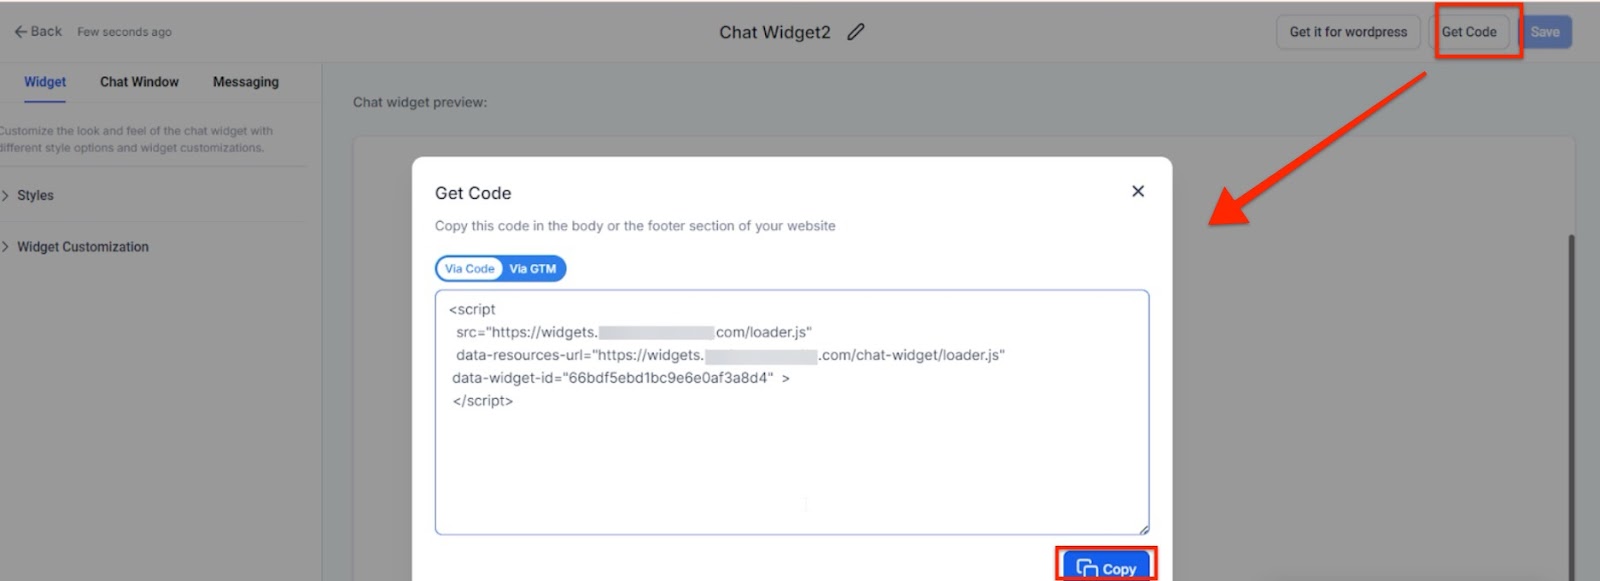
- Copy the code (you’ll need it in step 2)
Step 2: Add the code to your Membership Settings
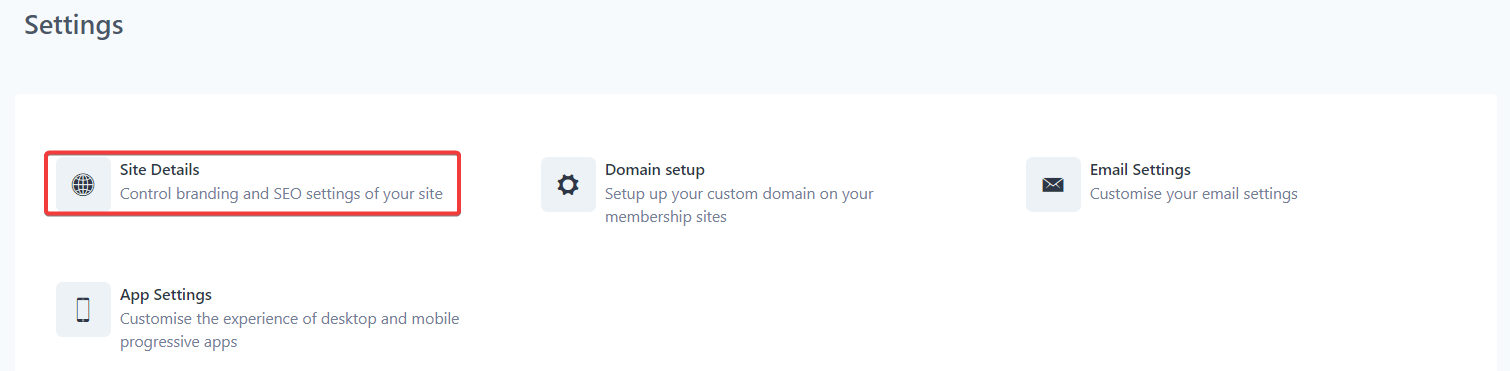
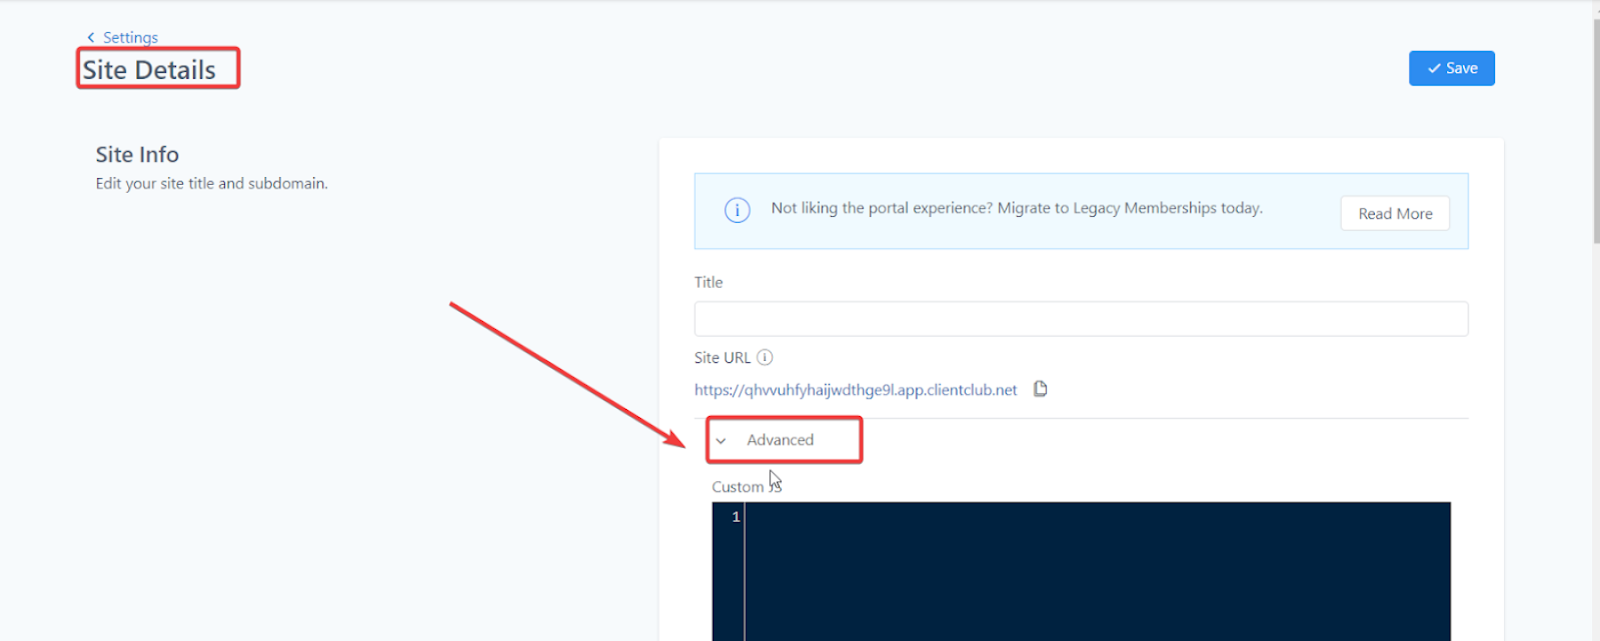
Section titled “Step 2: Add the code to your Membership Settings”- Navigate to Memberships on the left > Courses at the top > From the dropdown select Settings
- Click on “Site Details”
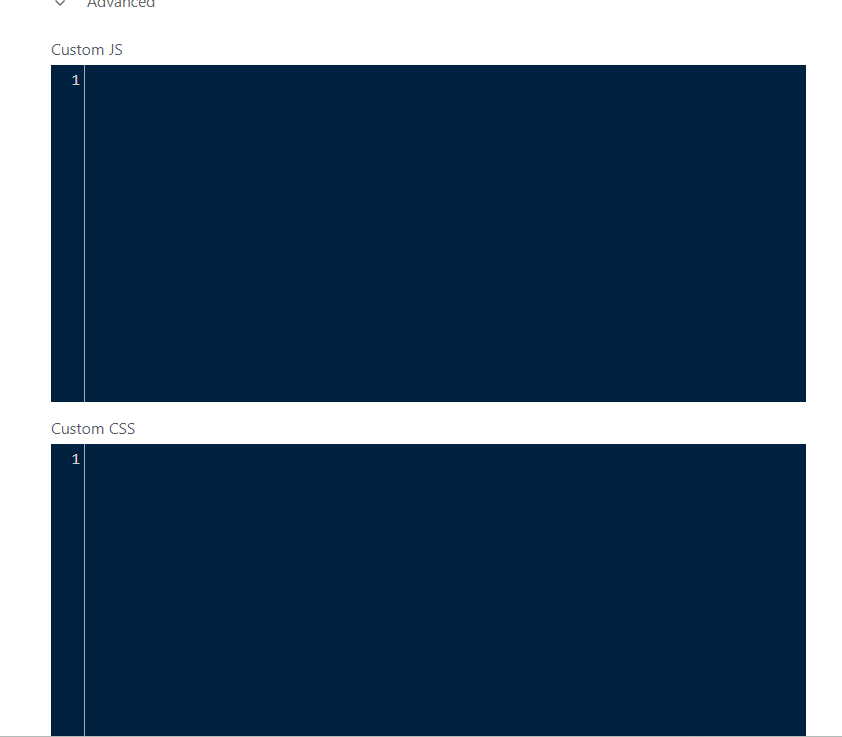
- Expand the “Advanced” dropdown.
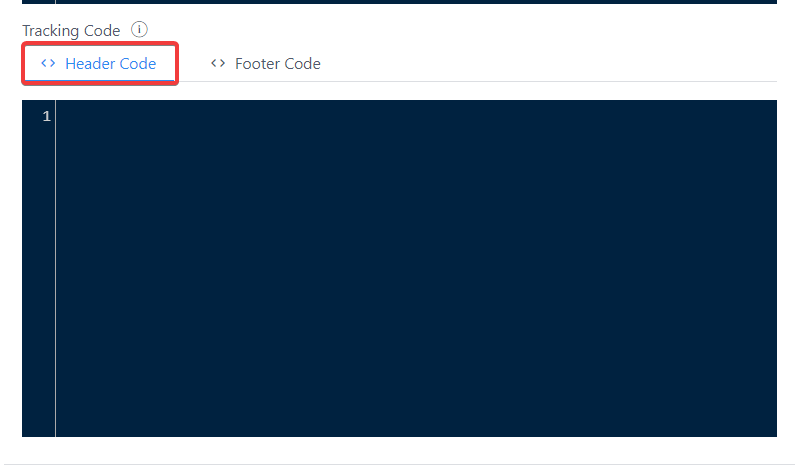
- Add your custom JS, CSS, or Tracking Code.
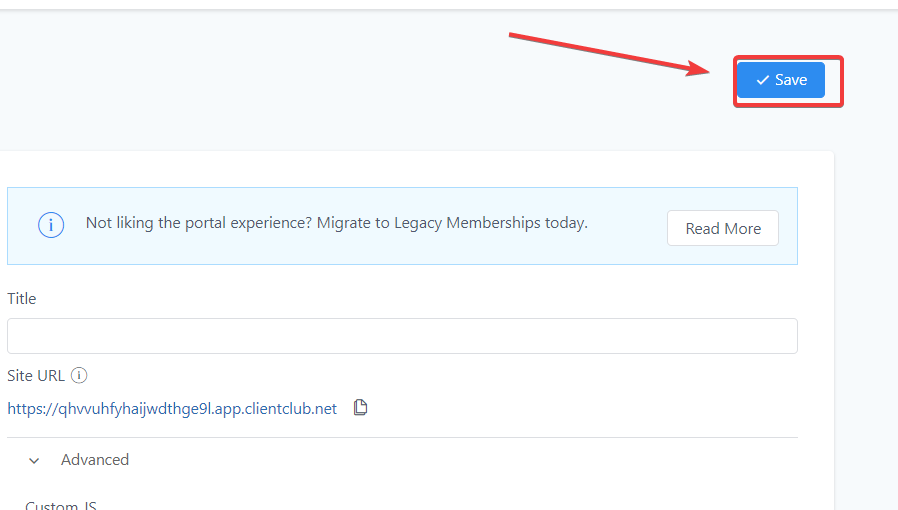
- Click “Save” to confirm your changes.
Question: How do I add a chat widget to my Membership section in ?
Answer: To add a chat widget to your Membership section, first grab your chat widget code by navigating to Sites > Chat Widget and clicking “Get Code.” Then, go to Memberships > Courses > Settings, click into “Site Details,” expand the “Advanced” dropdown, add your code in the appropriate section, and click “Save.”
Question: Where can I find the chat widget code to add to my Membership section? Answer: You can find your chat widget code by navigating to Sites > Chat Widget in your account. Click on “Get Code,” and copy the code for use in your Membership section setup.
Question: Can I add custom JavaScript, CSS, or tracking code to the Membership section in ? Answer: Yes, you can add custom JavaScript, CSS, or tracking code by going to Memberships > Courses > Settings, clicking into “Site Details,” expanding the “Advanced” dropdown, and pasting your code in the appropriate field before saving your changes.
Question: What should I do if my chat widget is not displaying correctly in the Membership section? Answer: If your chat widget is not displaying correctly, ensure that you have copied and pasted the chat widget code correctly into the “Advanced” section under Memberships > Courses > Settings > Site Details. Double-check that the code has been saved properly.
Question: Can I use the chat widget in other areas of besides the Membership section? Answer: Yes, the chat widget can be used in multiple areas within , including other sites and pages. Follow similar steps to grab the widget code and embed it wherever you want it displayed within your platform.
Question: Can I control which pages in Membership show the chat widget? Answer: Yes, the widget will only appear on pages where you add the code. To limit it, paste the code only in the specific Membership pages where you want it visible.
Question: How do I ensure the chat widget code is saved properly in the Membership section of ? Answer: After pasting the chat widget code in the “Advanced” section under Memberships > Courses > Settings > Site Details, make sure to click “Save” to confirm your changes. If you do not save, the changes will not be applied.
Question: Does the chat widget code go into the JS, CSS, or Tracking Code field?
Answer: The chat widget code provided by the platform is typically a script, so it should be pasted into the Custom JS or Tracking Code box within the Advanced settings.
Question: Does the chat widget have to be recreated specifically for the Membership section?
Answer: No, you can use an existing chat widget. The article notes that you can simply navigate to your existing widgets, click the three dots to edit, and “Get Code” to use it in your Membership settings. (If you haven’t created one yet, you would need to follow the platform’s specific setup tutorials first).
Question: Where specifically within the Membership settings do I need to go to find the “Advanced” dropdown menu? Answer: To find the Advanced dropdown, you must first navigate to Memberships on the left sidebar, select Courses at the top, choose Settings from the dropdown menu, and then click on Site Details. The Advanced section will be available to expand at the bottom of that page.