How to Use the Stop Bot Action for Better Customer Interactions
The Stop Bot Action allows users to automatically stop the AI bot’s responses when specific conditions are met. This prevents unnecessary back-and-forth messaging, improving customer interactions and ensuring a more efficient experience. This also allows businesses to configure a final message before stopping and set a reactivation timer for future engagement.
Key Benefits of the Stop Bot Action
Section titled “Key Benefits of the Stop Bot Action”- Improved Customer Experience – Prevents excessive messaging by stopping bot responses when needed.
- Customizable Triggers – Define clear conditions to halt bot interactions at the right time.
- Reactivation Timer – Set a delay for re-engaging contacts after a specified duration.
How to Set Up the Stop Bot Action
Section titled “How to Set Up the Stop Bot Action”1. Navigate to the Bot Goals Tab
Section titled “1. Navigate to the Bot Goals Tab”- Navigate to settings on the left>Conversation Ai in the left settings menu and head over to bot goals from the top right menu.
- If creating a new bot, assign or edit the bot’s name before proceeding.
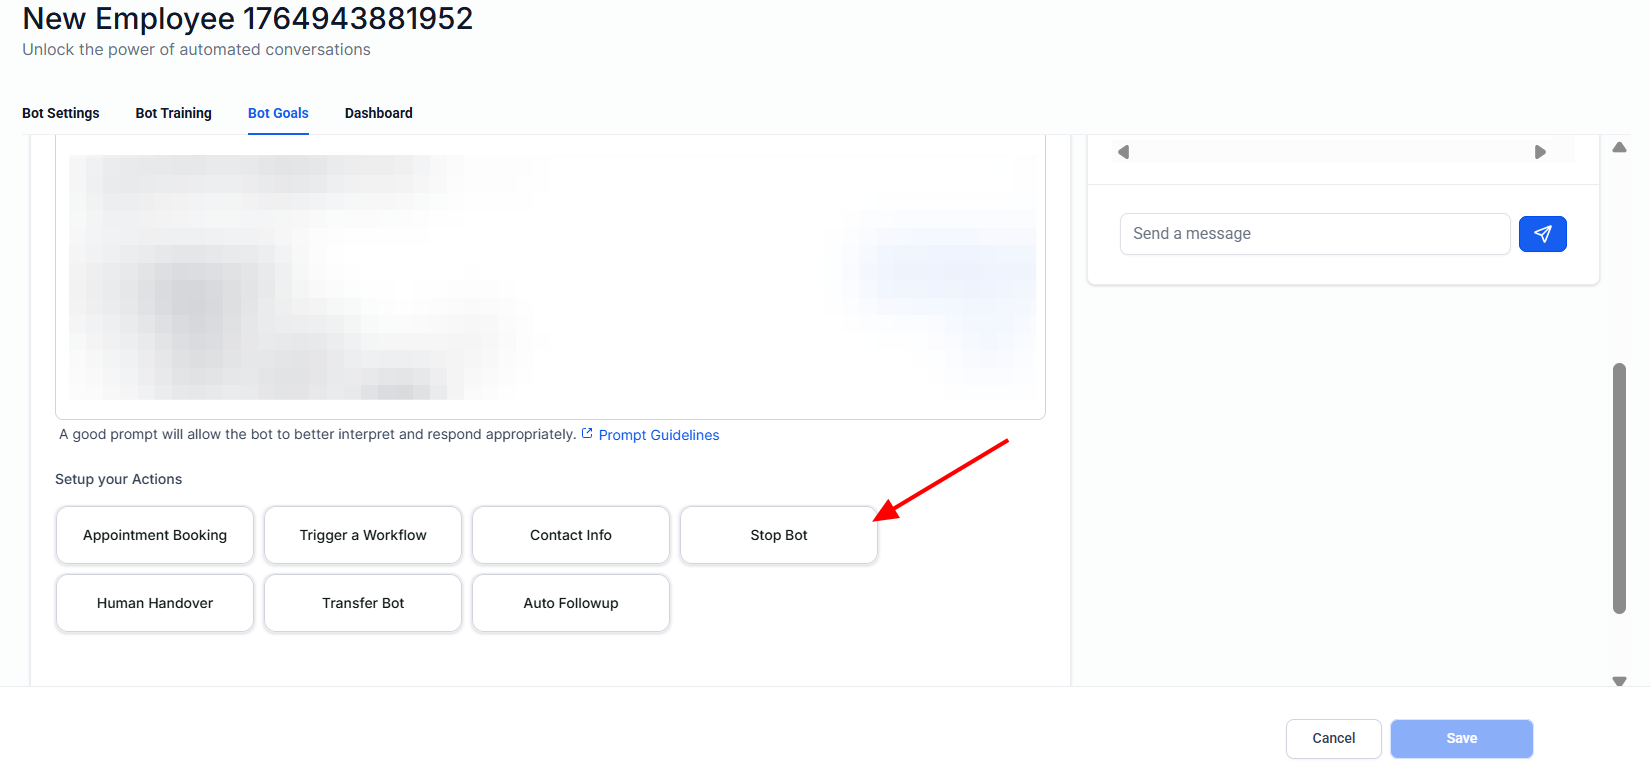
2. Add the Stop Bot Action
Section titled “2. Add the Stop Bot Action”- Click on the “Stop Bot” button.
- Open the configuration panel to set up the action.
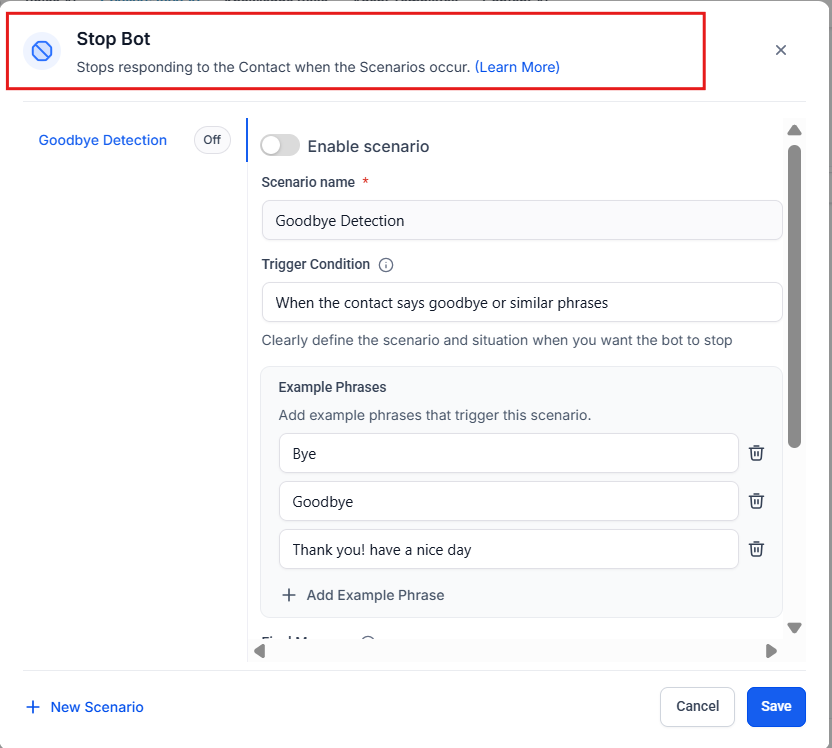
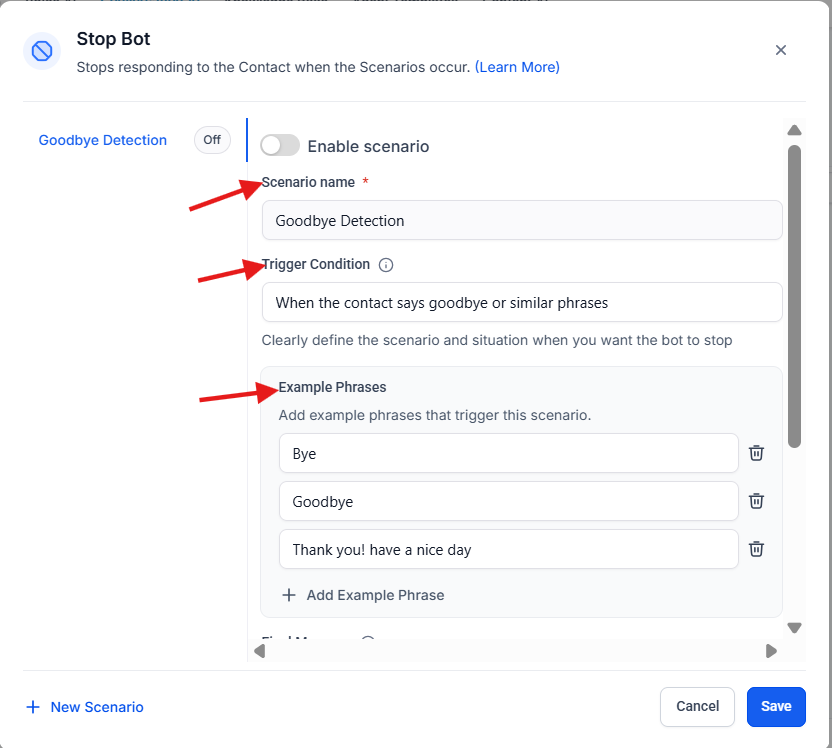
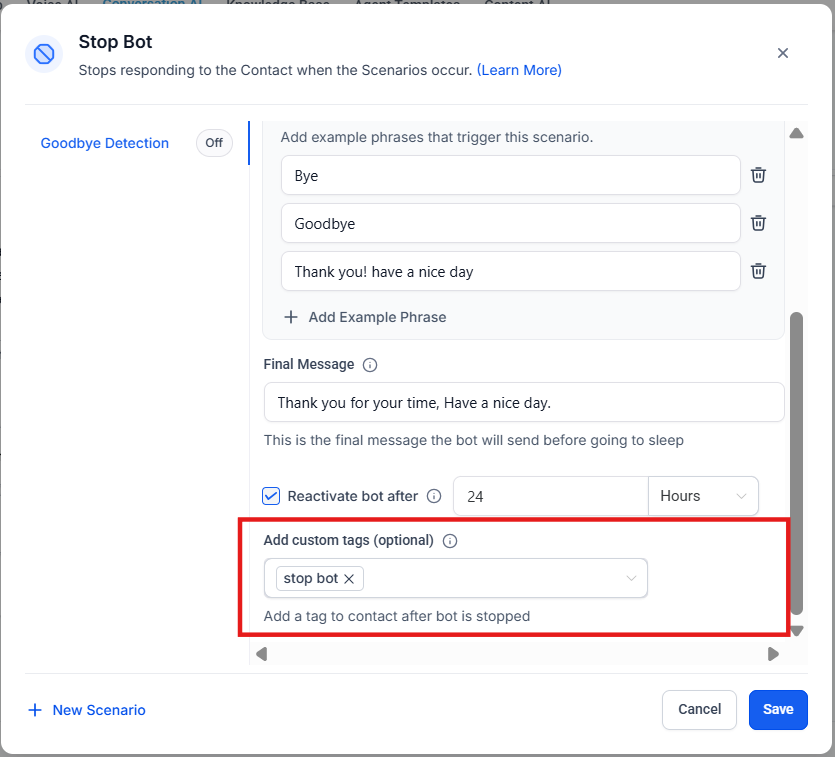
3. Configure Stop Bot Conditions
Section titled “3. Configure Stop Bot Conditions”- Scenario Name: Assign a descriptive name (e.g., “Customer Not Interested”).
- Enable Scenario Toggle: Turn this on to activate the Stop Bot action.
- Select Trigger Conditions: Define when the bot should stop. Examples:
- “Customer not interested in the product.”
- “User says goodbye.”
- Add Example Phrases: Input common phrases that users might say to trigger the stop action.
4. Set the Final Message
Section titled “4. Set the Final Message”- Customize a message that will be displayed before the bot stops responding. Example:
- “Thank you for your time. If you have any other questions, feel free to ask.”
5. Configure Reactivation Timer
Section titled “5. Configure Reactivation Timer”- Set the bot’s reactivation time to determine when it can re-engage a user.
- Recommendation: Use 5–10 minutes for quicker re-engagement instead of the default 24 hours.
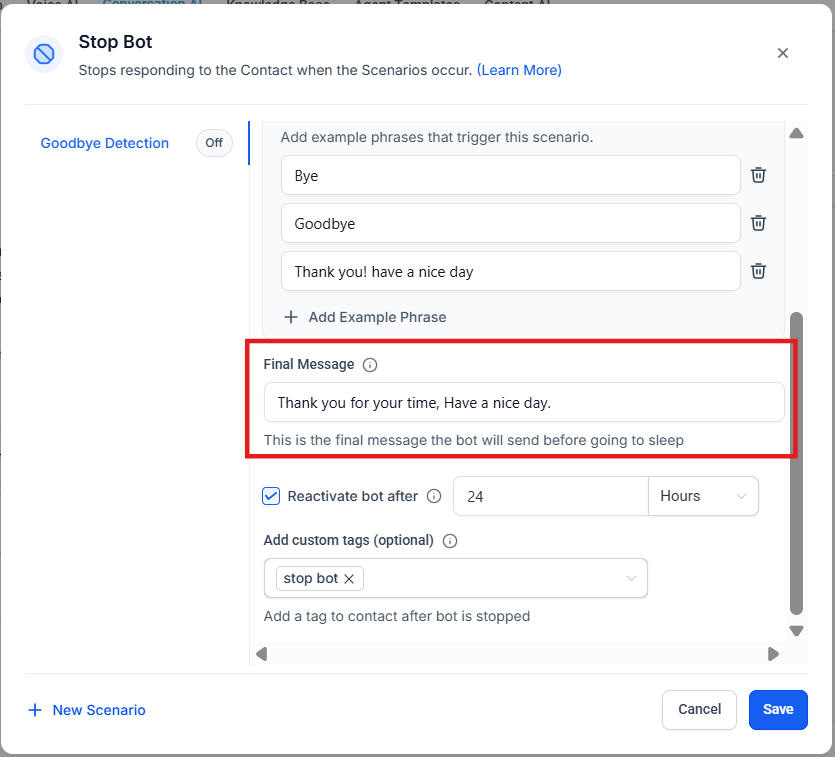
6. Add a Custom Tag (Optional)
Section titled “6. Add a Custom Tag (Optional)”- Assign a tag (e.g., “Stop Bot”) to categorize contacts for follow-up actions.
7. Save and Test the Workflow
Section titled “7. Save and Test the Workflow”- Save the setup and run a test to verify that the bot stops responding when trigger conditions are met.
Important Considerations
Section titled “Important Considerations”- Ensure trigger conditions are clearly defined to avoid unintended bot deactivation.
- Test thoroughly to confirm that the bot stops only when necessary.
- If contact is still valuable, consider allowing the bot to nurture them instead of stopping too soon.
Question: What is the purpose of the Stop Bot Action? Answer: It prevents unnecessary responses by stopping the bot when users indicate they are no longer interested or the conversation is complete.
Question: Can I customize the final message before the bot stops? Answer: Yes, you can set a final message to close the conversation professionally.
Question: How long does the bot stay inactive after stopping? Answer: The inactivity duration depends on the reactivation timer, which can be set to 5–10 minutes or longer based on preference.
Question: Can I apply the Stop Bot Action to all interactions? Answer: Yes, but it’s best used with specific trigger conditions to avoid prematurely stopping conversations.
Question: What happens if I don’t set a reactivation timer? Answer: The bot will remain inactive for 24 hours by default before responding again.
Question: Does stopping the bot affect analytics or reporting? Answer: No. All interactions, including stop events, continue to be logged in your system analytics, ensuring visibility into conversation trends and user behavior.
Question: How do I “unstop” a bot manually if I need to?
Answer: If you want to force the bot to start responding again before the reactivation timer ends, you can go to the Contact Record, find the AI Bot status, and manually toggle it back to “Active” or “On.”
Question: How do I define what actually triggers the bot to stop?
Answer: In the configuration panel, you create a Scenario Name (like “User says goodbye”) and add Example Phrases. These are common sentences a customer might say that the AI should recognize as a signal to end the conversation.