Understanding and Managing Contacts: A 101 Guide
The Contacts tab is one of the most essential features in managing leads and client data effectively. This section helps you organize, manage, and utilize contacts with ease, making it a crucial tool for keeping track of your communication and interactions with clients. This article will cover how to efficiently manage contacts, add new ones, and use features like smart lists, bulk actions, and custom fields to streamline your workflow and enhance your marketing campaigns.
Key Features and Benefits:
Section titled “Key Features and Benefits:”- Easy Contact Management: All of your contacts, whether email or SMS, are displayed in one place, allowing you to view and select them easily.
- Quick Add & Import: You can manually add contacts or upload them in bulk via CSV files.
- Pipeline Changes: You can easily move contacts between pipelines and automate these processes.
- Send SMS & Emails: Quickly send messages to selected contacts via SMS or email with just a few clicks.
- Smart Lists: Filter and organize contacts using smart lists, which help in segmenting your audience and targeting specific groups for campaigns.
- Custom Object Sorting: You can organize your records more effectively by sorting Custom Object list views using your unique data fields. This allows for faster navigation and prioritization based on criteria like price, status, or specific deadlines rather than just creation dates.
- Custom Fields: Add specific information to your contacts with custom fields, allowing for more precise filtering and targeting.
- Task Management: Create tasks for your team members to stay on track with client follow-ups or actions needed.
Modern, Unified Design
Section titled “Modern, Unified Design”- Upfront Details: Key information, such as Name, Owner, Tags, and Followers, are now visible at the top for easy access.
- Associations Panel: Companies, Opportunities, and Custom Objects are grouped in one section, eliminating the need to switch between tabs.
- Conversations Panel: The updated panel is centrally located, offering easier access to communication history.
.jpg)
How to Use It:
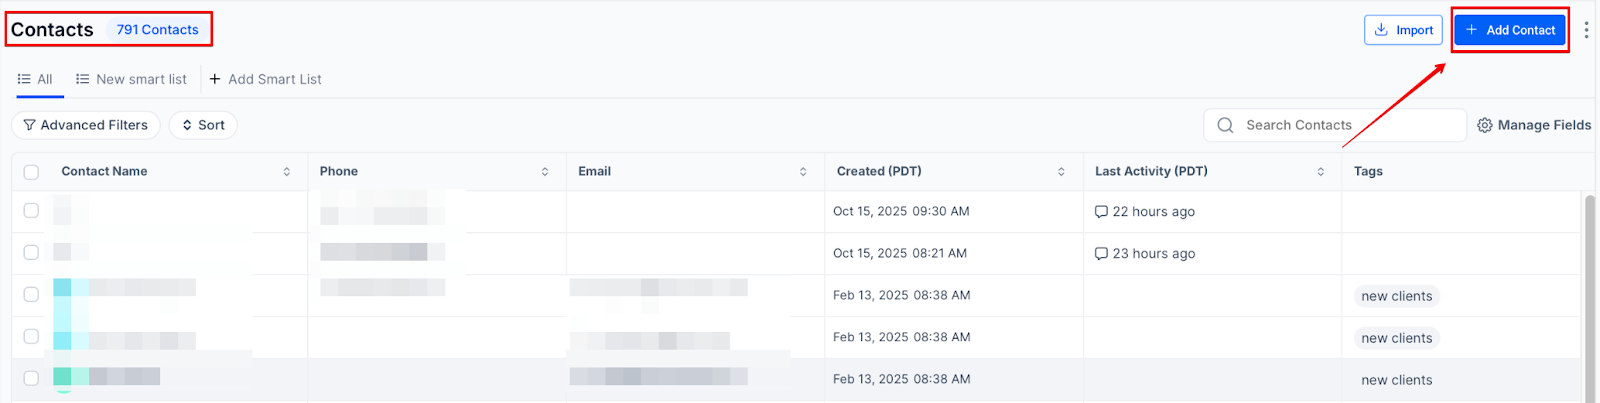
Section titled “How to Use It:”1. Add Contacts (Manually): To add a contact manually, simply click “Add Contact,” fill in the information, and save. You can also upload contacts via a CSV file by clicking the “Import” button.

Contacts are automatically created upon Form, Survey, and Quiz Submissions. Third-Party Apps: You can create an Automation to set up a Zap to automatically create contacts from other apps (e.g., Google Sheets). Finally, Facebook Lead Ads: Contacts from Facebook Lead Ads can be automatically added to when they fill out your lead form.
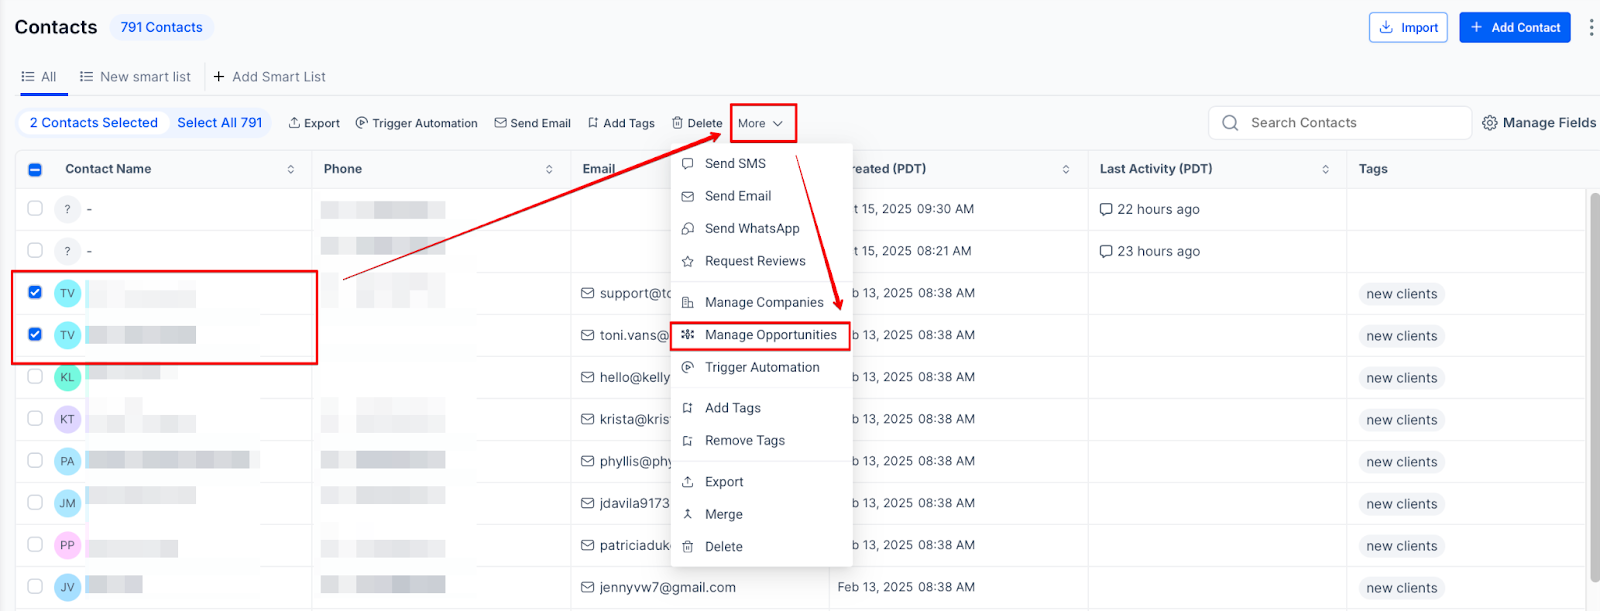
2. Use Opportunities/Pipeline Changes: If you need to move a contact to a different pipeline, just select the contact, choose the new pipeline, and move it.
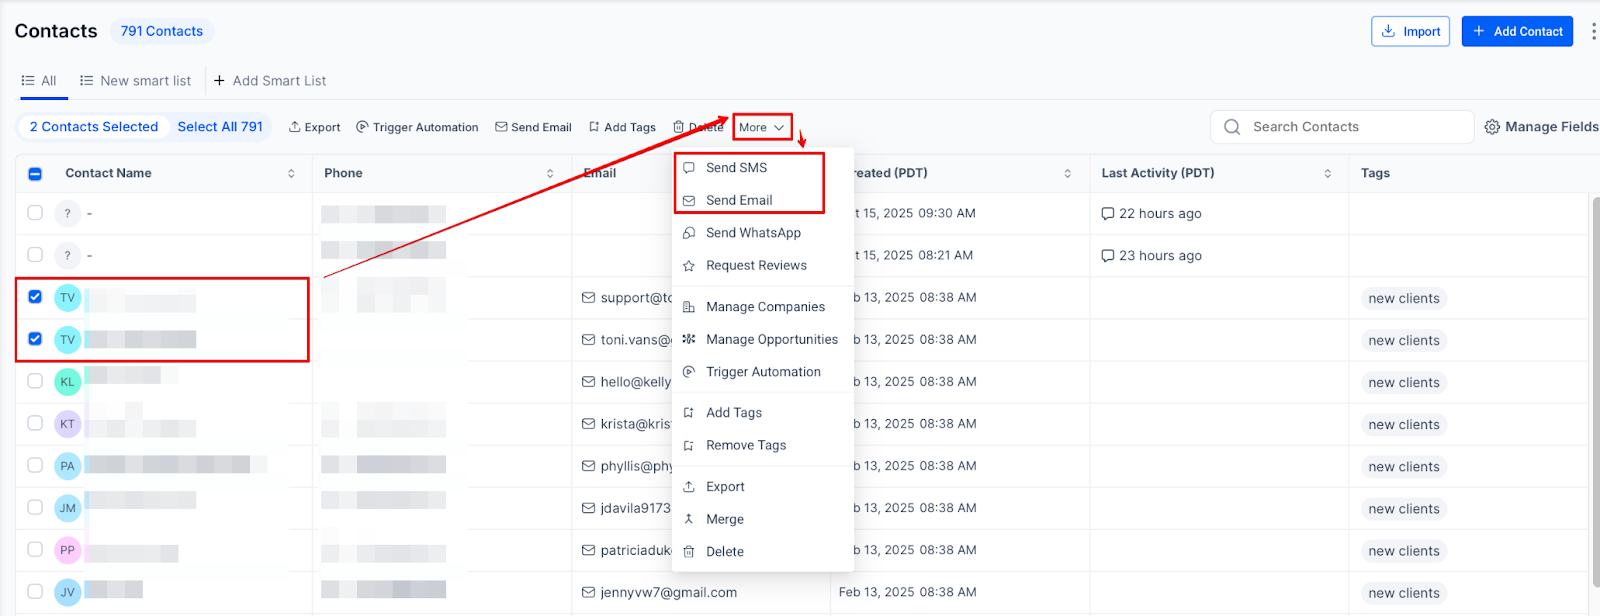
3. Send SMS/Emails: Select multiple contacts, then click on the “Send SMS” or “Send Email” option to quickly communicate with your audience.
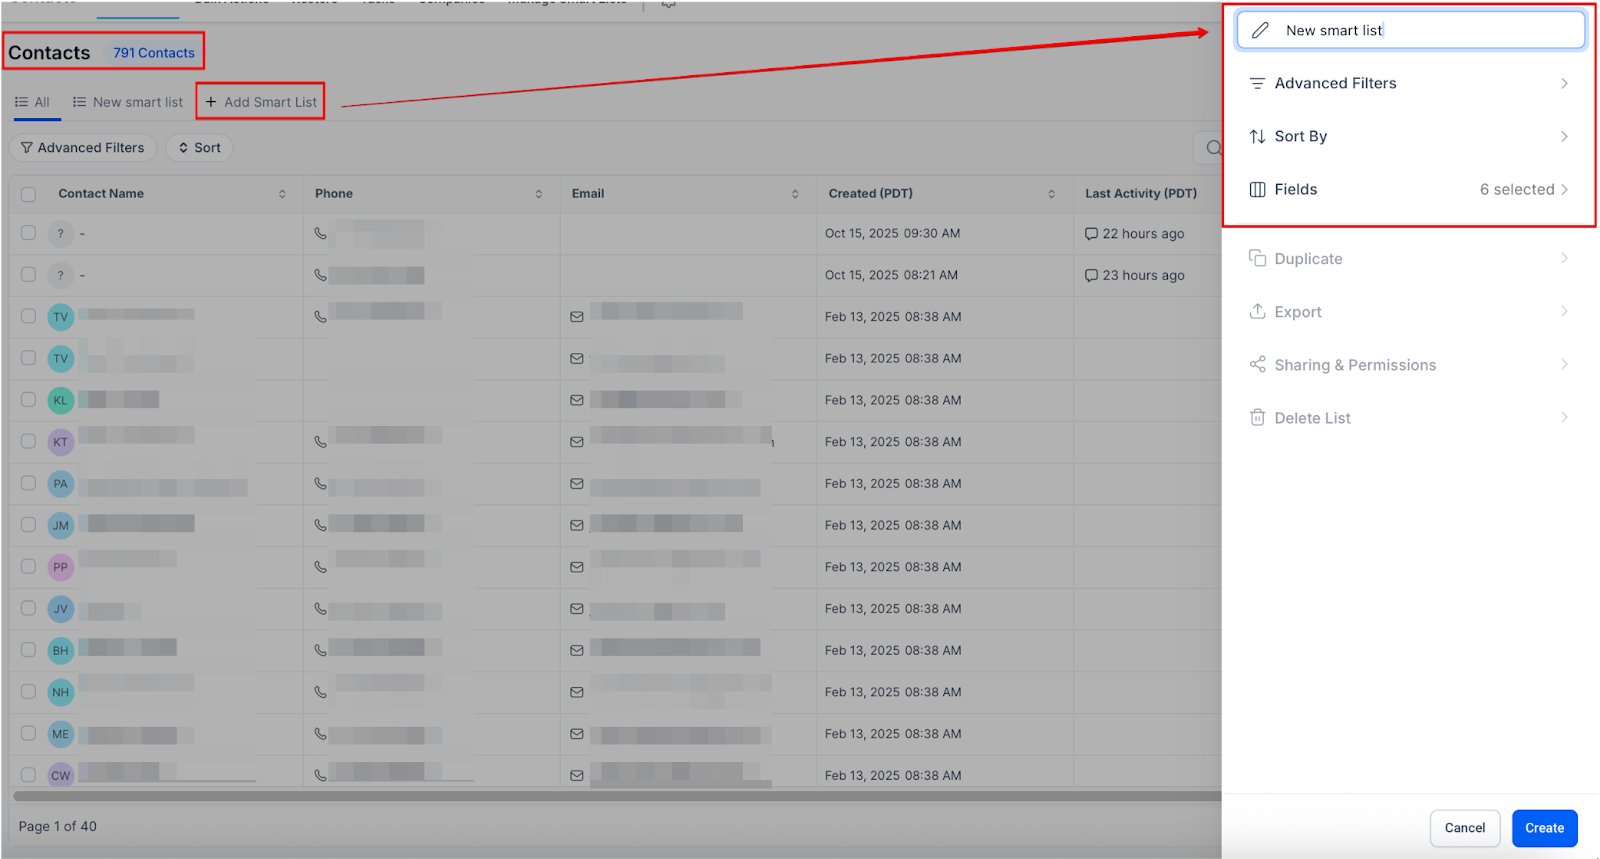
4. Create and Use Smart Lists: Create smart lists for faster access. To create a smart list, you can also apply the filters.
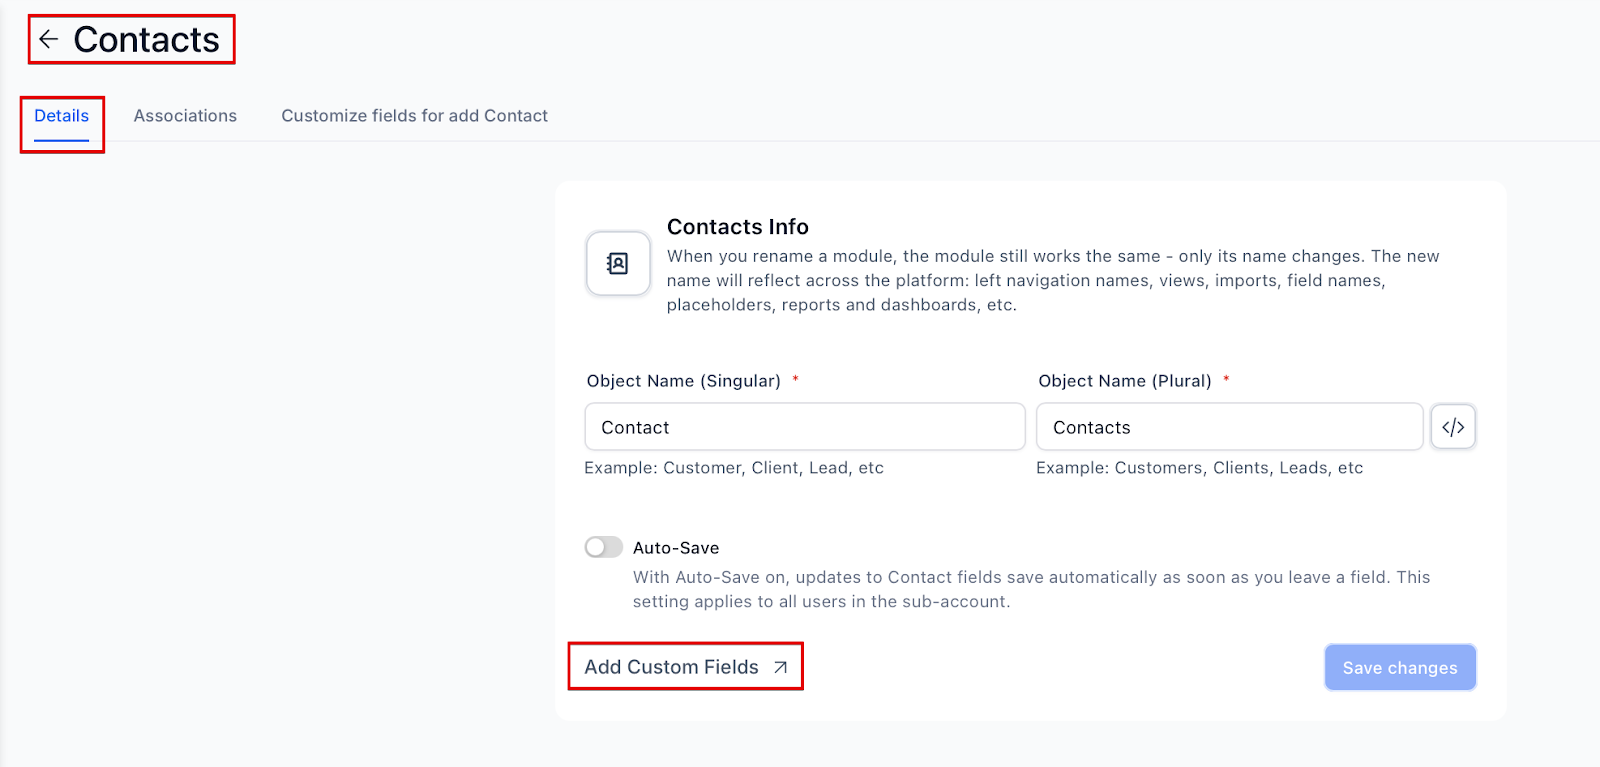
5. Add Custom Fields: Navigate to the contact settings and click “Add Custom Field” to insert custom data fields, helping you organize your contacts better.
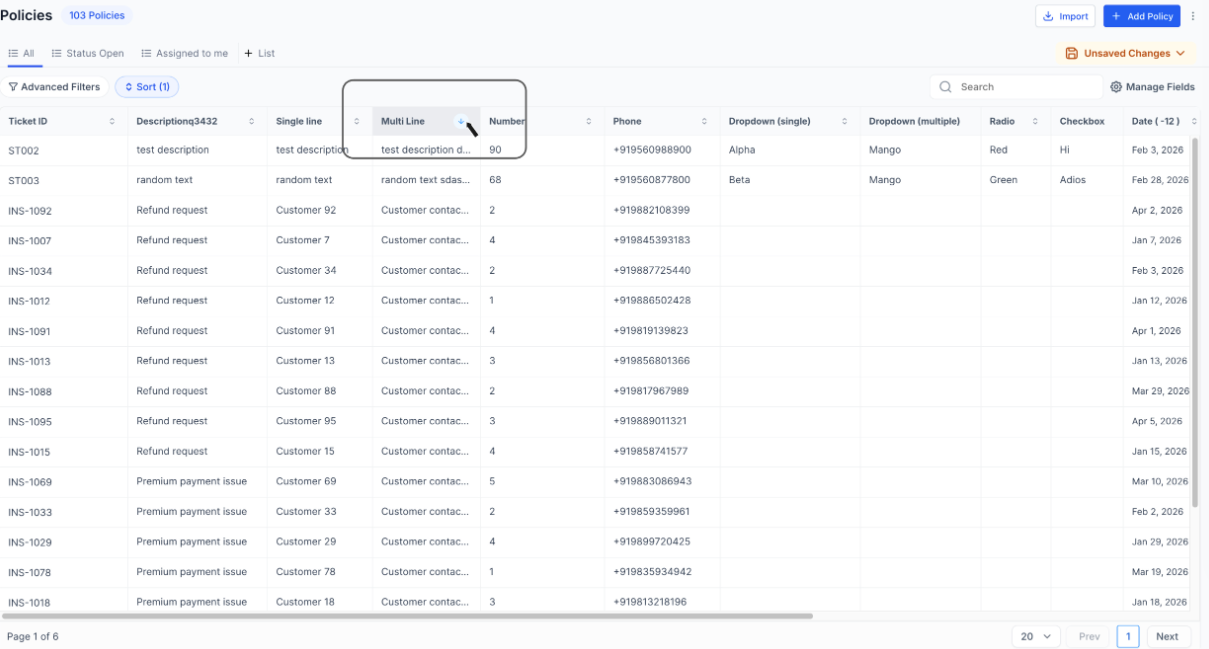
6. Sort Custom Object Records: You can sort your list views in two ways:
- Header Sorting: Simply click the column header of a custom field to sort the list. Click it again to toggle between ascending and descending order.
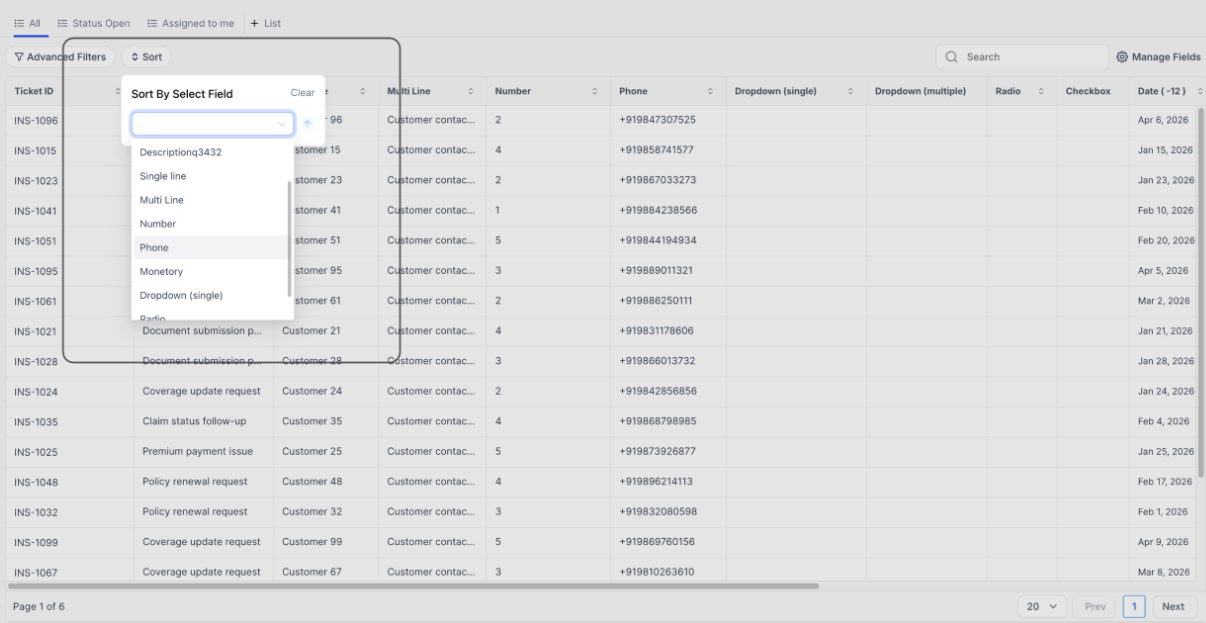
- Sort Dropdown: Click the “Sort” button within the List View, choose your desired custom field, and select your preferred order. This is especially helpful if the field you want to sort by isn’t currently visible as a column.
Pro Tips:
Section titled “Pro Tips:”- Tagging Is Key: Make sure to tag your contacts properly, as this will make it easier to organize, search, and automate actions.
- Use Smart Lists for Targeted Campaigns: Smart lists are an excellent way to segment your audience based on specific criteria, like past purchases or engagement.
- Leverage Custom Fields: Custom fields are perfect for gathering specific details about your contacts, like customer preferences or purchase history, which can help personalize your communication.
Question: How do I add a new contact? Answer: Click on the ”+ icon” to add contacts in the Contacts tab, fill in the required information, and save.
Question: Can I import contacts in bulk? Answer: Yes, you can import contacts by uploading a CSV file from the “Import” button in the Contacts tab.
Question: What are Smart Lists, and how do I use them? Answer: Smart Lists are filtered lists of contacts based on specific criteria. To use them, apply a filter and save it as a smart list for quick access in the future.
Question: How do I move contacts between pipelines? Answer: Select a contact, choose the new pipeline from the options, and move the contact to the new stage.
Question: How do I add custom fields to my contacts? Answer: Go to the contact settings, click “Add Field,” select the field type, and input the required information to customize your contact data.
Question: How are contacts automatically created in the system? Answer: Contacts are automatically created when someone submits a form, survey, or quiz. Additionally, you can set up an automation to create contacts from third-party apps like Google Sheets or through Facebook Lead Ads when a user fills out your lead form.
Question: Is it possible to export my contacts? Answer: Yes, contacts can be exported as a CSV file for reporting, backups, or use in external systems.
Question: Which custom fields can I use to sort my records? Answer: You can sort by most custom fields to organize your data. However, please note that sorting is currently not supported for Multi-dropdowns, Checkboxes, or Textbox Lists.
Question: How do I change the sorting direction of my list? Answer: You can toggle between ascending and descending order by clicking the column header of the field or by selecting the order preference within the “Sort” menu in the List View.