Guide to Setting Up Calendar Payments
The ability to collect payments when booking an appointment is a valuable feature for businesses that require upfront payments. With this functionality, you can ensure that payments are collected during the appointment booking process, streamlining your workflow and securing your time slots. The Calendar feature also offers clear options for handling notifications and payment settings. In this guide, we will walk you through the steps to enable calendar payments, including how to integrate payment gateways and set up the necessary settings for successful transactions. The process is made more efficient by the ability to create and manage email templates directly within the Calendar’s Notification settings, as well as the visibility of payment connections within the Calendar settings, allowing for easy management of bookings and payments.
What Are Calendar Payments?
Section titled “What Are Calendar Payments?”Calendar payments allow your business to collect payments directly when a customer books an appointment. This feature is particularly useful for businesses offering paid services, consultations, or events, where securing payment upfront is necessary to confirm the booking.
Available Payment Gateways
Section titled “Available Payment Gateways”You can collect payments for calendar appointments through several payment providers. The available options include:
- Stripe
- NMI
- Authorize.net
- Razorpay
- Square
Note: Razorpay, NMI, and Square are not supported for the Classic Widget or Service Menu at the moment. However, they can be used with other calendar types.
How to Add Payment Gateways
Section titled “How to Add Payment Gateways”To get started, you’ll first need to add your payment gateways. Follow these steps:
1- Access Payment Integrations:
- Navigate to the Payments Tab in your settings.
- Select Integrations from the options.
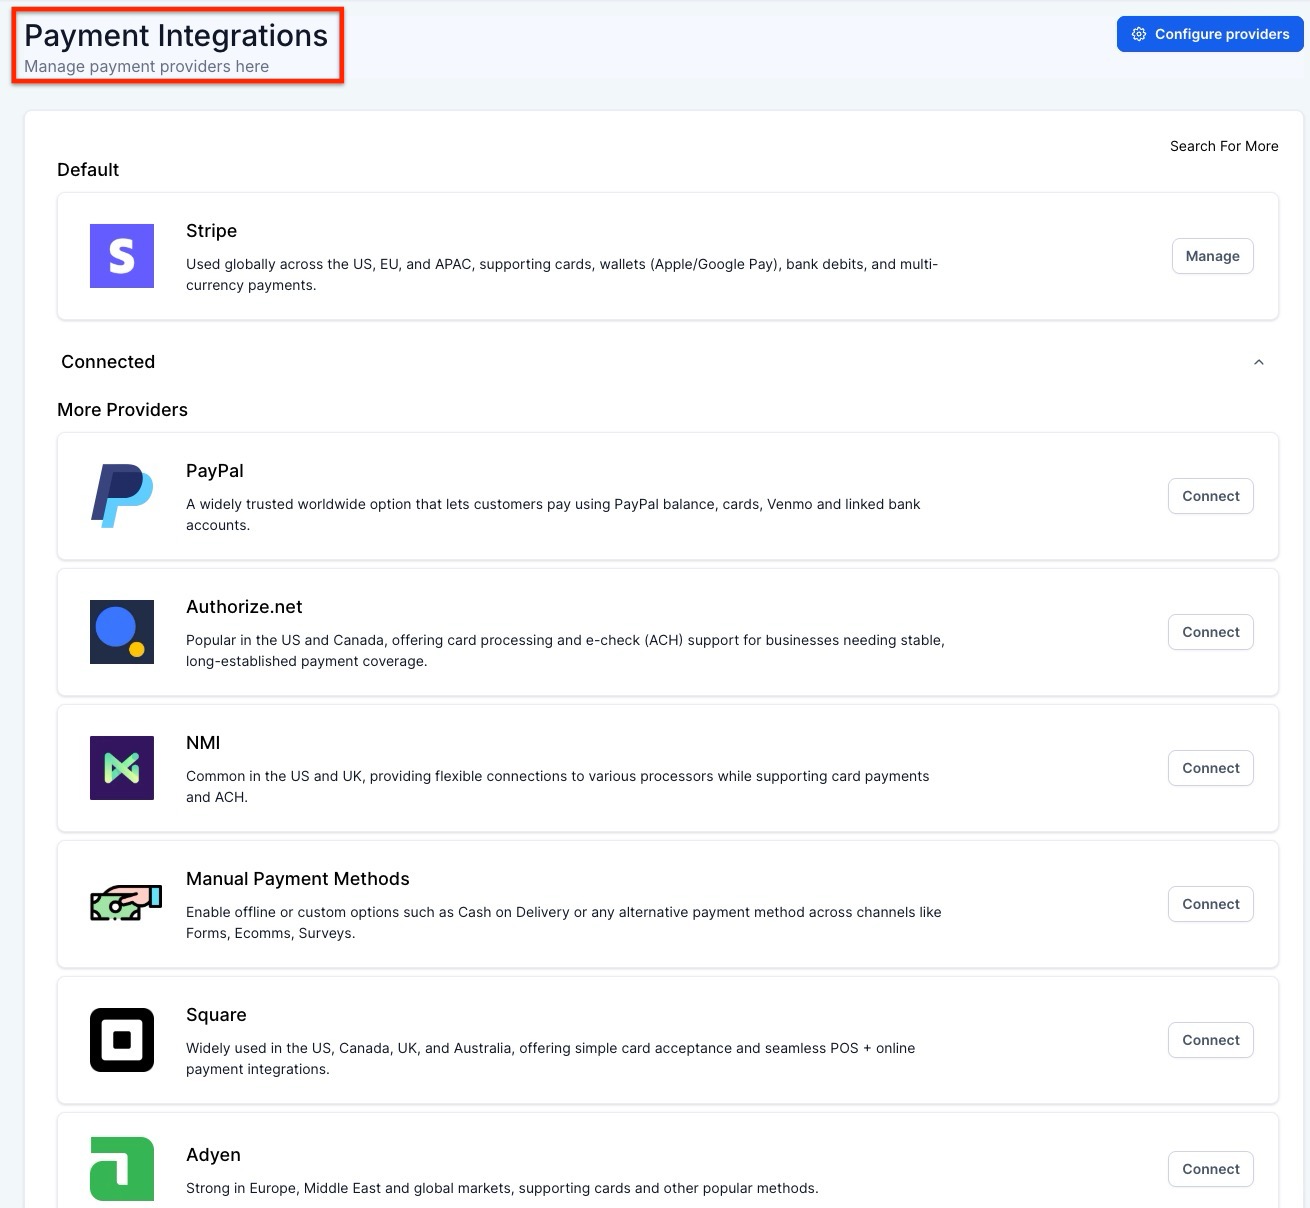
2- Connect Your Payment Gateway:
- From the integrations page, you’ll see options to connect your preferred payment gateway (Stripe, NMI, Authorize.net, Razorpay, or Square).
- Follow the on-screen prompts to connect and authenticate your payment gateway.
3- Set a Default Payment Gateway:
- If you connect multiple payment gateways, a dropdown menu will appear, allowing you to select your default payment gateway.
Important: Only the default payment gateway will be used for transactions, so make sure you select the one you intend to use for payments.
How to Enable Payments for Calendar Appointments
Section titled “How to Enable Payments for Calendar Appointments”Once your payment gateway is set up, you can start collecting payments when clients book appointments. Here’s how:
1- Go to Calendar Settings:
- Access your calendar settings by selecting Calendars in the settings and click on edit icon menu.
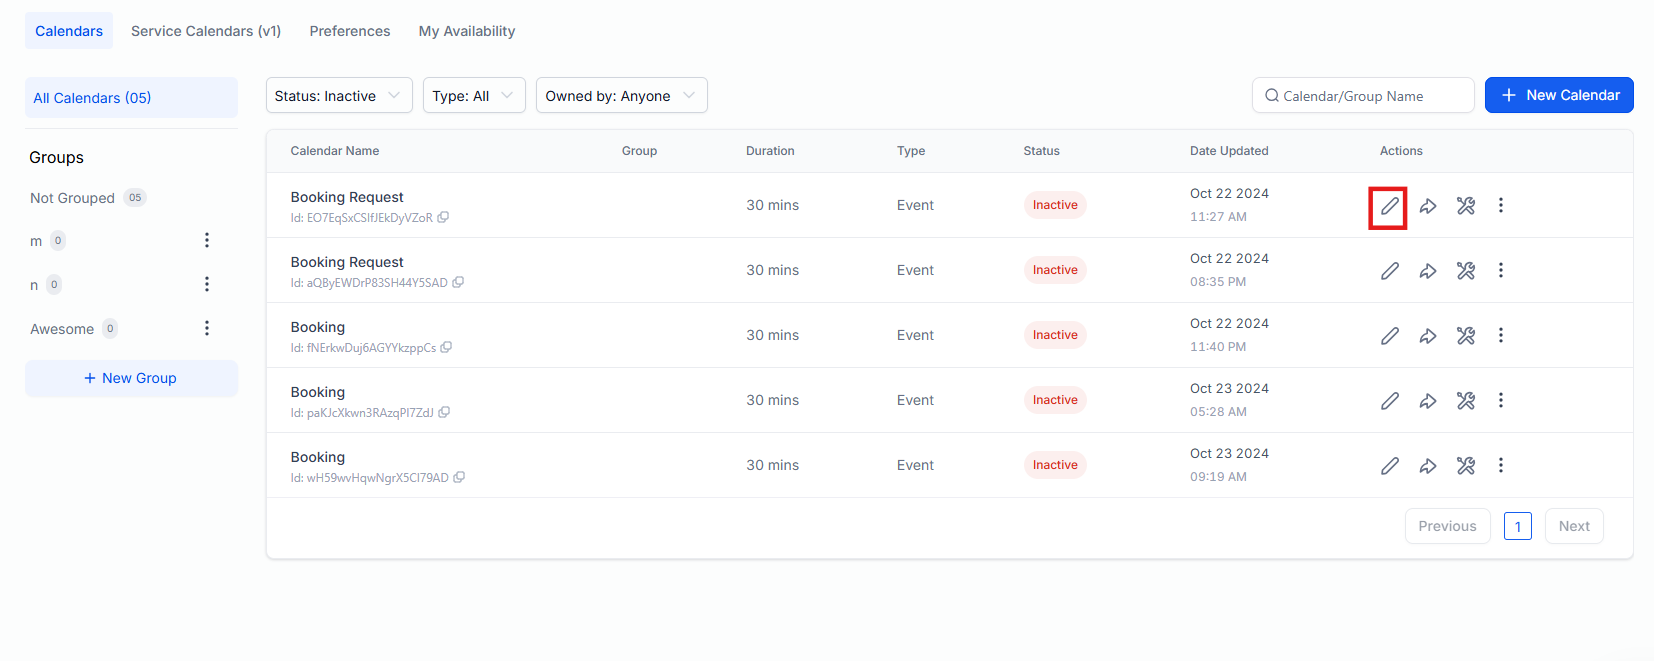
2- Edit or Create a New Calendar:
- You can either edit an existing calendar or create a new one by clicking the three dots next to the calendar name and selecting Edit, or select Create New Calendar.
3- Enable Payment Options:
- In the Advanced Settings section of the calendar, find the Forms & Payments area.
- Look for the toggle option “Accept Payments” and turn it on.

REMEMBER! If you are unable to turn on Payment Options, it’s because you haven’t integrated a payment gateway yet.
4- Once enabled, new payment-related fields will appear:
- Amount (Set the payment amount, along with the currency)
- Description (Add a brief description of the appointment or service)
- Payment Mode (Choose between Test or Live mode)
Note: Partial payments are not supported for recurring calendars, so be sure to adjust accordingly.
Coupon Codes in Calendar Bookings: You can offer discounts during booking by allowing customers to enter coupon codes at checkout. These codes can be fixed or percentage-based, with limits and calendar-specific restrictions, making them ideal for promotions or loyalty rewards.

The Calendar feature, used for scheduling appointments and managing booking flows, provides clear options for handling notifications and payment settings. Key benefits include fewer steps required for setup, clear visibility of payment connections within the Calendar settings, and a straightforward process for managing bookings and payments.
Create Email Templates Directly from Calendar Notifications Settings
Section titled “Create Email Templates Directly from Calendar Notifications Settings”Email templates can be created and managed directly within the Calendar’s Notification settings. This allows everything to be handled in one place without switching to another section.
How to Create Email Templates:
1. Go to the Calendar section and open the Notifications settings.
2. Click on the option to create a new email template within the same settings page.

3. Fill in the necessary template details.

Once created, the template will be available for selection in the dropdown menu within the Notifications settings.


What to Do If Payment Options Are Not Visible
Section titled “What to Do If Payment Options Are Not Visible”If you do not see the payment options after enabling the “Accept Payments” toggle, it means you have not yet integrated a payment gateway. Review the steps above to connect a payment provider, and then return to the calendar settings to enable payments.
Question: Can I collect payments for all types of calendars? Answer: Yes, payments are supported across all calendar types, but Razorpay, NMI, and Square are not compatible with the Classic Widget or Service Menu.
Question: How do I change my default payment gateway? Answer: Go to the Payments Tab under Integrations, select your new gateway, and choose it from the dropdown menu to make it your default.
Question: Can I collect partial payments for recurring appointments? Answer: No, partial payments are not supported for recurring calendars.
Question: What happens if I don’t integrate a payment gateway? Answer: Without integrating a payment gateway, you will not be able to enable the payment options for your calendar, and clients will not be able to make payments when booking appointments.
Question: How do I ensure that payments are collected in real time? Answer: After enabling the payment options and setting up your gateway, ensure the payment mode is set to Live when the calendar is published.
Question: Where will the discount show**? Answer: It appears during booking and in the appointment’s payment details.
Question: How can I create email templates directly from calendar notification settings? Answer: To create email templates, go to the Calendar section and open the Notifications settings. Click on the option to create a new email template, fill in the necessary details, and the template will be available for selection in the dropdown menu within the Notifications settings.
Question: How do I manage payment integration in Calendar settings? Answer: To manage payment integration, navigate to the Calendar settings and check if a payment method is connected. If not, click the button to go to the Payment Integration section, select a payment provider, and configure it accordingly. The selected default provider will be displayed.
Question: Are coupon codes available for all calendars?
Answer: Coupon codes can be used for most calendar types, but limitations may apply depending on the gateway or the calendar type. You can restrict coupons to specific calendars as needed.
Question: What should I do if payment options are not visible after enabling “Accept Payments”?
Answer: This indicates that no payment gateway has been integrated yet. Connect a payment provider in the Payment Integrations section and return to the calendar settings to enable payments.